Reolink 510A and 811A security cameras and all things related
This post is going to be a bit of longer one covering off a review of two cameras and then how it all comes together … So, the first two cameras I played with were WIFI solar. Both cameras came pretty close to doing what I needed, which was pretty basic. The Dekco D8L missed the mark, just barely by not having anything other than push notifications, no email, no FTP. The Reolink Argus 3 for some bizarre reason did not have WIFI antennas (all the other Reolink WIFIs do), and the WIFI was a bit up and down.
So now we come to a different category of cameras, powered … Some of them like the Dekco D4L use WIFI and have a power adapter, other rely on what’s called POE, or Power Over Ethernet. What POE does is embed a DC power in the same ethernet signal meaning you run one wire to the camera and you get ethernet and power. So I started looking around to see which might meet my needs. Setting your criteria can help save time, my criteria was … fluid? So do you want a light on the camera, what kind of connectivity do you want etc. I first bought the 510, and I have to say, of the 510, 811A, and 1212A the 510A is the pick of the litter. It mis-detects the least, is cheap, and overall just works. If it had a light I would have probably stayed with it. The 5Mp is kind of limited but usable. Night vision is ok, and smart detection works ok as well (more on smart detection in a bit). The 1212 was a disaster with constant mis-detections.
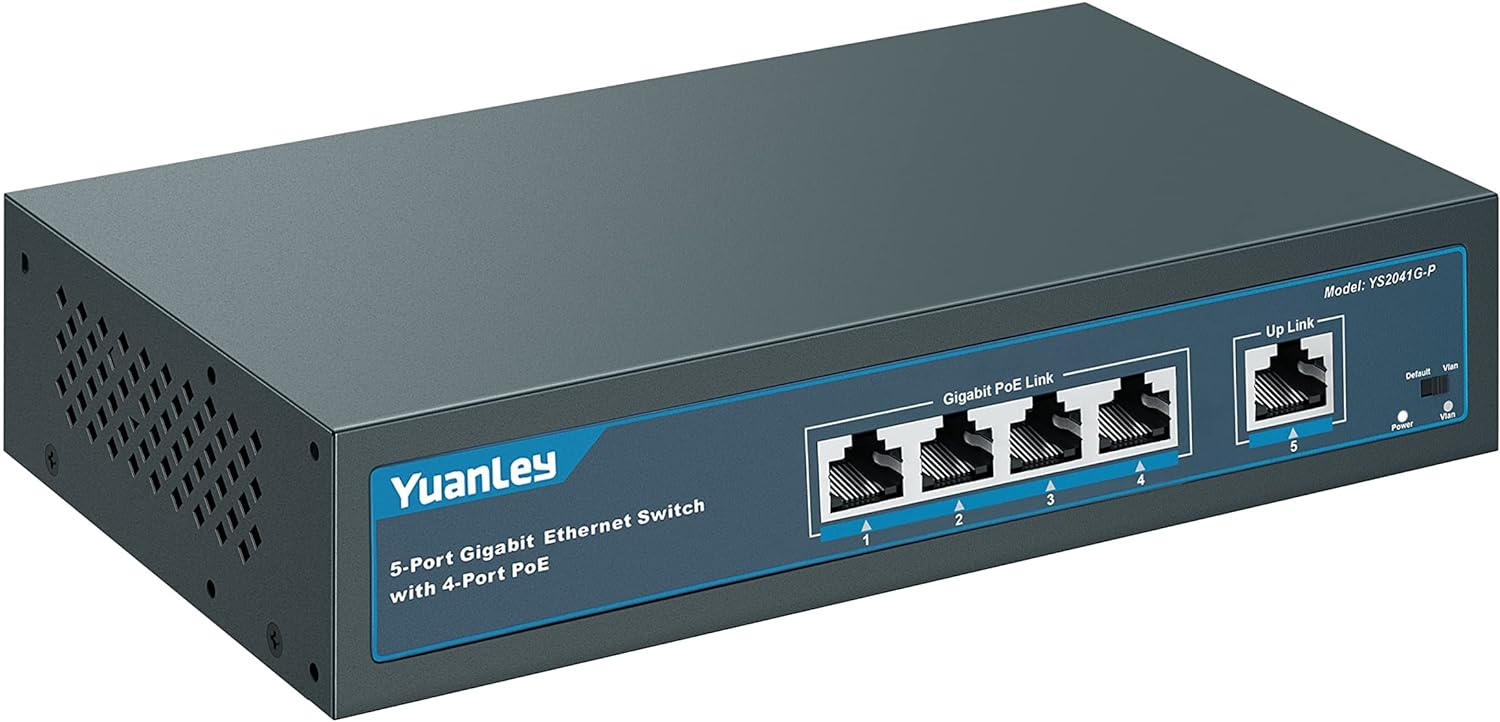
Ok, so POE … so you need to buy a switch that supports POE. I bought a YuanLey 5 Port Gigabit PoE Switch off Amazon for $39.99. It can handle up to 30W per port, to a max of 78W (no idea how you get that math). It’s well designed, solid, the power cable is a standard AC power adapter instead of a brick, has a dedicated uplink port and is VERY thrifty on power. The 510, 811 and the poe switch consumes a mere 10W, although that jumps to 15 when the light on the 811 turns on. If you plug the POE switch into a UPS, which I did, your cameras live on even with a power hit until the bitter end …
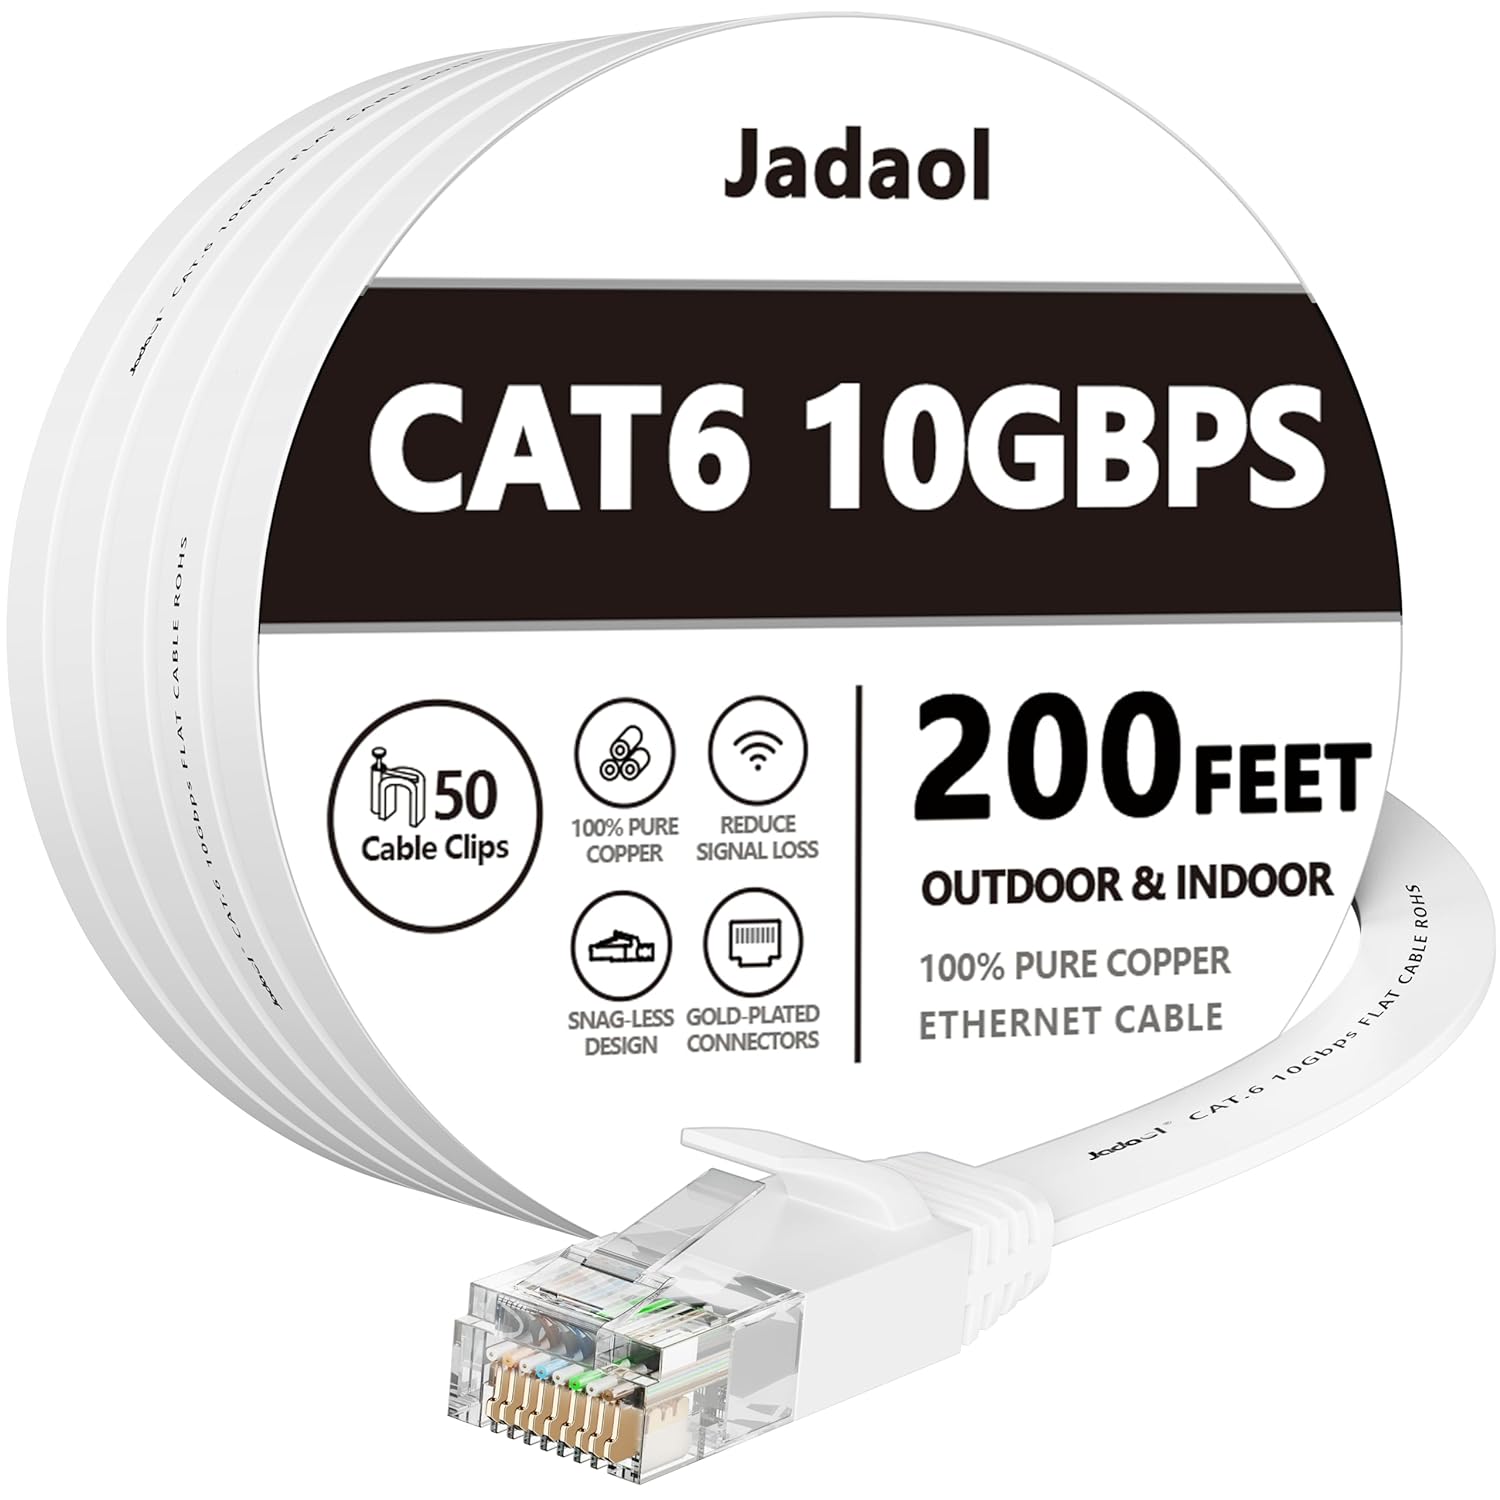
Next up is cable. I found some VERY thin flat cables and was amazed how well they feed through window sills of sliding windows with no drilling required. I did discover one BIG catch with these cables though, there are VERY difficult to work with, they tangle REALLY easily, and forget the thought of cutting them to length and putting a new connector on them. Even stripping the wire is brutal and good luck getting a crimper to put a new RJ45 end on them. The one I got was cheap $24 for 100ft.
Ok, so we got the cables run, the switch setup and we are ready to go. Now, I strongly suggest you setup the camera on the ground, in the house before mounting them. It’s just easier. I ran into a BIZARRE issue with the 811A, when I set it up initially I was lazy and had already mounted the camera (you get to learn from my error) so I pointed the app at the IP … Well after emailing Reolink, and their tech support is pretty darn good BTW (other than they are in China so a different time zone altogether), I discovered they sell two cameras under the same name. One comes with NVRs (network video recorders) and one stand alone. If you don’t scan the QR code the camera initializes as if it is with the NVR, and I had issues with smart detection and push notifications was missing. A complete restore and this time scanning the QR code resolved the issue.
So initial setup requires you to load the phone app. Plug the camera in your network, and then scan the QR code using your phone. You then give it a password for the camera and your off to the races.
There are a number of options for what to do with triggers (email, push and FTP) all of which need to be enabled, configured and setup. And this needs to be done for each camera. It’s all manual. Now there is a Windows/Mac app you can download that allows you to set the camera up from your desktop/laptop (and your going to need this app later on anyway IMHO).

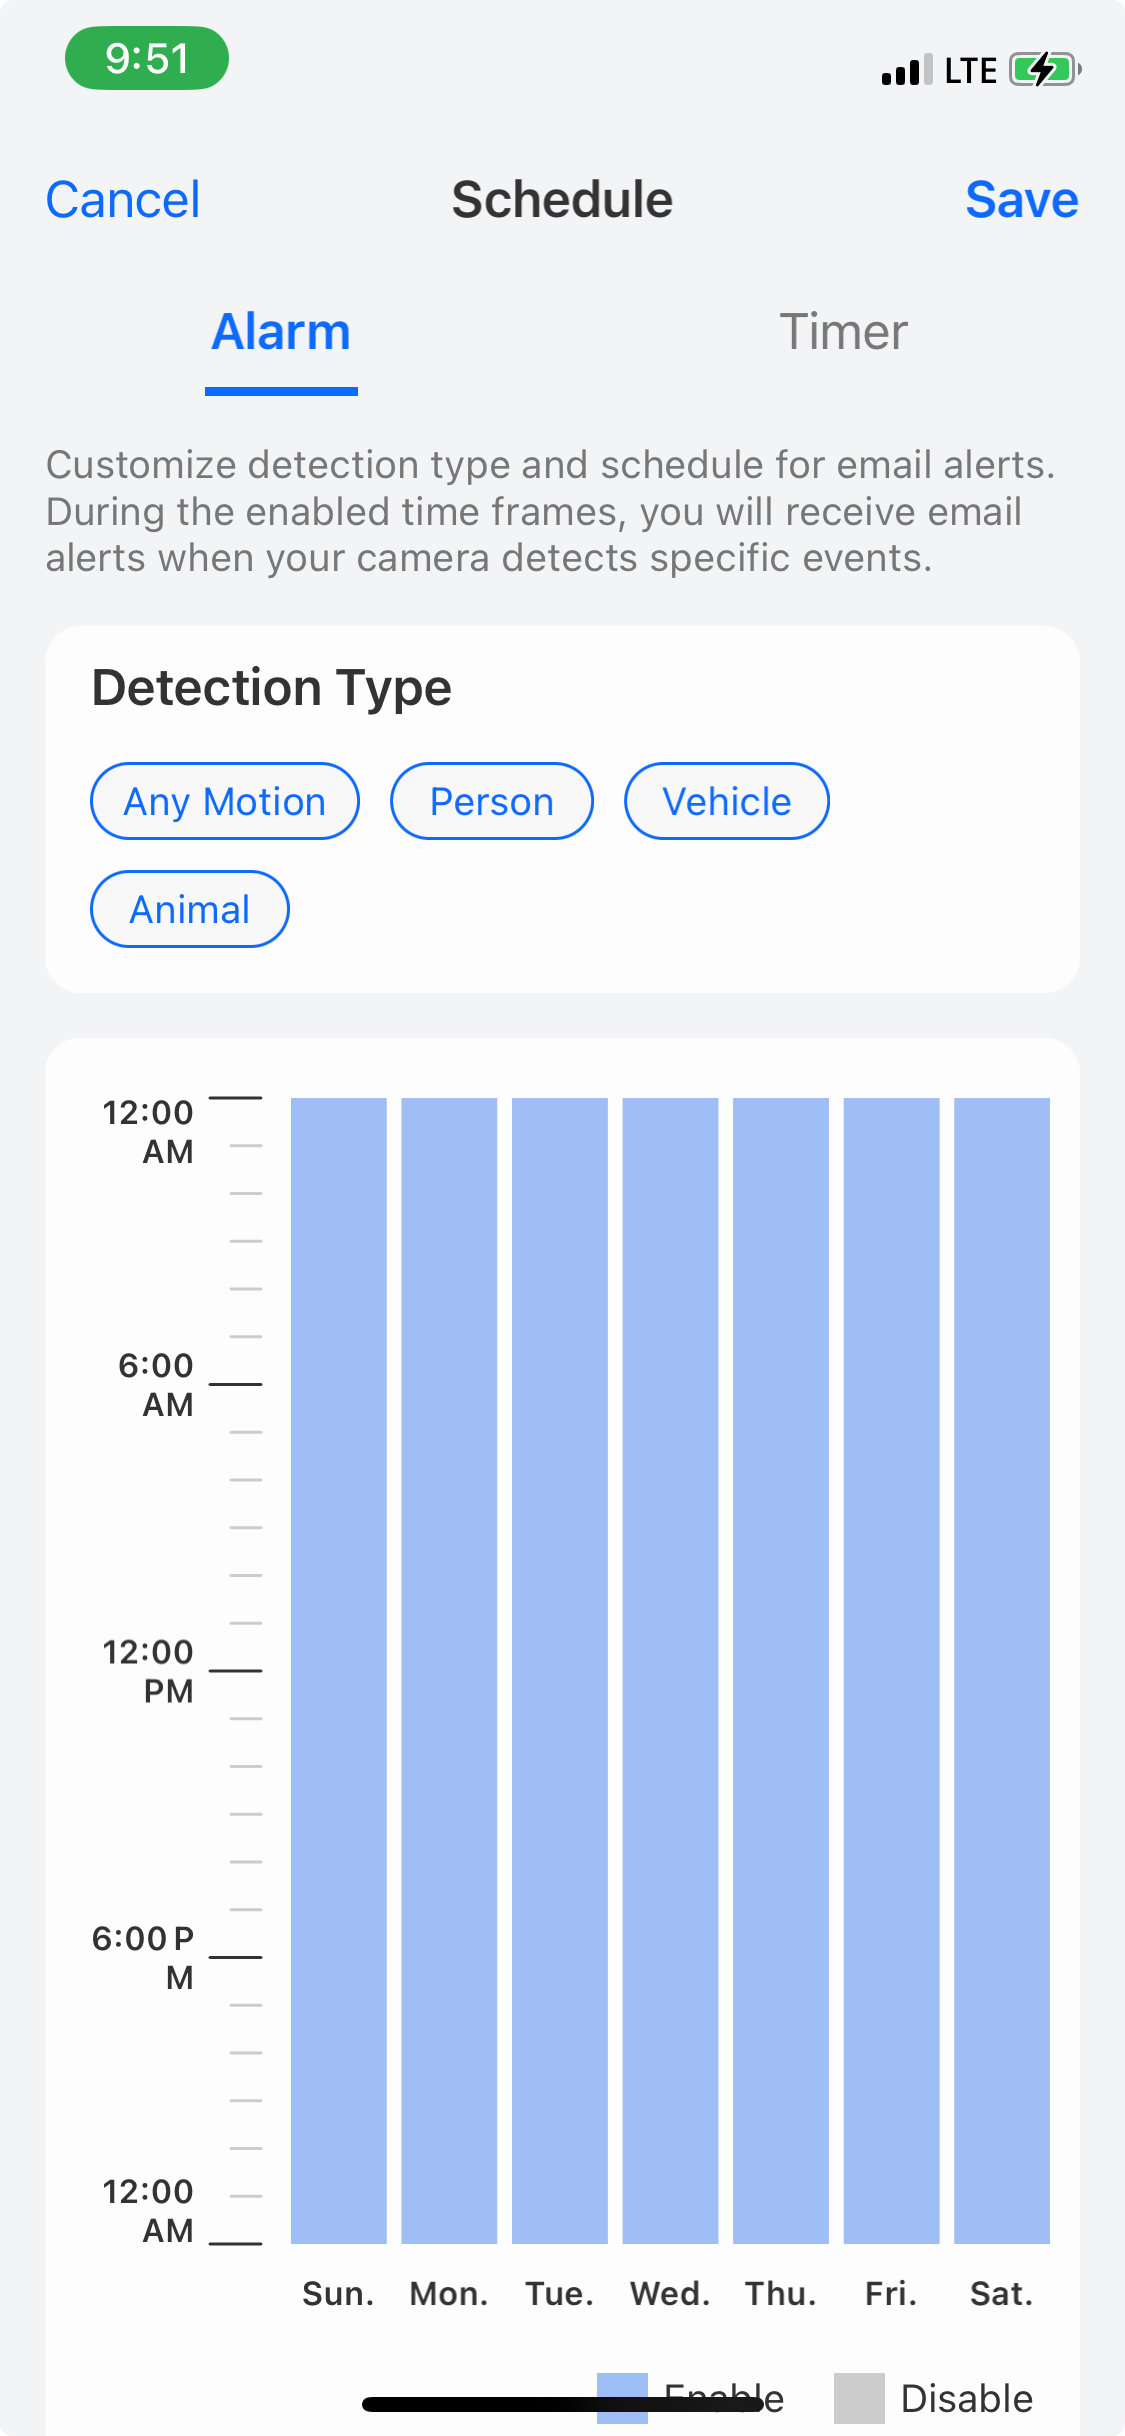
For email you need to configure an SMTP server, I couldn’t get gmail, yahoo or live to work for me, but luckily I was able to get Hotmail setup and working. Once setup you can set a schedule and set which type of events (any motion, smart detection person/animal/vehicle) you want to be emailed (same for push notifications). If there is anything missing I would have loved to be able to notify differently for different times of day. Finding out about a squirrel through the day is less interesting than the skunk in the middle of the night. Although, either way, I’m not getting outta bed … LMAO.
There’s an SD card slot, and if you don’t put one in, and none are included, you can NOT watch the captured video from the Reolink app. The SD card’s storage determines how quickly content get’s overwritten. The camera stores in H264 MP4s and records the mic as well, on the 511 this means a 2G card can store ~53mins of video before it starts over writing, and the 811 ~38mins, remembering though this isn’t constant recording, it’s even driven. So to give yourself a LOT more storage the cameras support FTP (or FTPS, not SFTP) and once a recording is done the video and picture are uploaded to the FTP server. This works VERY well BTW. You can setout a schedule for when events are recorded and can decide if you want to record any motion or only smart detects.
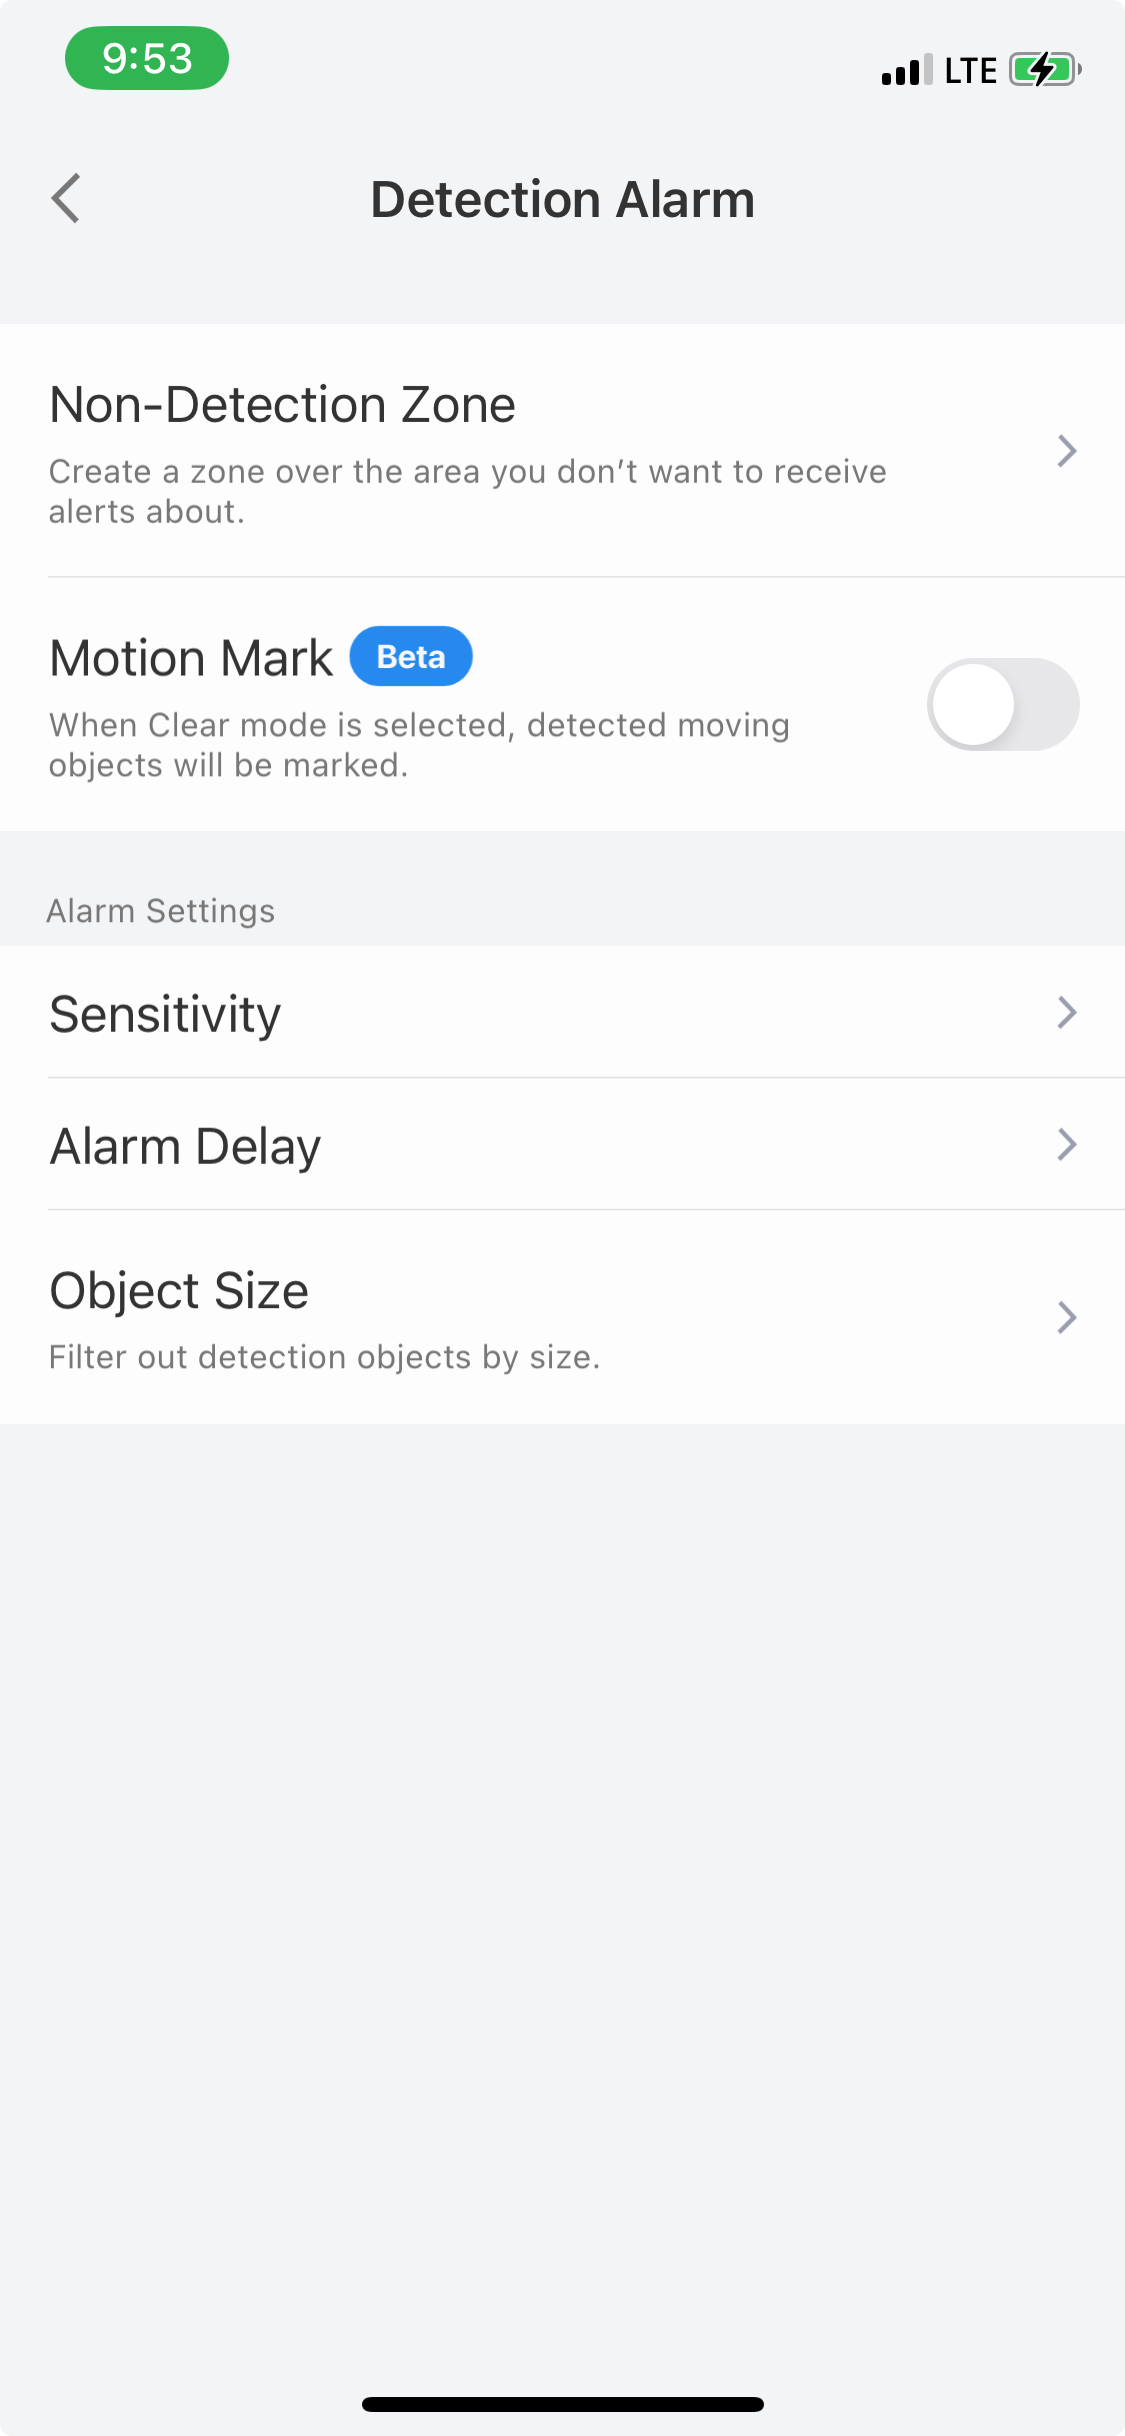
So how this camera works is it detects motion. You can control how sensitive the camera is on motion detect. You can also create a “no detection” zone to ignore motion in. Once motion is detected it is recorded. From there the camera uses “AI” in what they call smart detection to look for a person, animal or vehicle. If you dial your sensitivity down too low, the camera will see nothing, motion detection is the starting point. You can also control the size of the object (for smart detection) as well as the accuracy of the smart detection. You can use smart detection to determine if you are notified by email or push. You can turn notification on/off the schedule for both push and email. Think of smart detection as kind of filter for notifications for motion detections (or can be used that way). For the 1212 for example, if I had chosen to keep it, I would have had to disable notifications for motions and ONLY be notified for smart detections, the sensitivity on motion was that bad.
All in all, the smart detection works pretty well. Motion detection on the 510 was very good, jury is still out on the 811 (so far it’s not as bad as the 1212 but not as good as the 510 either), and the 1212’s motion detection was impossible to find a combination of seeing nothing and seeing everything. Tuning this is very important to insure you aren’t drowning in frivolous notifications, or you would miss the ones you actually want to know about.

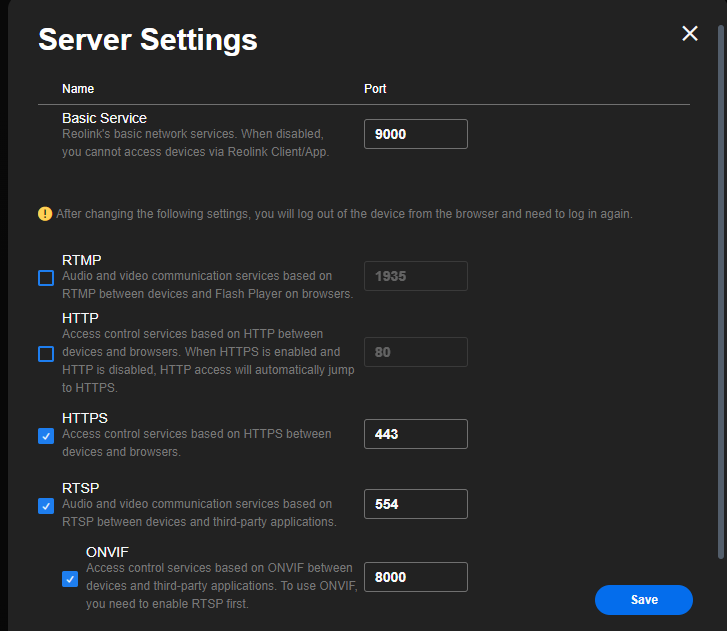
So at this point you are 100% within the Reolink ecosystem. And for some you just might be done … But if your not and you want to see just how much more you can do with your camera … On we go. So the starting point is to download the Windows/Mac app. By default the camera’s web interface as well as industry compatibility (called ONVIF) are disabled. Using the Windows/MAC app you can enable it. The Windows/Mac APP BTW does NOT receive any form of notifications … Start the app, click on Network, Advanced, Server setup and here’s where they hide the magic

ONVIF is an industry standard that allows other NVRs like iSpy, Frigate etc and other apps to talk to your cameras. I played a little with frigate but found it VERY time consuming to get working even a little.
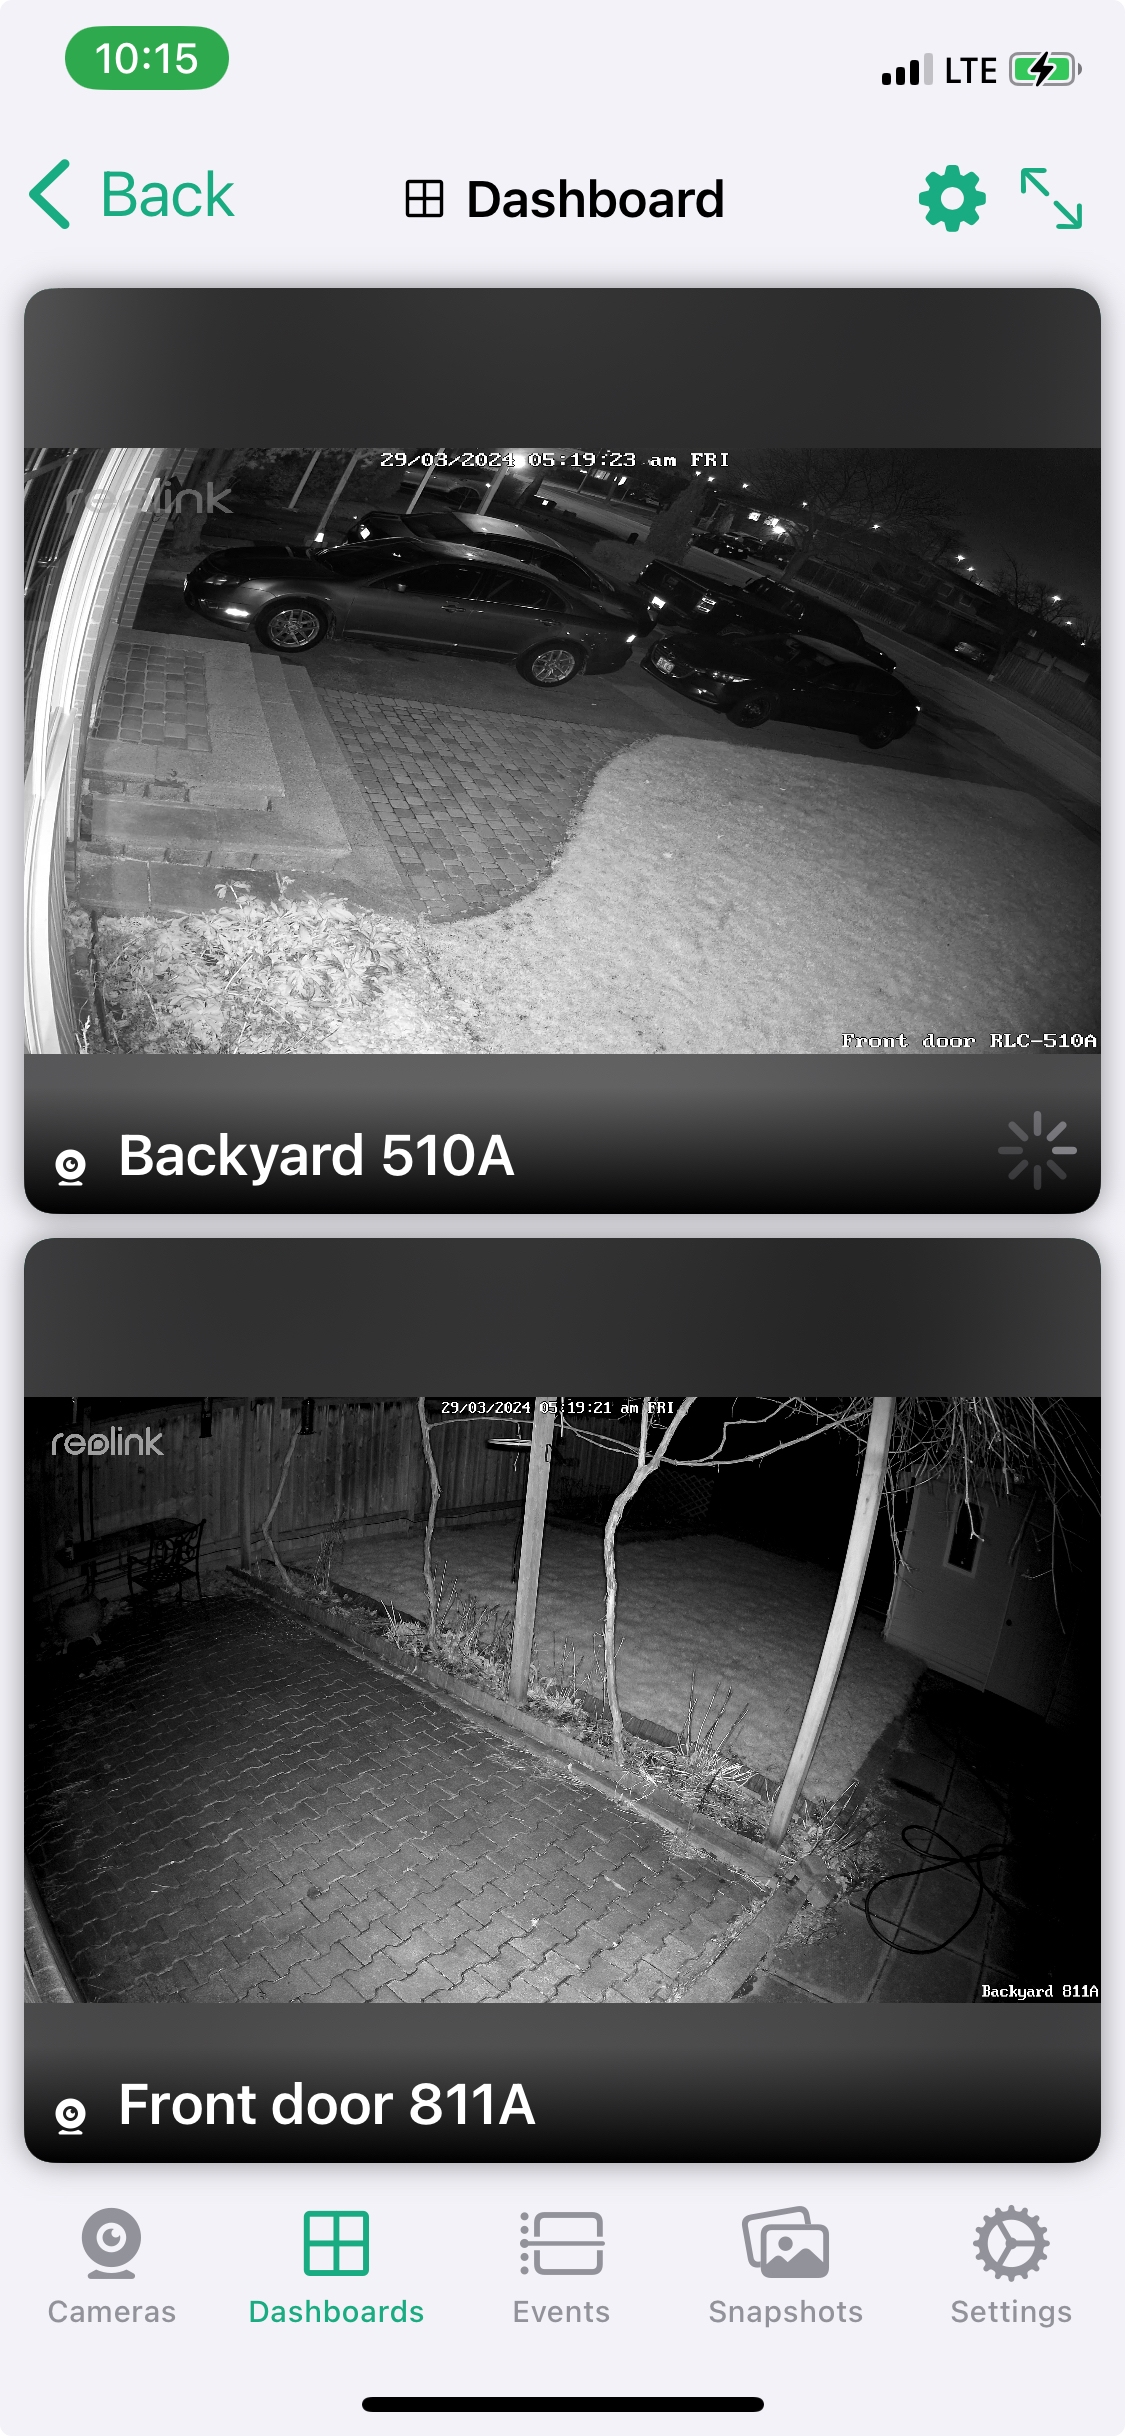
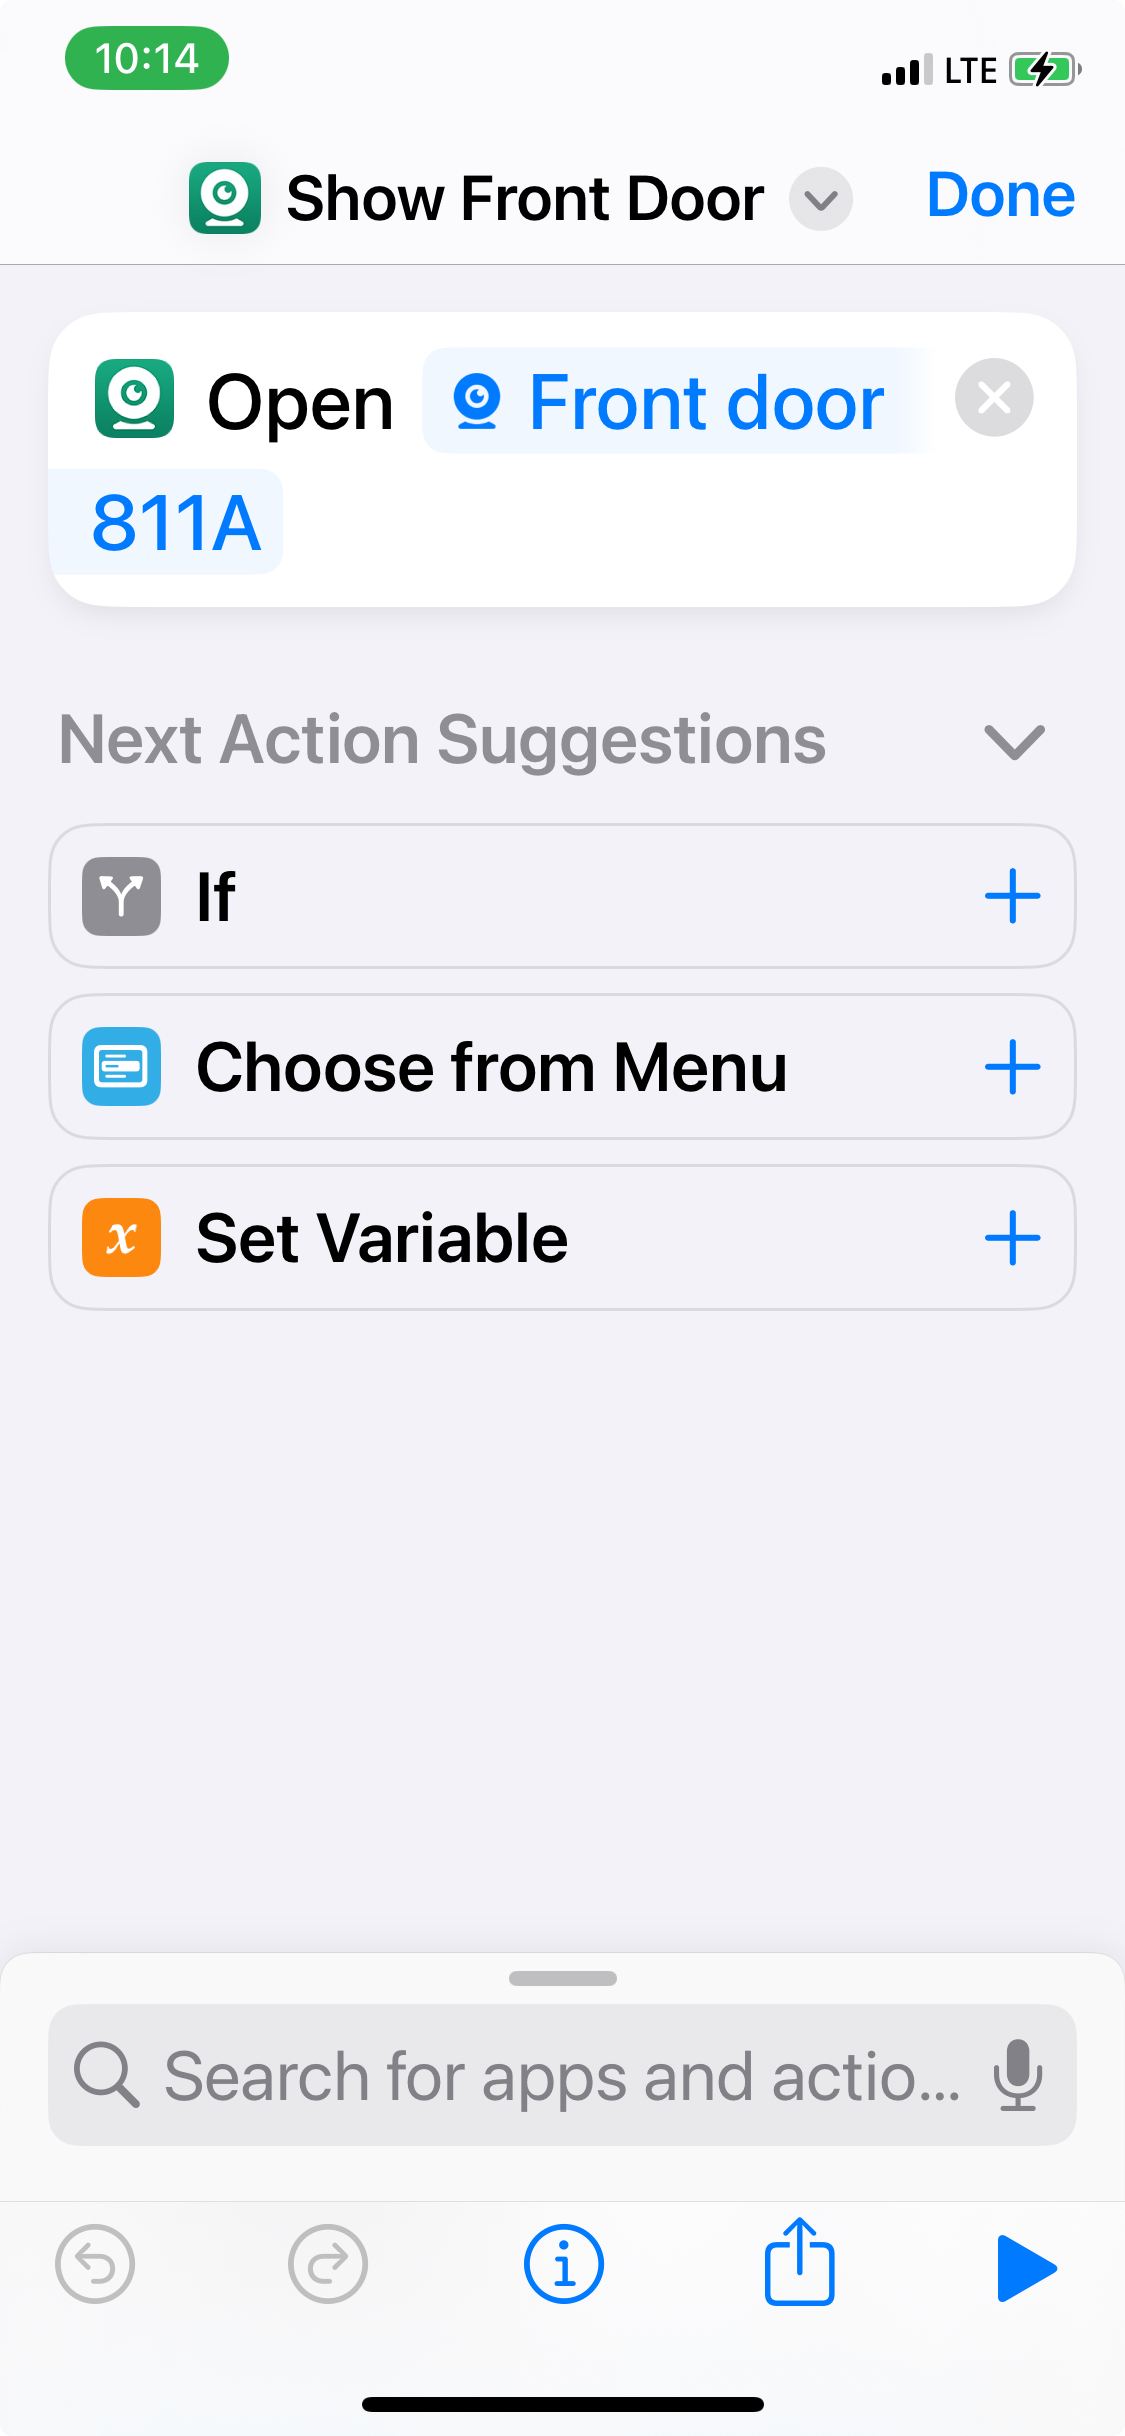
However, I found a great iPhone/iPad app called IpCams that even the free version lets you see the cameras in a dashboard. Additionally, you can use Apple shortcuts to setup SIRI to say, for example show me the front door!
Physically the 811 is a more solid mount, solid metal and you adjust it with a pair of allen keys, one on the neck and one on the stem. Amusingly the two are not the same size but they only provided one size allen key? WTF …

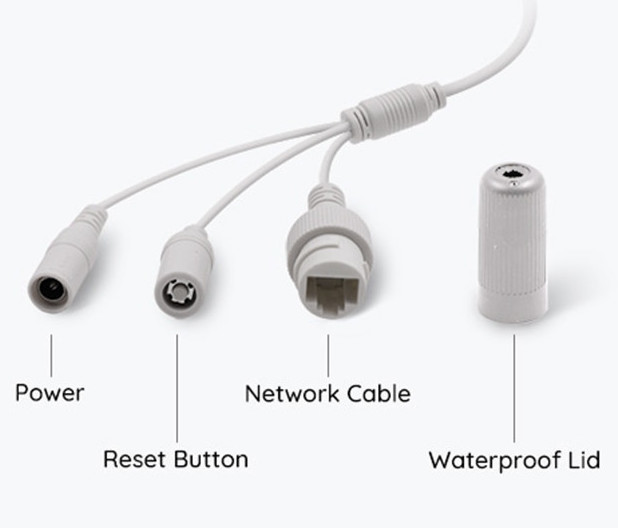
The one thing I REALLY don’t like about both cameras is they have this bizarre pigtail on the end with three wires coming out, ethernet, reset and power. They have provided a reasonably ok waterproof cover to go around the ethernet cable. I still would not want to hang this in a way water would run down the cable and straight in … No idea what they were thinking about this … They all do have covers over them, so I guess there is that?
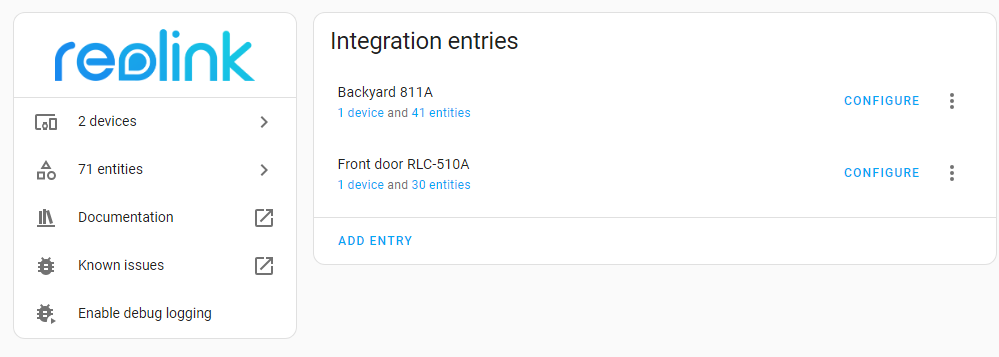
How everything plays together nicely can make a huge difference in potential! Fortunately, right off the bat there was a Reolink integration for Home Assistant and lots of potential shows up for triggering on events from the Cameras etc. You can control the light on the camera etc. I’ll update this post when I figure out useful things to do with this 😉
If your cameras were to go offline for some reason, died, stolen, cut cable whatever, you kinda wanna know … So to take care of that I added a simple ping test on Zabbix. iSpy can also notify on source disconnected as well.
I discovered, by default, the Reolink cameras do NOT record audio. You can change this simply within the Reolink app, on a per camera basis.

And with that I have a working system. I’ll see if I can live with the 811A …
Update 5/14/2024 So I’ve now settled in on a set of settings that are working well for me. I’ve changed the cameras to Push/email for people and vehicles, record for animals/people/vehicles and FTP upload for any vehicles/people/animals. Triggering on motion causes a LOT of extra noise. Email/push for animals also ended up being more noise than I want, with squirrels constantly busy. I clean up the ftp directory by running a script to delete older than 7 days. I’ve also chosen iSpy/Agent DVR to do 24/7 recording with an auto roll over of 7 days. It consumes about 1TB of space.
forfiles /m *.mp4 /P "h:\camera" /d -7 /c "cmd /c del @path"
Reolink Argus 3 Pro solar security camera
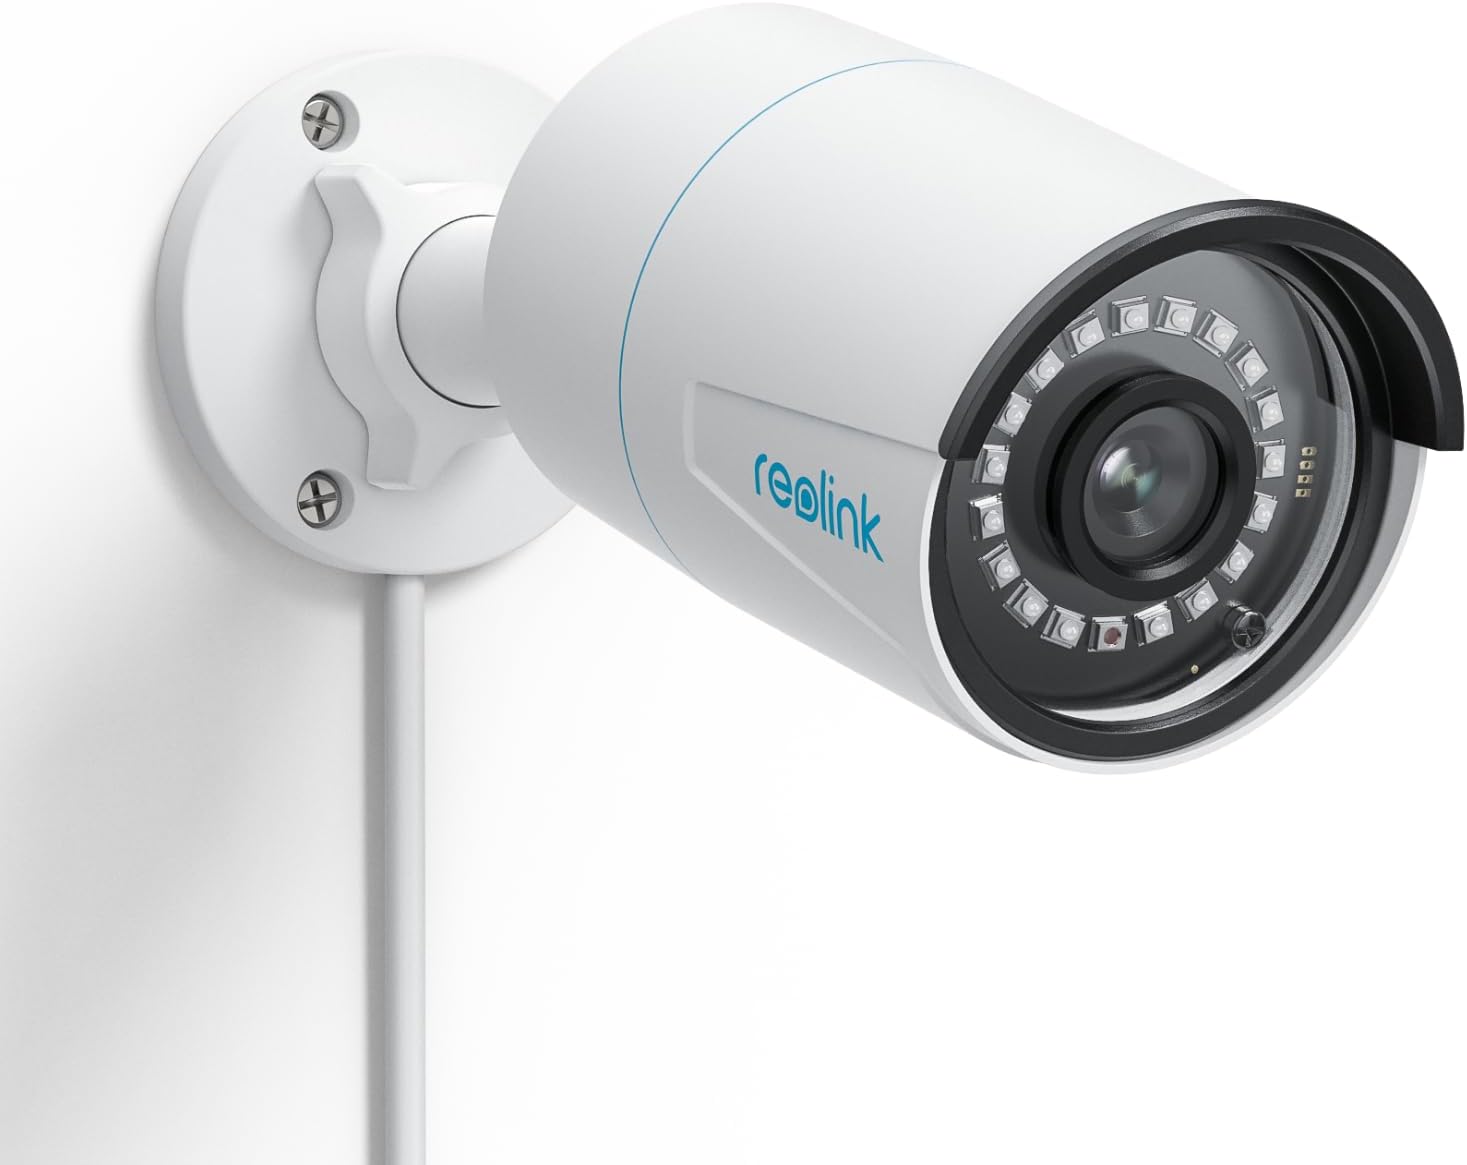
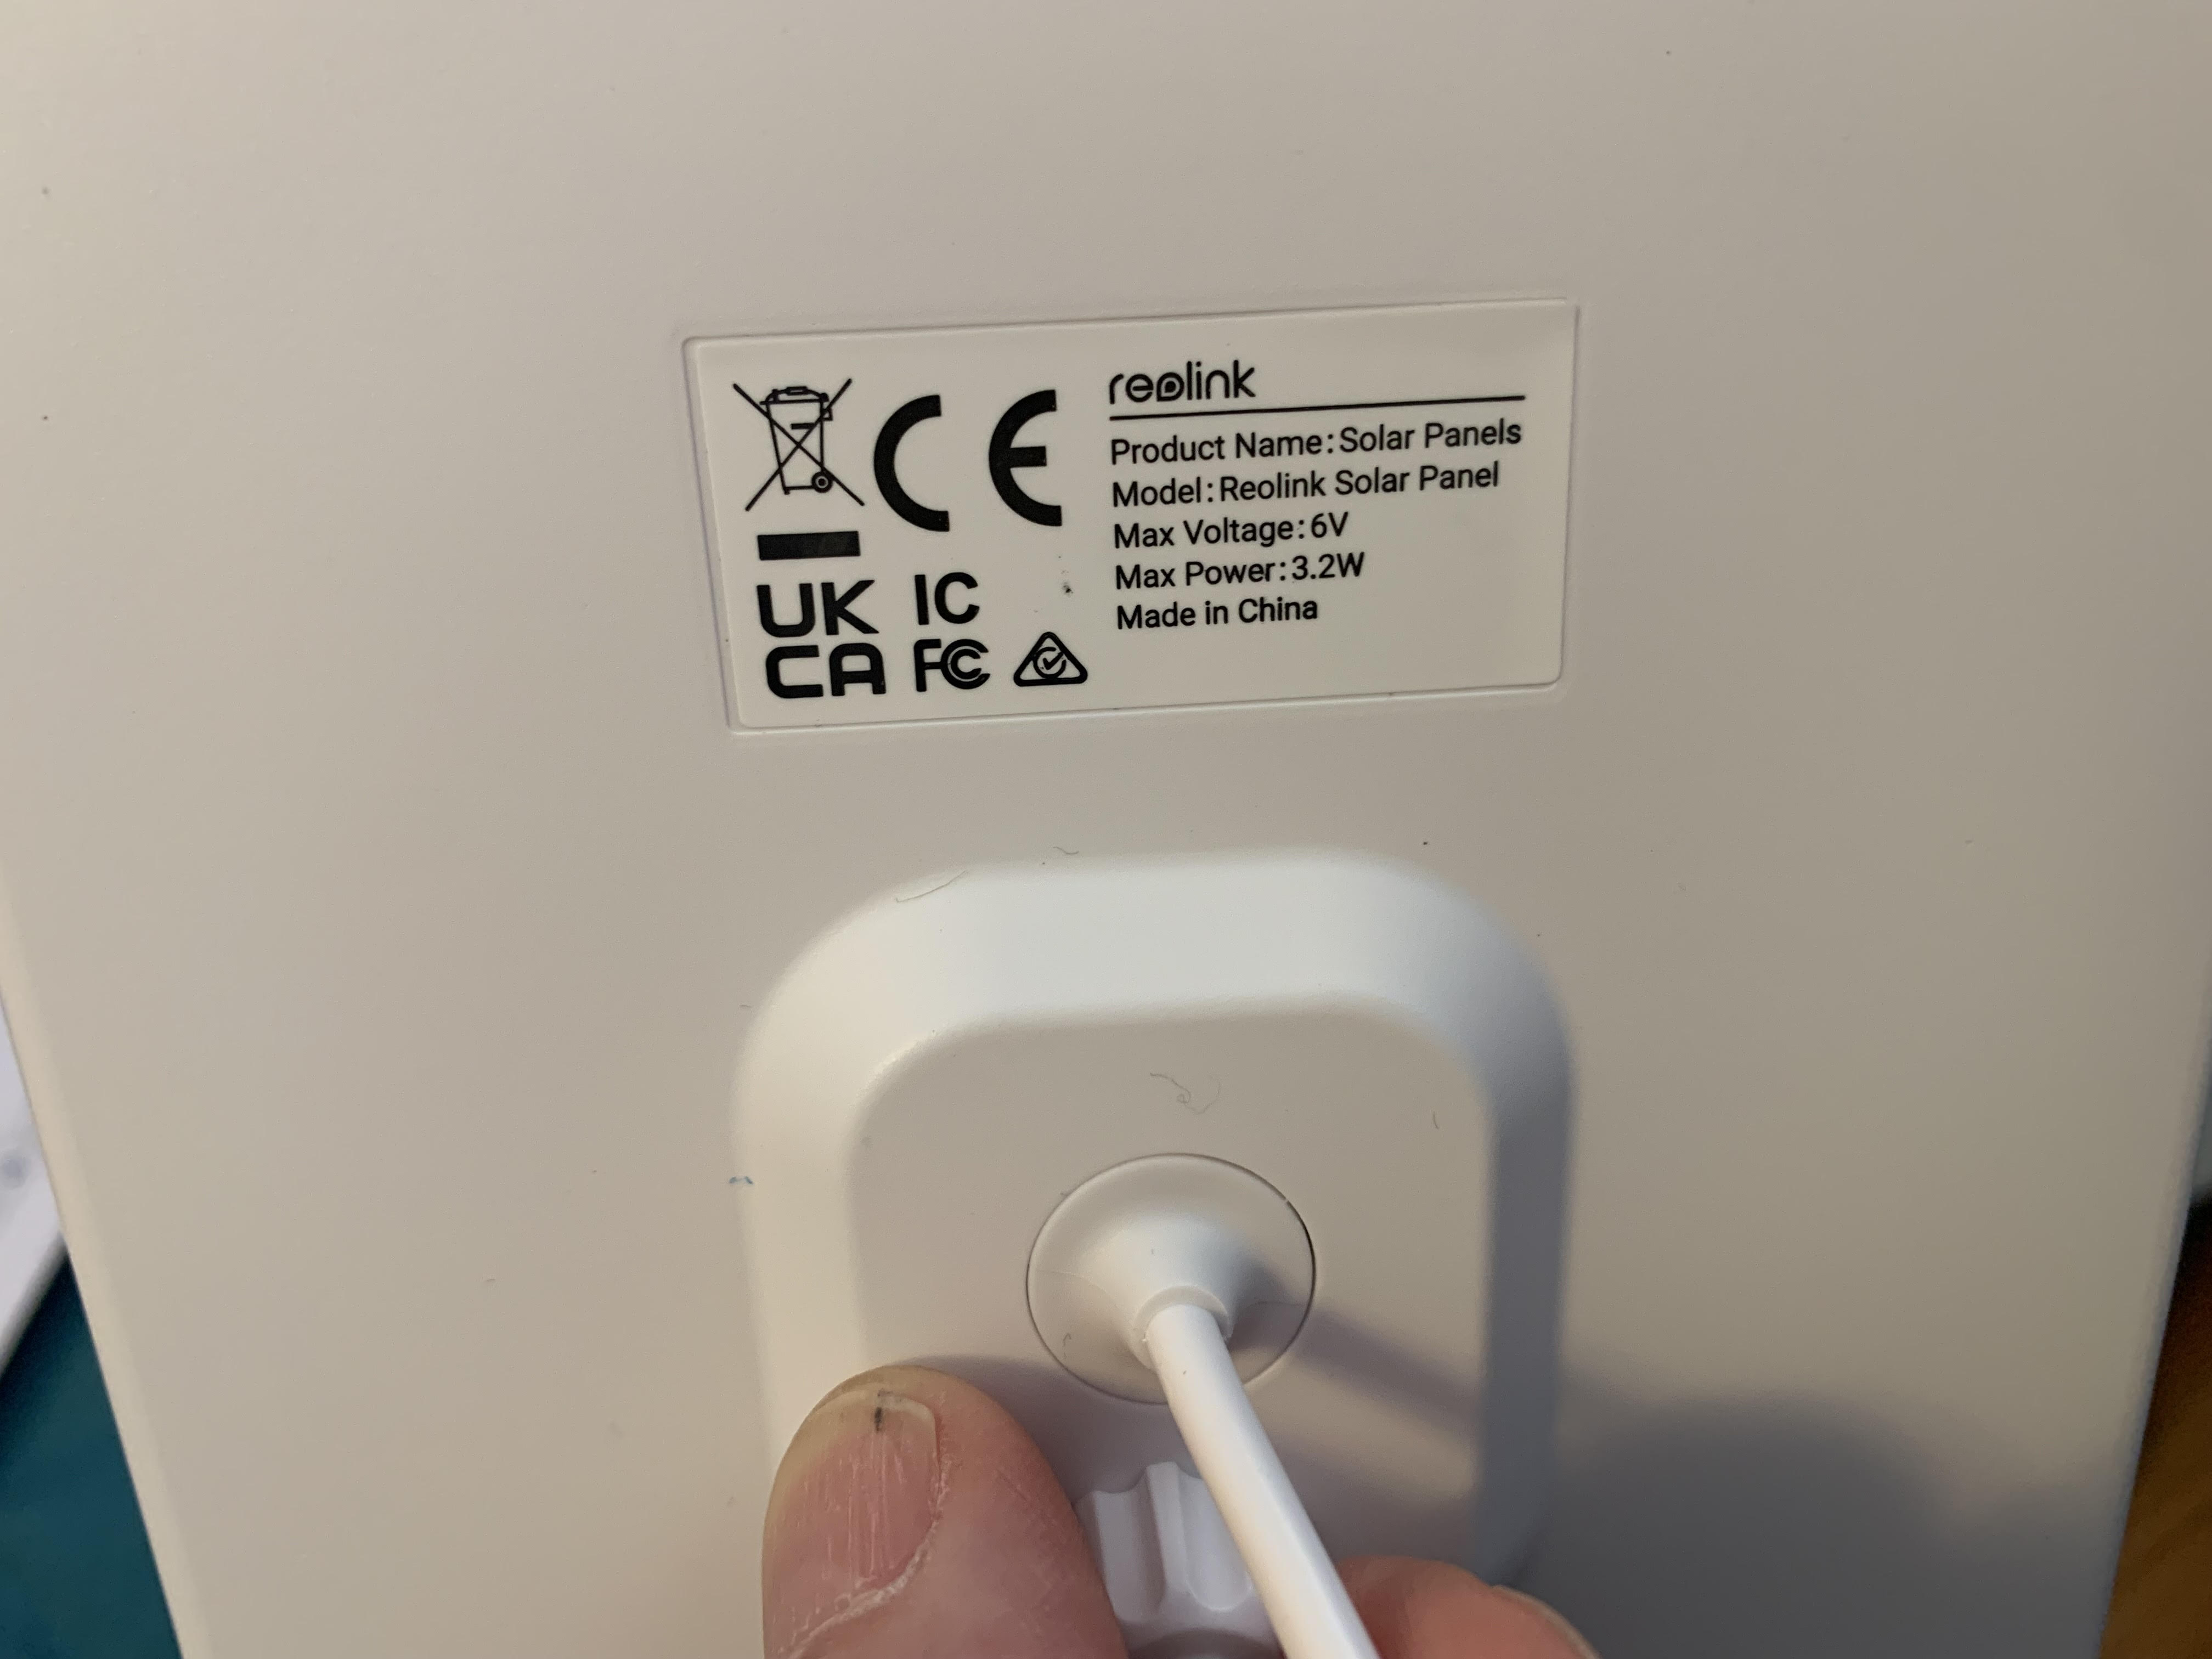
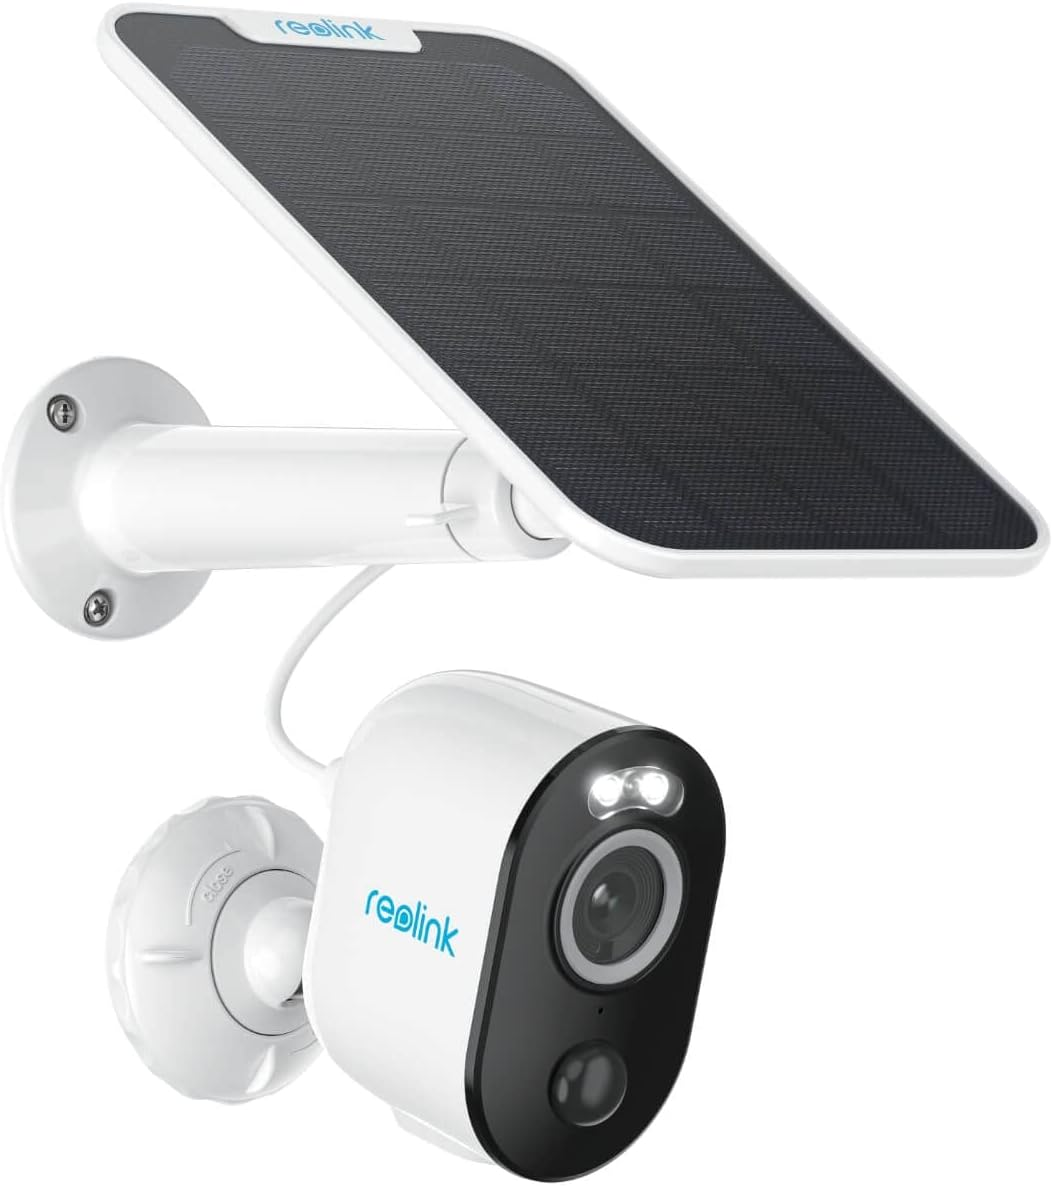
Ok, security camera take 2 … The Dekco I last reviewed missed the mark with no light and terrible night time vision … So based on a recommendation from my buddy Lance I looked at Reolink. The Dekco cost me $67.79, and the Reolink $153.67 so a BIG jump in price. Looks wise I would have preferred the black over the white, but I was impatient and the white was more readily available. Looking at the camera you immediately notice the lack of antennas for the WIFI, and this translated directly into a noticeably weaker WIFI signal compared to the Dekco in the exact same spot. The Reolink clearly identifies the solar panel as 3.2W, no clue how big the Dekco’s was.
The mounting bracket for the camera, which includes a strap you could use as a trail cam, is more solid than the Dekco one, but it’s also a LOT more fidgity, with a short thread to the base that’s not easy to get in, and a knobby edge that catches on things as your trying to tighten it. The solar panel mount is solid and well done.
The camera includes a light you can choose to disable that can be used like a security light. The light also improves the night time vision. In addition to the improved night vision the camera includes the ability to send you an email with the pic from a motion trigger. Setting this up was challenging, but we will get to that in a sec … Initial setup was relatively easy, download the app, and point it at the QR code … BUT, I got caught and wasted a good amount of time because as well as a tiny QR code on the back of the camera there is a much larger barcode on the side of the camera and I was scanning that instead and the app didn’t give any hints to NOT use the bar code. Once past that little annoyance you add the WIFI configuration and off you go. This camera supports both 2.5 and 5GHZ.
Setting up email requires you to know an SMTP server, which might be challenging for some. I tried Yahoo and gmail which they recommend, both of which didn’t connect at all. I suspect my account is not setup to allow it. I tried mailgun that I use and that got dubbed as spam by gmail and thrown into the spam bin. I couldn’t get it to work with my MS IIS SMTP server because the camera insists on using a userid in the form of an email address and password to authenticate, but I couldn’t figure a way to set that up on IIS, and it would not allow anonymous. Finally I got it working with SMTP2GO which is free. I still get a warning from gmail questioning whether it’s safe, but the mail at least comes through.
Now comes the question, what happens if your camera is offline when an alert happens. Now this is where it gets REALLY BAD. First of all you will be oblivious to it being offline. Unlike my WIFI thermostat that informs me when the thermostat hasn’t checked in, you get nada … zippo … zero … And any motion triggers that happen while the camera is offline go into the bit bucket, not to be retried when it comes back online. So your blind to the fact anything occurred. It is recorded and stored on the micro SD card if you know to go looking for it.
The camera worked ok other than the unreliable WIFI, ok motion detection etc. If they had only designed in an antenna … Ah well … next …
iSpy review and camera wrap up
So now that we have some security cameras working time to investigate iSpy. Now I must say, when I first started this venture I didn’t understand how iSpy worked … and trying to get both iSpy and the cameras properly tuned at the same time given my misunderstanding was challenging …
So what is iSpy … it is a free to use for personal use network video recorder to work with security cameras. There is an open industry standard called ONVIF that allows interoperability, well somewhat.
Loading iSpy was easy, I had it up and running as a container pretty quickly under docker, but I quickly realized this was a REALLY bad place for it. iSpy is quite processor intensive and seems (at least on containers to be single threaded. This processor heavy is true even if your not doing detections. Even having someone streaming the cameras uses a good deal of processing power. So I moved the installation to a physical PC to avoid my container host getting bogged down. Again installing was easy, and under Windows it does seem to be multi threaded. I didn’t find iSpy under Windows 10 to be rock solid. So I loaded it up on Debian and that resolved all instabilities.
I decided to play a bit with it’s ability to use NVIDIA GPUs … I have a 1050TI, so I loaded up Debian but had issues with getting the NVIDIA drivers loaded. So I backed off to Ubuntu to give that a try. Getting that going was no small feat … I’ll bore you you the details to get that going … So the first step is to see if once Ubuntu is loaded the NVIDA card is seen, which it is, but no drivers are loaded:
lspci|grep NVIDIA
01:00.0 VGA compatible controller: NVIDIA Corporation GP107 [GeForce GTX 1050 Ti] (rev a1)
01:00.1 Audio device: NVIDIA Corporation GP107GL High Definition Audio Controller (rev a1)
- hardware is seen

cat /proc/driver/nvidia/version
- no drivers installed
So off to the NVIDIA web site to download the Linux drivers … The install is long, gives a lot of warnings but in the end it get’s the drivers recognized under Ubuntu:
jgalea@ubuntu-ispy:~$ nvidia-smi
Thu Apr  4 10:51:41 2024
+-----------------------------------------------------------------------------------------+
| NVIDIA-SMI 550.67                 Driver Version: 550.67         CUDA Version: 12.4     |
|-----------------------------------------+------------------------+----------------------+
| GPU  Name                 Persistence-M | Bus-Id          Disp.A | Volatile Uncorr. ECC |
| Fan  Temp   Perf          Pwr:Usage/Cap |           Memory-Usage | GPU-Util  Compute M. |
|                                         |                        |               MIG M. |
|=========================================+========================+======================|
|   0  NVIDIA GeForce GTX 1050 Ti     Off |   00000000:01:00.0 Off |                  N/A |
| 30%   26C    P0             N/A /   75W |       0MiB /   4096MiB |      0%      Default |
|                                         |                        |                  N/A |
+-----------------------------------------+------------------------+----------------------+

+-----------------------------------------------------------------------------------------+
| Processes:                                                                              |
|  GPU   GI   CI        PID   Type   Process name                              GPU Memory |
|        ID   ID                                                               Usage      |
|=========================================================================================|
|  No running processes found                                                             |
+-----------------------------------------------------------------------------------------+
Now with this loaded and supported your ready to head over to your iSpy server configuration for playback where you can turn on the GPU. And immediately you can see the GPU doing STUFF using the nvidia-smi command from above.

On my NVIDIA 1050Ti with one camera on max res and max FPS it used about 30% of the GPU. You could immediately see a decrease in CPU use. 2 cameras bumped that up to 60% … I did play a bit with GPU use under Windows but ran into issues with the hardware I had, nothing to do with iSpy, but did see about the same GPU use as in Debian. Of course, getting it going under Windows was a LOT easier.
The most confusing part about iSpy for me, was to realize that iSpy has it’s own detection of motion. I assumed it was triggering off the cameras detection, which it does not (by default). Simple detection within iSpy catches so much it’s useless for notifications. It’s less of an issue to have iSpy doing excessive recordings, would always rather have more than less. So this, for me becomes problematic for iSpy notifications. You can however configure iSpy to detect and notify if a camera goes offline (or stolen ;). I found one way to mitigate this is to use a schedule and change the sensitivity to higher are night.
So there are a list of cameras iSpy support, and instructions on how to setup Reolink cameras from iSpy. There was also instructions from Reolink on how to setup their cameras in iSpy. Sadly, both documents, IMHO are WRONG. So I’ll give you my take. I’m going to use my Reolink 510A and 1212A for the purpose of this post … So by default Reolink do not enable ONVIF or RTSP. So install your cameras, get them on the network and either load the Reolink for Windows app or logon to the web interface for each camera. The Reolink Windows app, or the iPhone/Android app can tell you the IP of the camera. Click on the network tab and then click advanced and slide down until you see server settings. Here you will see how to setup ONVIF.

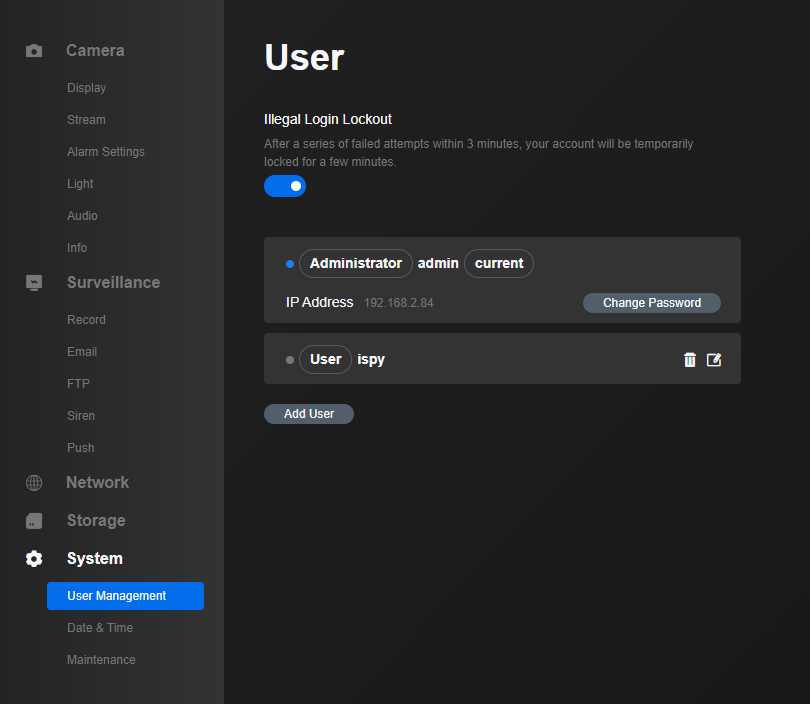
Now if you wanna get paranoid you can setup a read only used for the cameras to insure nothing on the camera gets changed by iSpy.
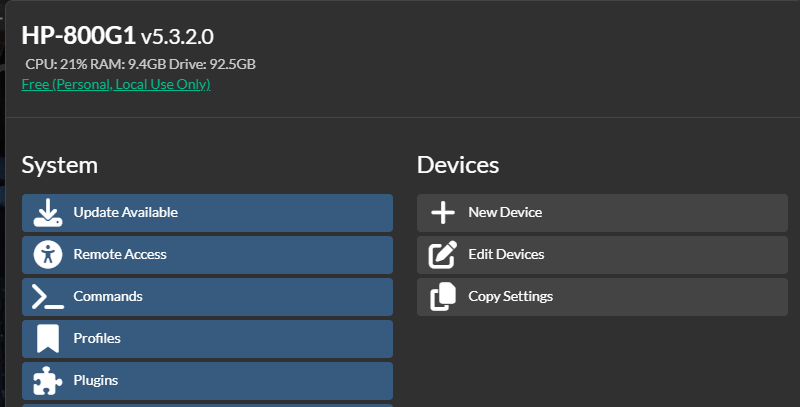
Ok the cameras are now setup, iSpy is loaded and your ready to go … So now logon to your iSpy interface and click the button next to the lock icon in the top left corner, then click new device.

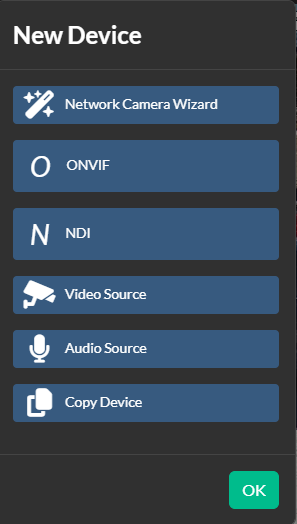
Now click the plus sign

Select an ONVIF decide and then click the three dots to configure the camera
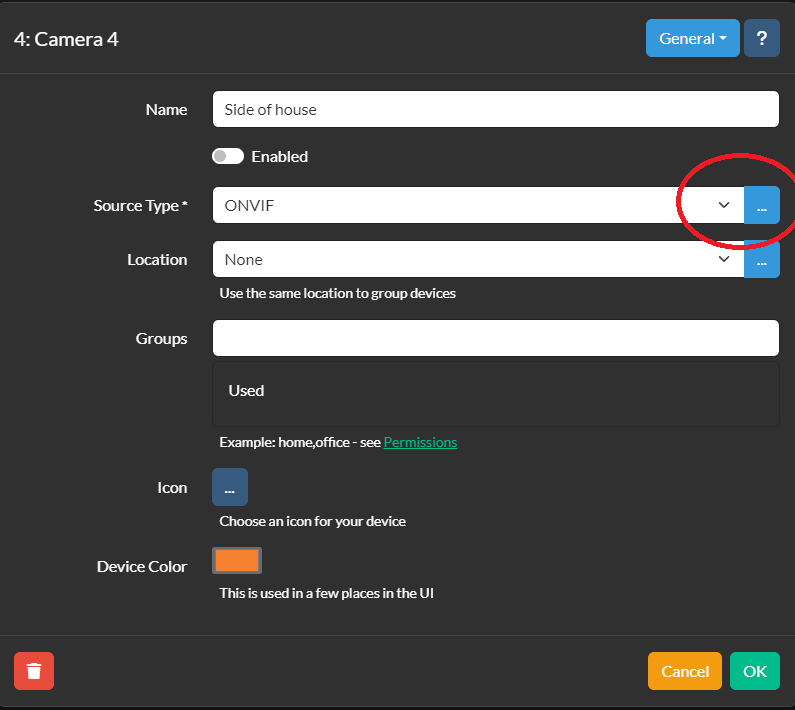
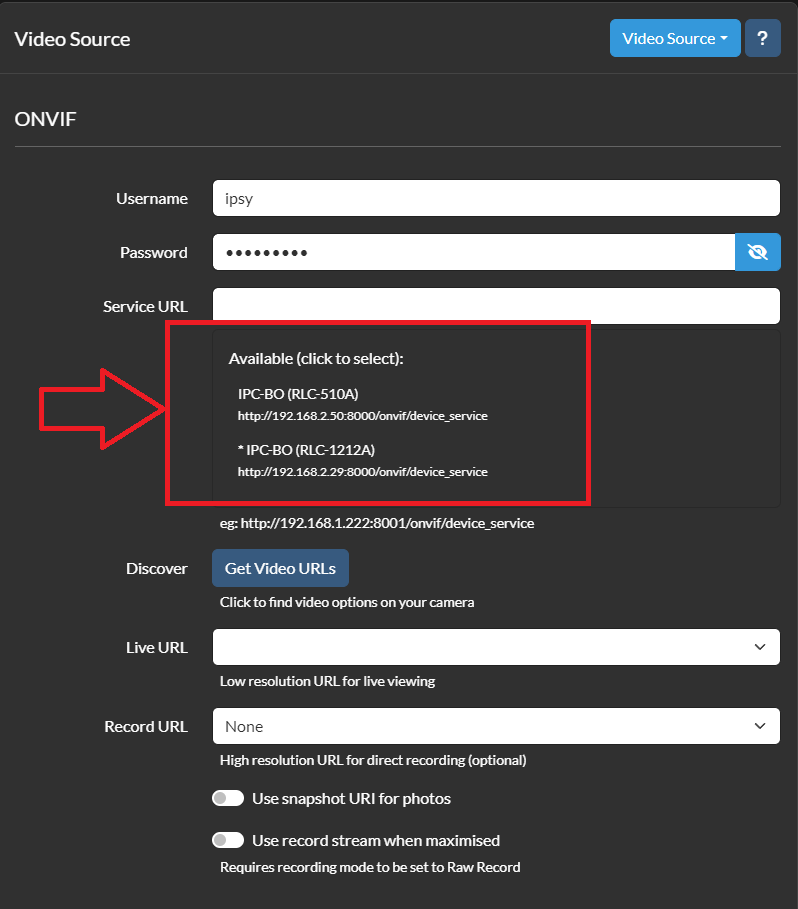
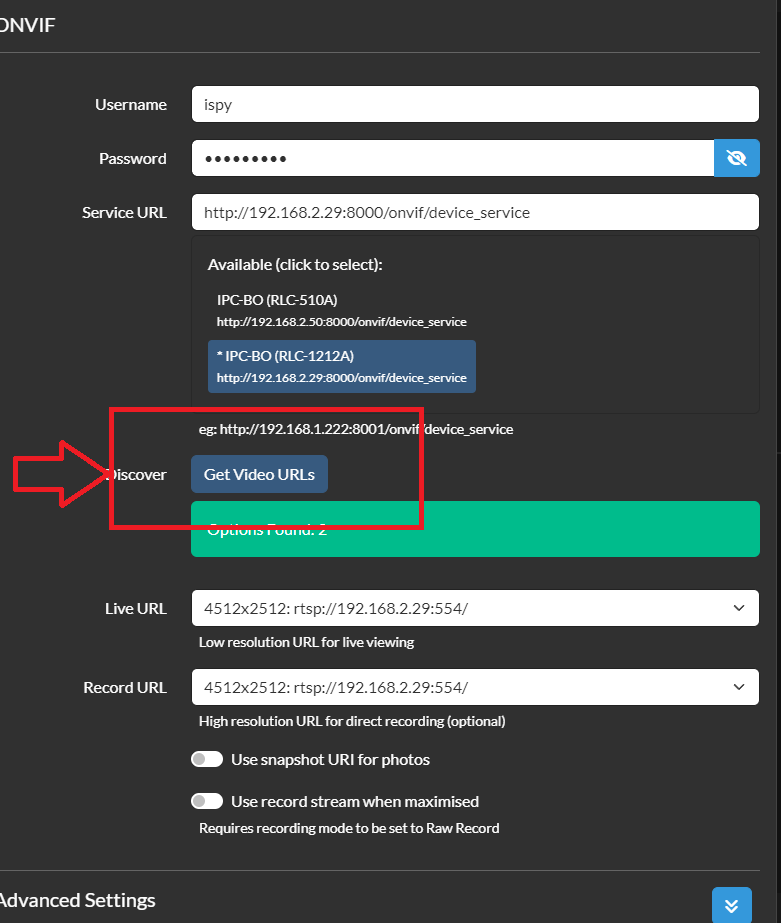
Enter your camera’s userid and password. By default the Reolink is admin for the userid but I create an account just for iSpy. If your lucky your camera will be found automatically by iSpy scanning your network. If not, it gives you hint and you can manually enter the service URL for the camera. If it does detect you camera, as mine did (after a little while) you can then click the camera you wanna setup and your on your way to clicking the get video URLs. Which allows you to choose your resolution.
And with that your camera is in ISpy … But at this point it won’t do anything other than display the camera. And maybe that’s all you want. But next up would be to edit the device(s) and for each device setup your detector, any detection zones, and sensitivity for the detector.
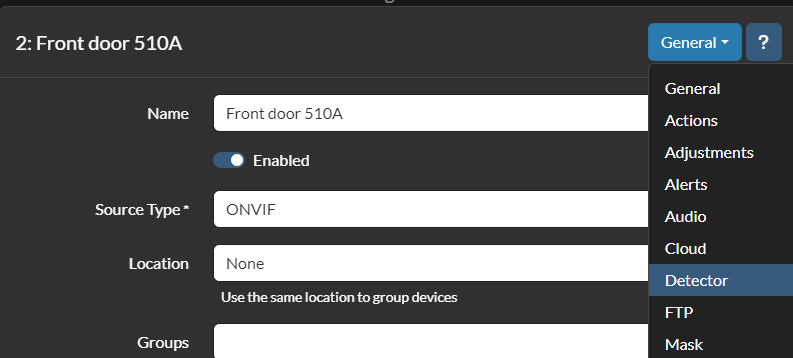
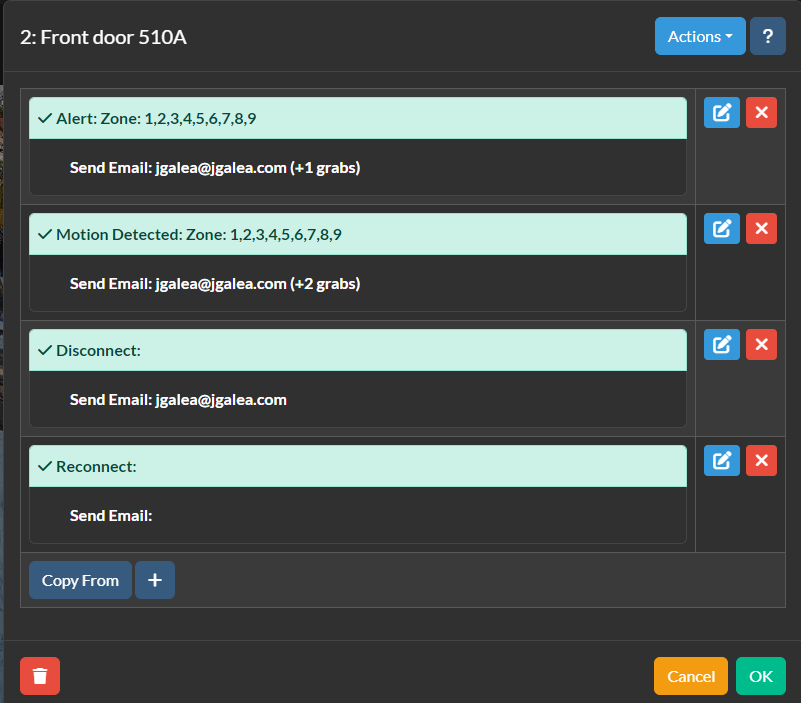
Once a detector is setup your now ready to define any actions you want to take, like notifications.
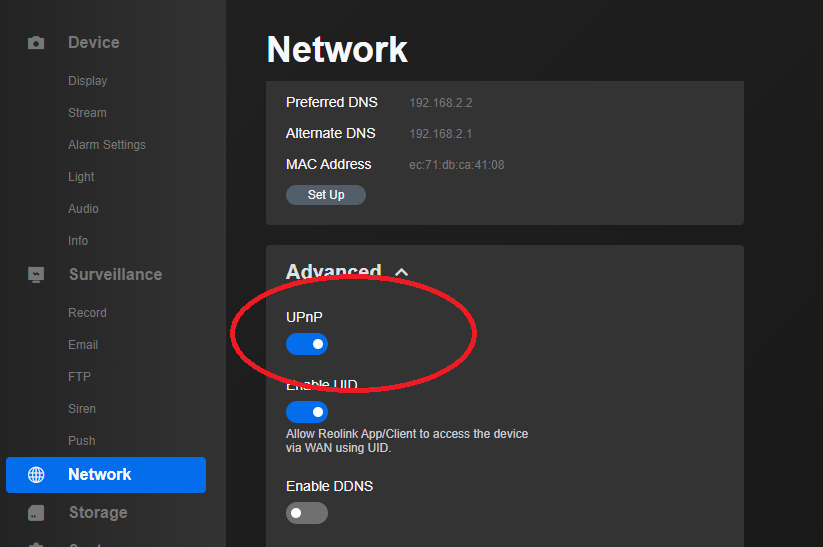
This is actually an updated article now, I did manage to get ONVIF detector working which works ok, I didn’t spent a lot of time on it, it worked sometimes and not others. I had issues getting Reolink AI detection going so I posted on the forums, and pretty quickly got back an answer. The solution to getting this working is to enable UPNP on the camera through the web (or PC app). From the web interface of the camera click, network, advanced where you will see the setting.
Once this is enabled go back to the camera setup in iSpy and select the Reolink AI detector, change it to SSL and change it to AI.
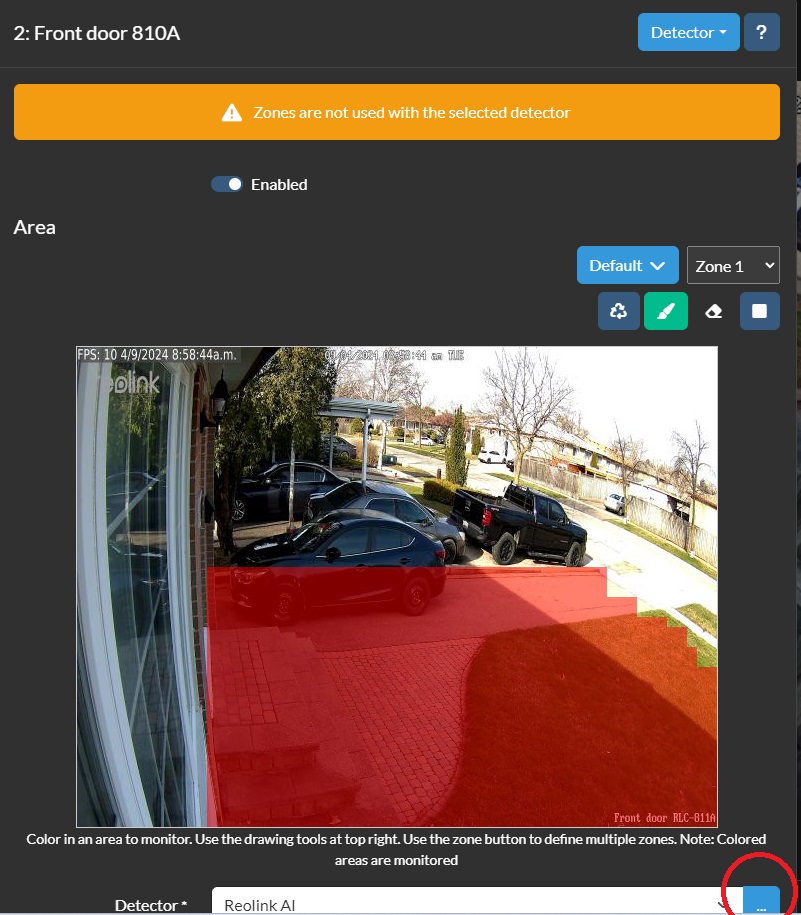

With this setup, you can now setup ONLY the camera with what you need for areas, sensitivity etc and it will in turn kick off iSpy. I was surprised to see, that while it decreased the processor use of iSpy, not as dramatically as I expected.
So next up I decided to try out constant recording. For this I am going to use default settings for encode to minimize CPU, and the 811A 8Mp Reolink camera (just one camera). I’ll divide the recordings into 15min chunks. It took 675M to record 15mins (and the file is an mkv), or 2.7G/hr, so it would take 65G to have 24 hours of on loop recording. iSpy can manage the space in the recordings settings, you can adjust how much space to limit iSpy to so it doesn’t just fill up and die. You can also schedule your recordings as well. I did not see much change to the CPU use with recording on/off. Speed wise it’s going to consume ~ .75MB/s so not a lot at all, and very manageable from an IO point of view. Even with constant recording on you still get event driven triggers!
The iPhone the iSpy app was easy to get going and allows you to see your cameras in an array that’s convenient. But push notifications are a paid service, there’s no siri integration and integration with Home Assistant is minimal at best.
Well this post is long enough so I’ll spin off a new post for CodeProject AI with iSpy.
Update 5/14/2024 So what I’ve zeroed in on is to use iSpy as a dedicated, 24×7 NVR with no detection, just constant recording. I’ve set up the archive settings so this rolls over every 7 days. I dedicated 1TB to the two cameras for this and it’s working well, set it and forget it. Tuning this took a little bit. You have to turn on archiving per camera and track the amount of space, and archive age there. Mine looks like this:

And then the storage setup I’ve chosen is to use an SSD for the live (/camera/live), and then archive to a hard drive (/camera). I ended up on a hyperv debian based VM where is is all working well and is stable.

In the end I gave up on Face or Object recognition, it just wasn’t working in a useful way for me.
About
I do these reviews for personal interest and amusement. I buy the devices out of my own pocket. If you would like to send along a donation it would be much appreciated.
![]()
-
Recent
- Lenovo Tab M9 Android tablet review for Home Assistant
- Creative Stage SE Under-Monitor Soundbar with USB Digital Audio and Bluetooth 5.3 mini review
- Lenovo K14 Gen 2 mini review
- Network isolation for your IOT and cameras
- Amazon air quality monitor mini review
- iPhone 15 Pro review
- CodeProject AI with iSpy mini review
- Reolink 510A and 811A security cameras and all things related
- Reolink 1212A mini review
- Reolink Argus 3 Pro solar security camera
- Dekco DC4L (super mini) review
- iSpy review and camera wrap up
-
Links
-
Archives
- May 2024 (4)
- April 2024 (4)
- March 2024 (6)
- February 2024 (2)
- January 2024 (4)
- December 2023 (1)
- November 2023 (6)
- October 2023 (1)
- September 2023 (6)
- July 2023 (1)
- June 2023 (6)
- May 2023 (2)
-
Categories
-
RSS
Entries RSS
Comments RSS
