Trek Top Fuel 7 review and a good story …
I’ve been a mountain biker for over 20 years now, a good friend of mine Joe got me into it, and it was love at first rock 😉 I started out with an old Raleigh and we hit Kelso, which is a rocky place. As you can imaging the Raleigh did not hold up to even one ride and with that I was bitten … I ended up buying a Gary Fisher Sugar 3+ in 2003. This bike was light, nimble, full suspension and I just loved running through flowy trails on it!

In 2006 a mere 3 years later the rear frame cracked at the weld. Trek who had bought Fisher came through after what seemed like an eternity (weeks) and warranted the frame. My bike dealer had lost their Trek franchise. You can see the back section of the bike is a different color, the replacement frame part they used was grey instead of blue.

In 2023, again the frame broke, this time COMPLETELY letting go. The second arm of the rear frame held and I was unharmed but the bike was done.

Again Trek came through and backed up their lifetime frame warranty offering me $$s towards a new bike, and actually gave me more than I originally paid for the bike. So I rode the bike for 20 years and got more than I paid for it, can you imagine? What an incredible company Trek is, of course I had to find the original receipt to prove I bought it at an authorized Trek dealer, which I was able to!
And so with that little story we are onto what’s new in 20 years since I last bought a mountain bike … spoiler alert, it would be easier to say what hasn’t changed. I went up to Trek Mississauga who explained everything to me, taking lots of time to zero in on a model. I wanted full suspension, so it was either the Trek Top Fuel 5 or 7. Let’s dig into what’s new …
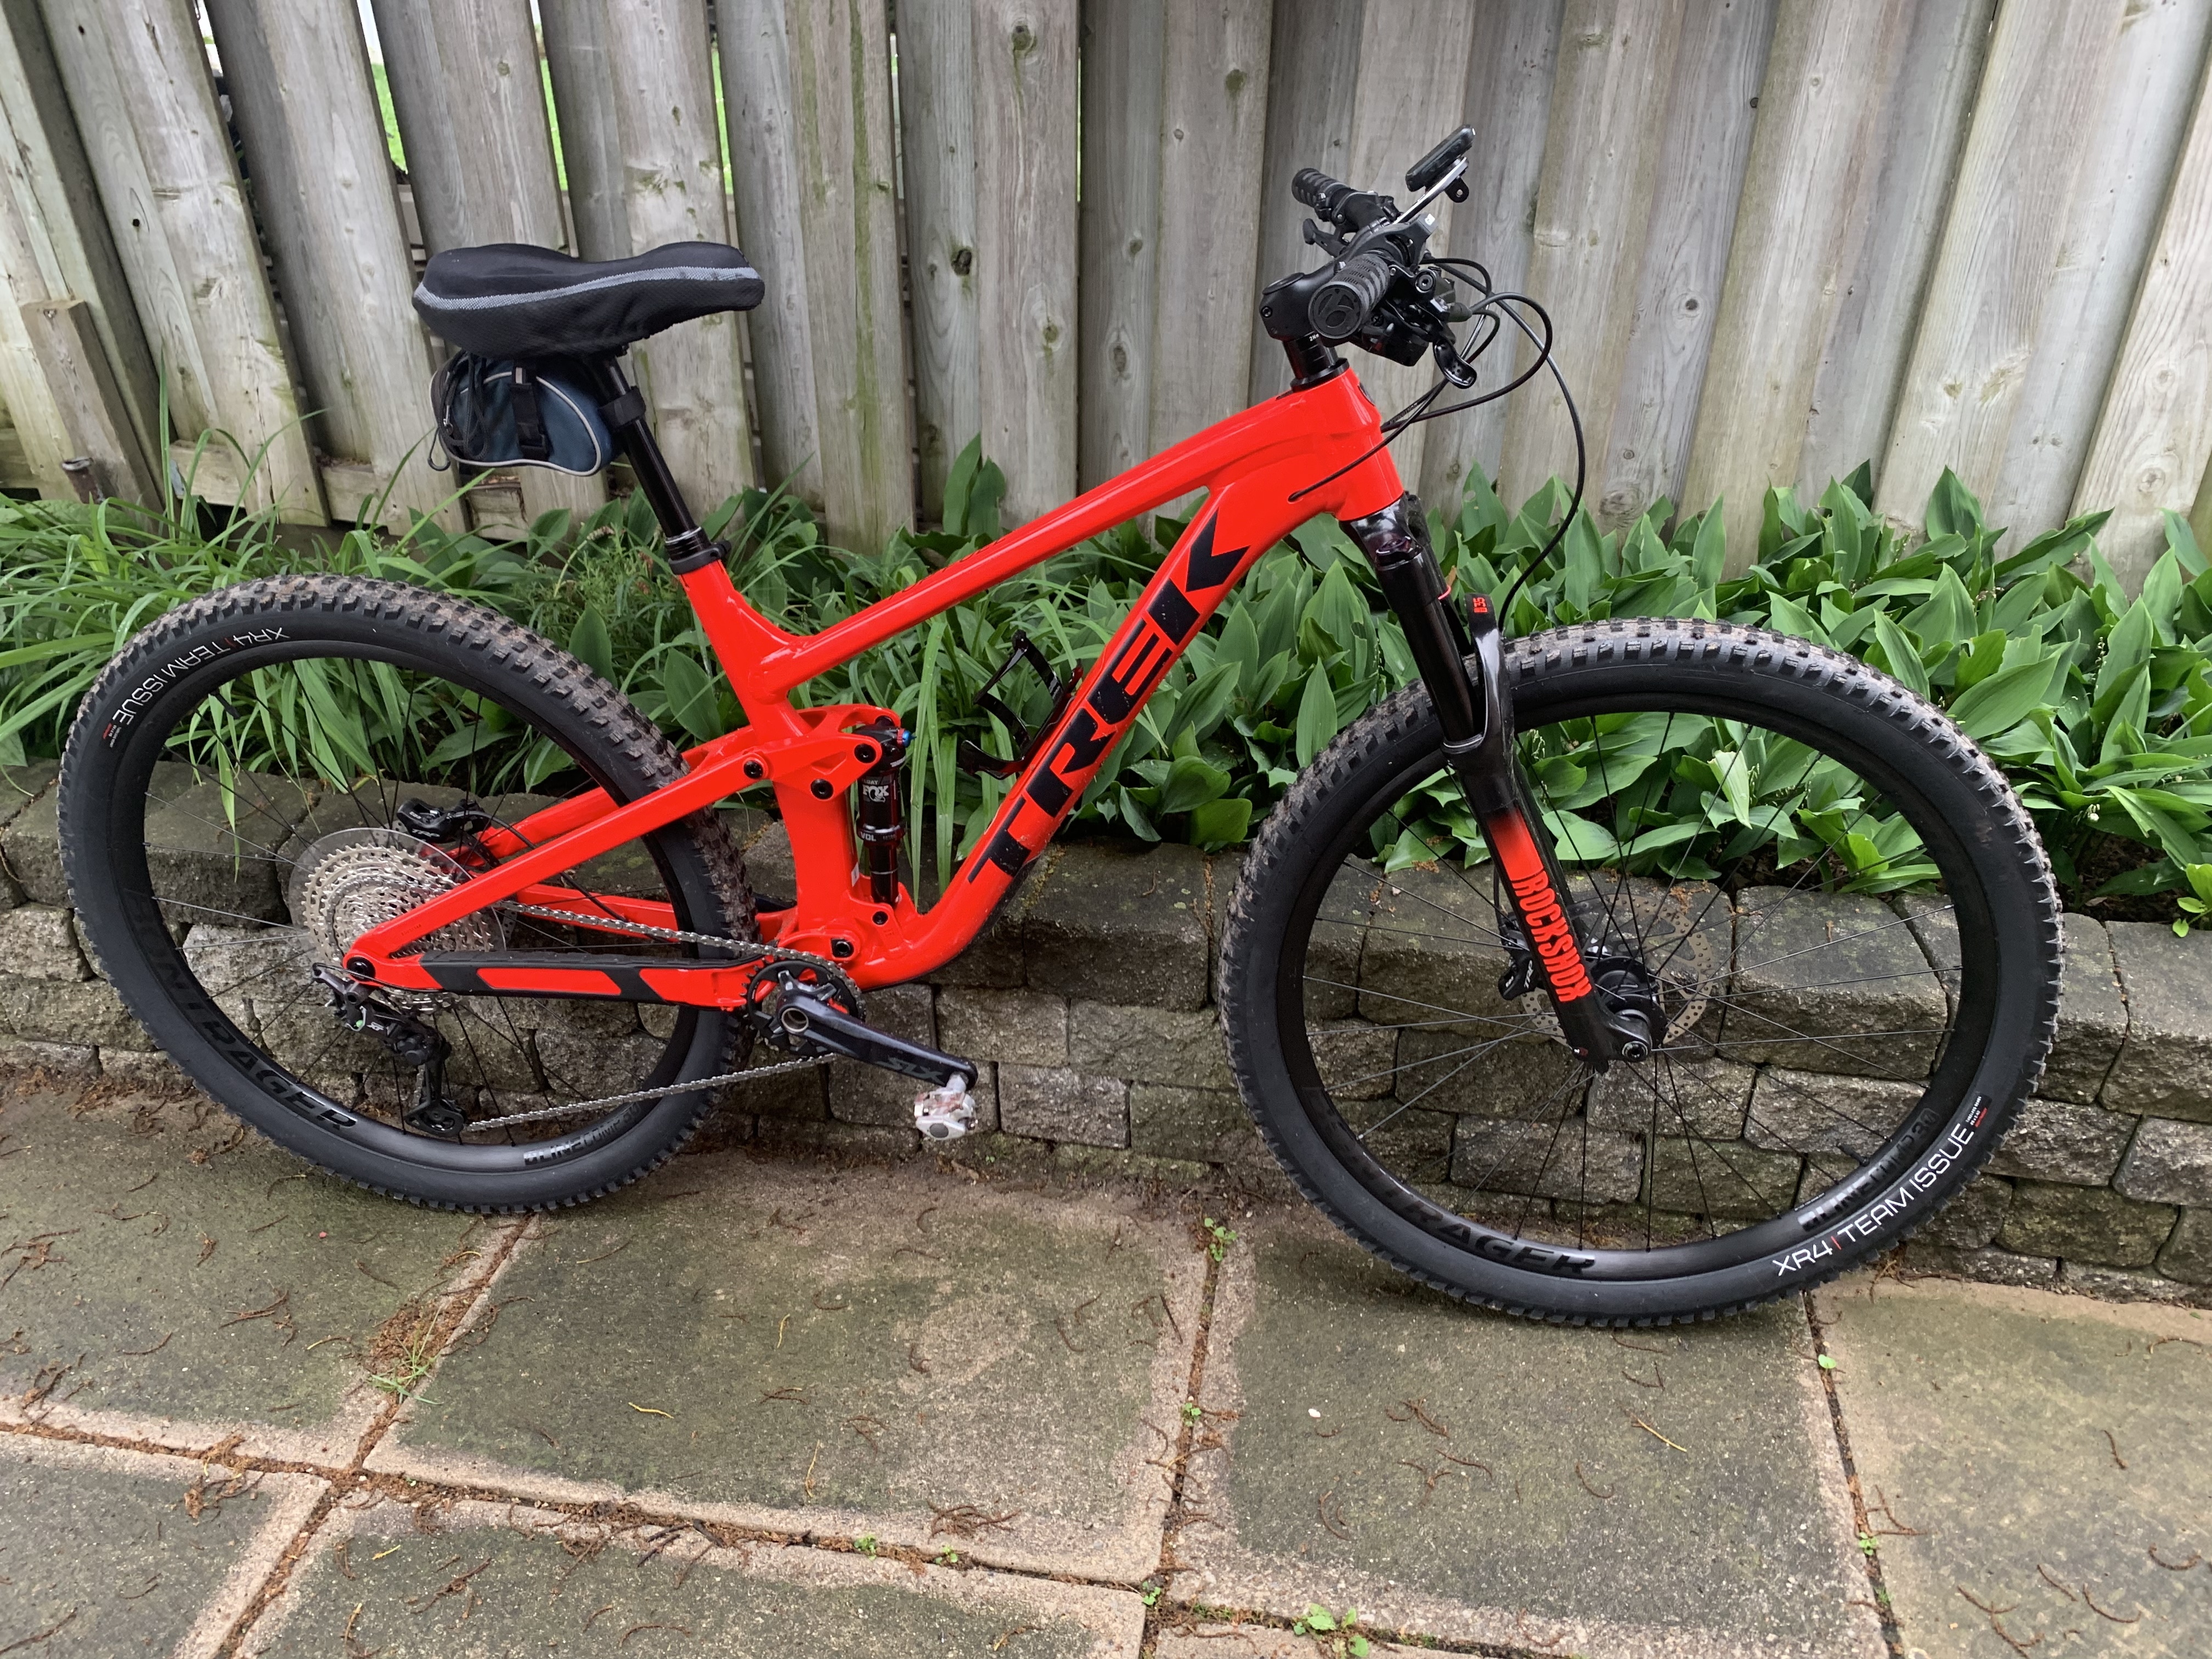
The biggest change is wheels … full suspension mountain bikes have almost entirely gone to 29″, from 26, with the sole exception being the Giant Trance X2 which still uses a 27.5″, honestly I came pretty close to buying the Giant, it just felt a whole lot more “familiar”. Tires on this level of bike have gone to tubeless which isn’t by any means a new concept. Tubeless need to be filled with goo once a year or so to keep it from leaking or to seal punctures. Inflating a tubeless from completely flat requires either a compressor or a CO2 inflation cartridge. Tubeless are more likely to loose air from a puncture and then the goo seals it, so you can simply add some air. You can carry along a 29″ tube which can be used for emergencies and trek even provides a compartment in the frame to hold it and a few other tools, reducing how much you need to carry in your saddle bag.

Tires on this bike have gone from 2.1″ wide, to a whopping 2.4, compared to a fat bike at an even more whopping 4″ min … These particular tires Bontrager XR4 team issue are quite knobby so ought to provide a ton of grip. 29″ wheels are really made for rolling over obstacles. First time out I played a bit on stairs, something I haven’t done for a while, and these wheels/tires just ate them up. Wow what a difference.

These newer bikes also feature a solid axel removing the possibility of the front tire coming loose and coming out of the fork (for example).
Gears have changed substantially, going from 3 in the front, and 9 in the rear to 1×12 and what a difference this makes. On the road this bike is really ill suited, but the tires alone make this a reality. 1×12 means one less derailer to maintain, and one less set of gears to think about while riding. It really is a LOT more convenient. And, in reality, the outer ring on my old bike was more of a bash ring and was rarely used for much else. There was so much overlap in gear combinations between the smallest and middle front ring, this 1×12 just makes a WHOLE lotta sense. The Fuel 7 actually upgrades the rear derailer from Shimano Deore to XT. The Deore and above also have a clutch system that is a lever that keeps the derailer from moving front and back, although, honestly I’m not sure I understand why you would want that? Trek have included a standard ISCG05 mount and you can buy a bash guard to protect the ring, although, I haven’t really decided if I like the idea of them, they are kind of narrow and I can see that being problematic in certain circumstances.

Brakes became a lot more common as disc rather than V brakes, not long after I bought my bike and these have continued to evolve. On the low end scale they are cable operated with the cable pushing only from one side of the roto. Hydraulic brakes have become a whole lot simpler than the original ones, using mineral oil, and pushing with pistons on both sides of the rotor. The Fuel 7 actually upgrades the brakes from 2 piston, to 4, and these brakes require very little effort to get incredible stopping power. But they will definitely take getting use to. Grab a mitt full of brakes and your going over the bars in what we affectionately refer to as a superman, in a heart beat. Changing out shoes is pretty easy, remove the wheel, remove the pin and the shoes drop right out. Anytime the rotor isn’t there (ie you remove the wheel) it’s important to protect the piston from popping out if the brake lever was hit, so they have a spacer you should put in.

Suspension geometries have continued to evolve and this is probably an area that there actually isn’t a lot to say. The suspension on this bike is comfortable. Trek provide a chart based on your model that tells you the amount to inflate your front and rear suspension to based on your weight, Trek support, suspension calculator from their webiste. You will need a low volume, high pressure pump, which does NOT come with the bike, so if you don’t have one you will need to buy one. Pretty sure they included it with my Fisher. Shocks can loose pressure over time, of course. The shocks are a combination of air/hydraulic and springs.

Handle bar and riding position has really changed a lot, the bars are a WHOLE lot wider. I cut mine down 10mm a side, to make them closer to what I am use to, they just felt WAY too wide. The neck was also a LOT shorter than I am use to, so I changed it up to a longer one. With these changes and sliding the seat back, and I was able get a much more similar riding position to what I am use to. And I can always change back to the shorter neck if I choose to in the future.
In my 20 years of riding I’ve had a few wipe outs 😉 , and a couple of times when the wheel has gotten side ways the handle bars have come all the way around and jammed into my upper thigh, and MAN DOES THAT HURT, and takes a long time to heal as a deep muscle injury. Trek have come up with a way to prevent that called a knock block that keeps the handle bars from EVER going around that far. It’s still likely to hit your thigh, but a WHOLE LOT LESS. A nice improvement.
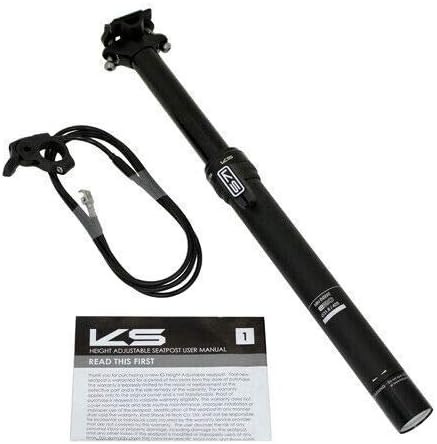
I have a buddy Brian who use to love to raise and lower the seats when we were coming up to a steep downhill … Well, the bike industry has come up with a solution to that too … Called a seat dropper post. A lever on the handle bar with weight towards the front of the seat lowers the seat down ready for doing drops, stairs etc, making this a whole lot easier. Lift off your weight flick the lever again and the seat returns to the upper position. All while riding. These dropper post operates on a combination of hydraulic and springs. This convenience does come at a price … $$s and weight, a hefty 1.5 pounds or more.
On first look you can see they have spent a lot of time making the frame a lot more robust. Built in frame protectors on the chain stay, a solid plastic frame protector on the bottom of the bike, and the like. All this comes at a cost … weight. My Fisher weighed in at a svelt 26 pounds, this bike comes in at a whopping 32.7 pounds. And the size, and weight of this bike are QUITE noticeable. If you’re use to a nimble, light agile bike … Ya this is SO NOT THAT. Here’s a complete list of specs from the Trek site.
| Frame | Alpha Platinum Aluminium, internal storage, tapered head tube, Knock Block 2.0, internal guided routing, downtube guard, magnesium rocker link, Mino Link, ABP, Boost148, 120 mm travel |
|---|---|
| *Fork | Size: S, M, M/L, L, XL RockShox 35 Gold RL, DebonAir spring, Motion Control damper, lockout, tapered steerer, 44 mm offset, Boost110, 15 mm Maxle Stealth, 120 mm travel |
| Size: S, M, M/L, L, XL RockShox 35 Gold RL, DebonAir spring, Motion Control damper, lockout, tapered steerer, 44mm offset, Boost110, 15mm Maxle Stealth, 120mm travel | |
| Shock | Fox Performance Float DPS, 3-position damper, 185x50mm |
| Max compatible fork travel | 130mm (541mm axle-to-crown) |
| Wheel front | Bontrager Line Comp 30, Tubeless Ready, 6-bolt, Boost110, 15mm thru axle |
|---|---|
| Wheel rear | Bontrager Line Comp 30, Tubeless Ready, Rapid Drive 108, 6-bolt, Boost148, 12mm thru axle |
| Hub front | Bontrager alloy, sealed bearing, alloy axle, 6-bolt, Boost110, 15 mm thru axle |
| Hub rear | Bontrager alloy, sealed bearing, alloy axle, 6-bolt, Shimano MicroSpline freehub, Boost148, 12 mm thru axle |
| Skewer rear | Bontrager Switch thru axle, removable lever |
| Rim | Bontrager Line Comp 30, Tubeless Ready |
| Tire | Bontrager XR4 Team Issue, Tubeless Ready, Inner Strength sidewalls, aramid bead, 120tpi, 29×2.40” |
| Tire part | Bontrager TLR sealant, 180 ml/6 oz |
| Rim strip | Bontrager TLR |
| Max tire size | Frame: 29×2.50″, Fork: See manufacturer |
Drivetrain
| Shifter | Shimano SLX M7100, 12 speed |
|---|---|
| Rear derailleur | Shimano XT M8100, long cage |
| *Crank | Size: S, M, M/L, L Shimano Deore M6120, 30T ring, 55 mm chainline, 170 mm length |
| Size: XL Shimano Deore M6120, 30T ring, 55 mm chainline, 175 mm length | |
| *Bottom bracket | Size: S, M, M/L, L, XL Shimano BB-MT501 BSA |
| Size: S, M, M/L, L, XL Shimano SM-BB52, 73mm, threaded external bearing | |
| Cassette | Shimano Deore M6100, 10-51, 12 speed |
| Chain | Shimano Deore M6100, 12 speed |
| Max chainring size | 1x: 36T round, 34T oval, min 28T |
| Saddle | Bontrager Arvada, steel rails, 138 mm width |
|---|---|
| *Seatpost | Size: S TranzX JD-YSI-22PLQ, 100mm travel, internal routing, 34.9mm, 346mm length |
| Size: M, M/L TranzX JD-YSI-22PLQ, 150mm travel, internal routing, 34.9mm, 454mm length | |
| Size: L, XL TranzX JD-YSI-22PLQ, 170mm travel, internal routing, 34.9mm, 497mm length | |
| Handlebar | Bontrager Rhythm Comp, alloy, 31.8mm, 15mm rise, 750mm width |
| Grips | Bontrager XR Trail Comp, nylon lock-on |
| Stem | Bontrager Rhythm Comp, 31.8 mm, Knock Block, 0-degree, 50 mm length |
| Headset | Knock Block 2.0 Integrated, 72-degree radius (includes infinite-radius chip), sealed cartridge bearing, 1-1/8″ top, 1.5″ bottom |
| Brake | Shimano hydraulic disc, MT4100 lever, MT410 calliper |
| *Brake rotor | Size: S, M, M/L, L, XL Shimano RT56, 6-bolt, 180 mm |
| Size: S, M, M/L, L, XL Shimano RT56, 6-bolt, 160 mm | |
| Rotor size | Max brake rotor sizes – Frame: 180mm, Fork: see fork manufacturer |
| Weight | M – 14.83 kg / 32.7 lbs |
|---|
Surround sound 5.1 setup
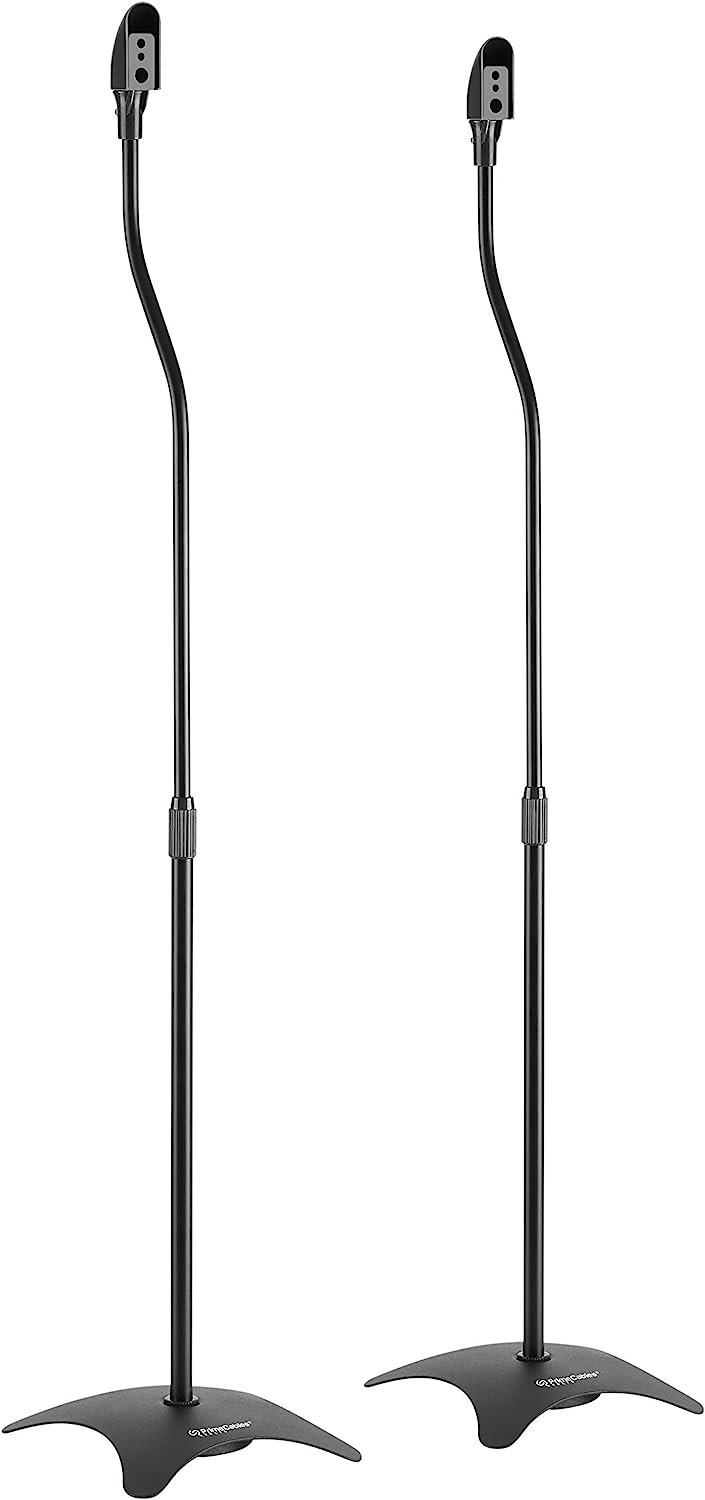
I’ve had difficulty getting surround setup in my main area, I can’t get the speakers behind far enough … I’ve lived with this poorly setup for a LONG time now, but the GF decided she wanted to see Top Gun … Well nothing says surround sound like Top Gun … So I got an itch to fix my setup. First up I bought some speaker stands that will allow me to get my very old bookshelf speakers as far behind us as possible. I found a cheap, albeit wobbly set on Amazon. They are from Prime Cables.
With that done I decided it was time to buy a decent center speaker. All the reading I did said it’s the place to spend your cash on for the most bang for the buck. I did some digging, and decided, go big or go home 😉 So I bought a Polk Audio Monitor XT35.

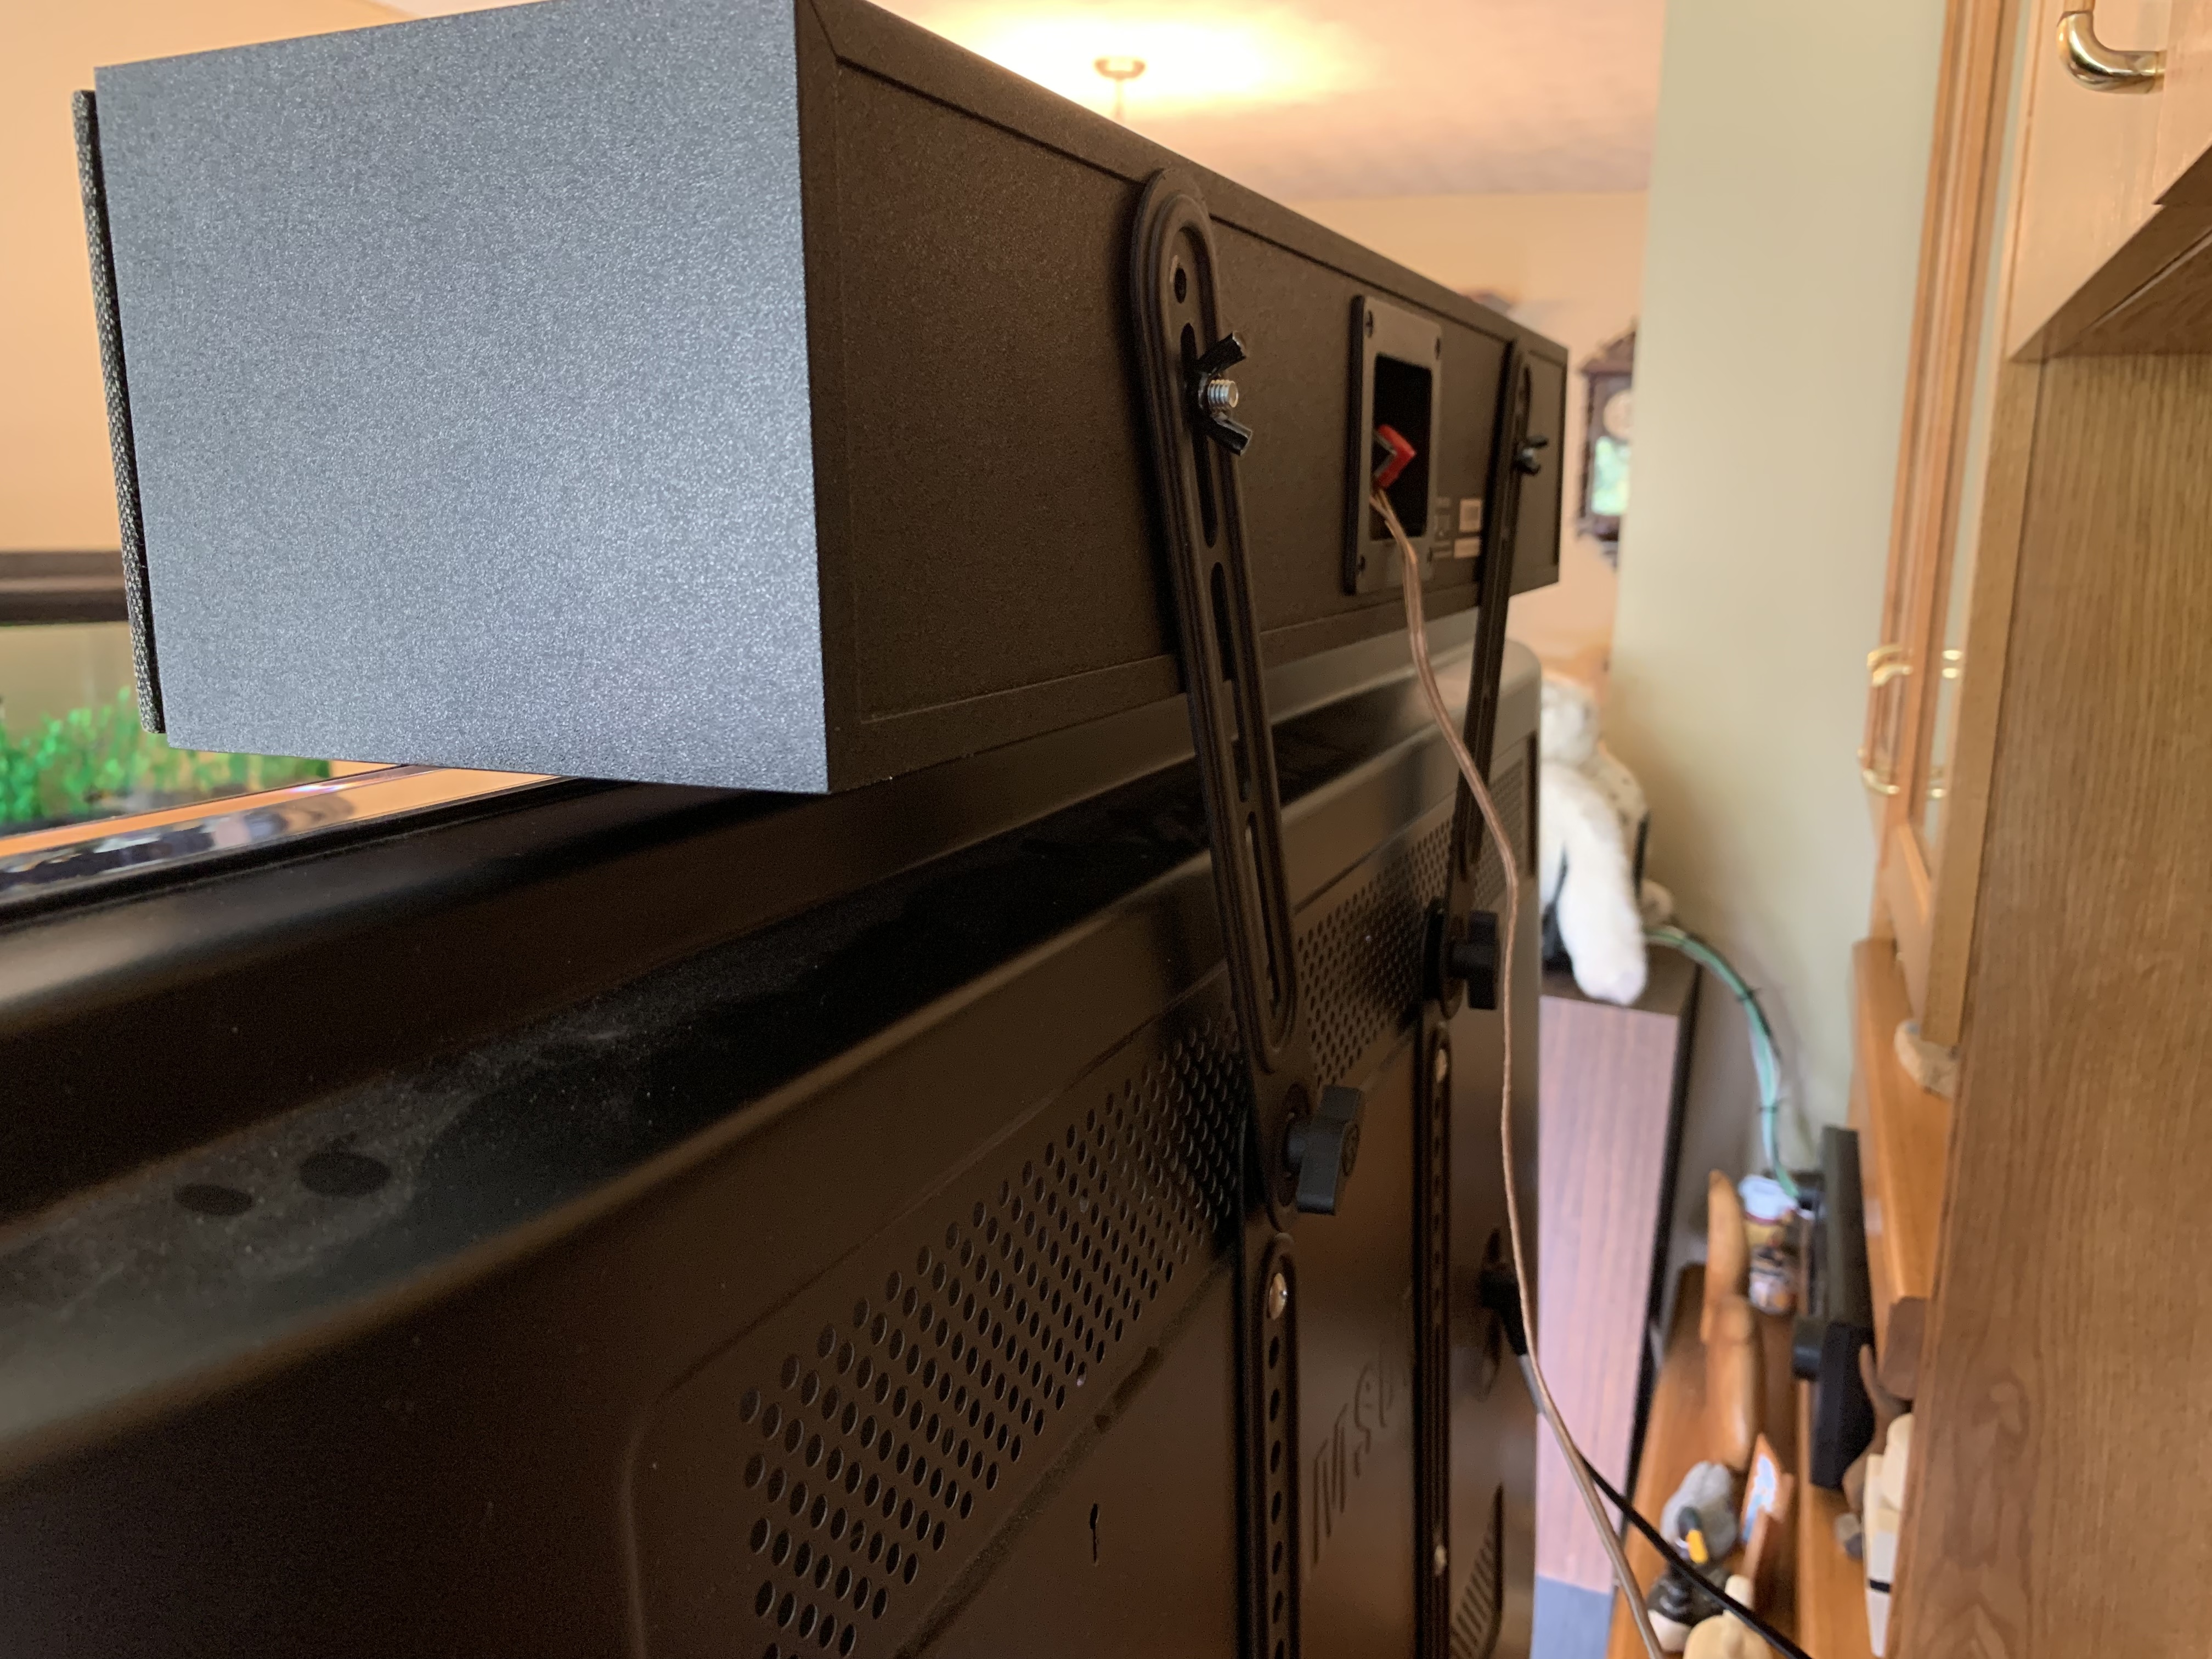
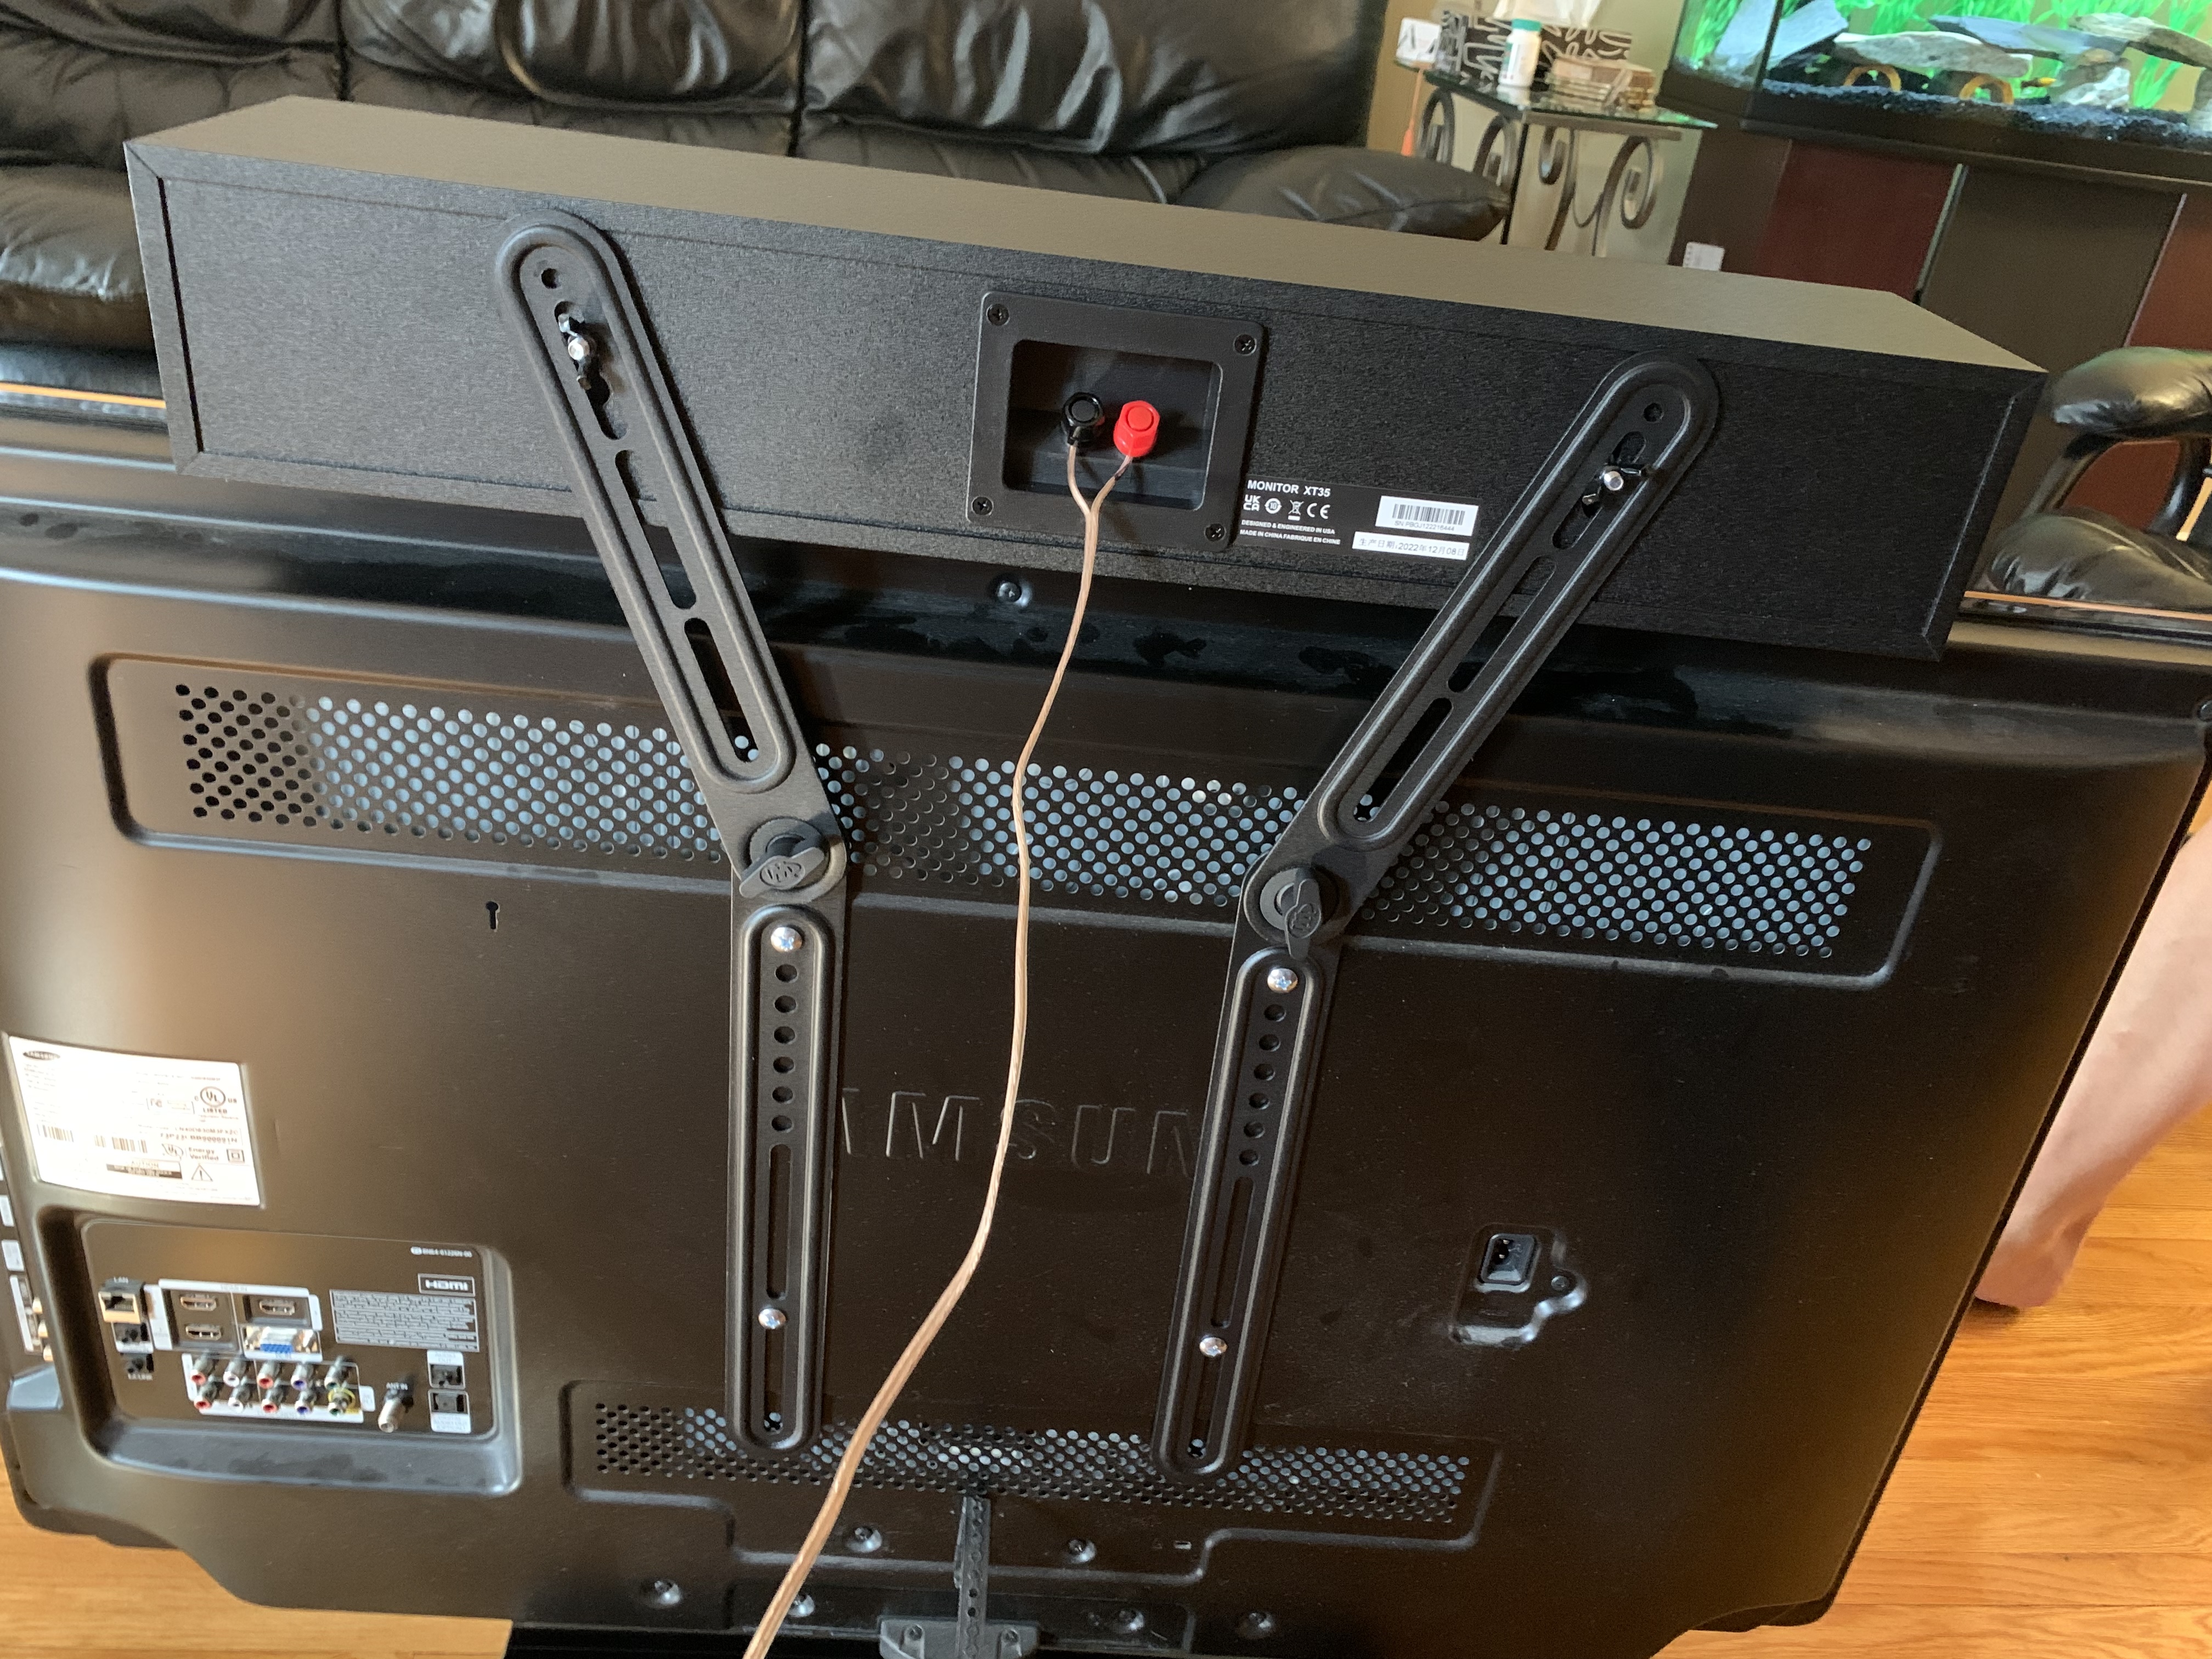
This thing is NOT light weighing in at almost 15 pounds, and cost me $289, again on Amazon. Placement of the center speaker is important, the closer to the screen the better the “feel” of the sound coming from where your looking at. So I decided I would mount it right above the TV, below wasn’t going to work. I briefly considered putting the TV on top of the speaker but the speaker itself that wide and I was concerned it wouldn’t support the weight of the TV. I found a great mount on Amazon (duh where else) that uses the VESA mounts on the back of the TV. The mount is really well made with lots of flexibility, lots of bolts and bolt holes … With a bit of a experimenting I rested the speaker on the top of the tv and secured it with the mount to the back of the speaker which has a keyhole mount.

I was a little concerned the weight might be a bit much for my 40″ Samsung but it is just fine. Here’s the TV with the mount from the back of the TV.
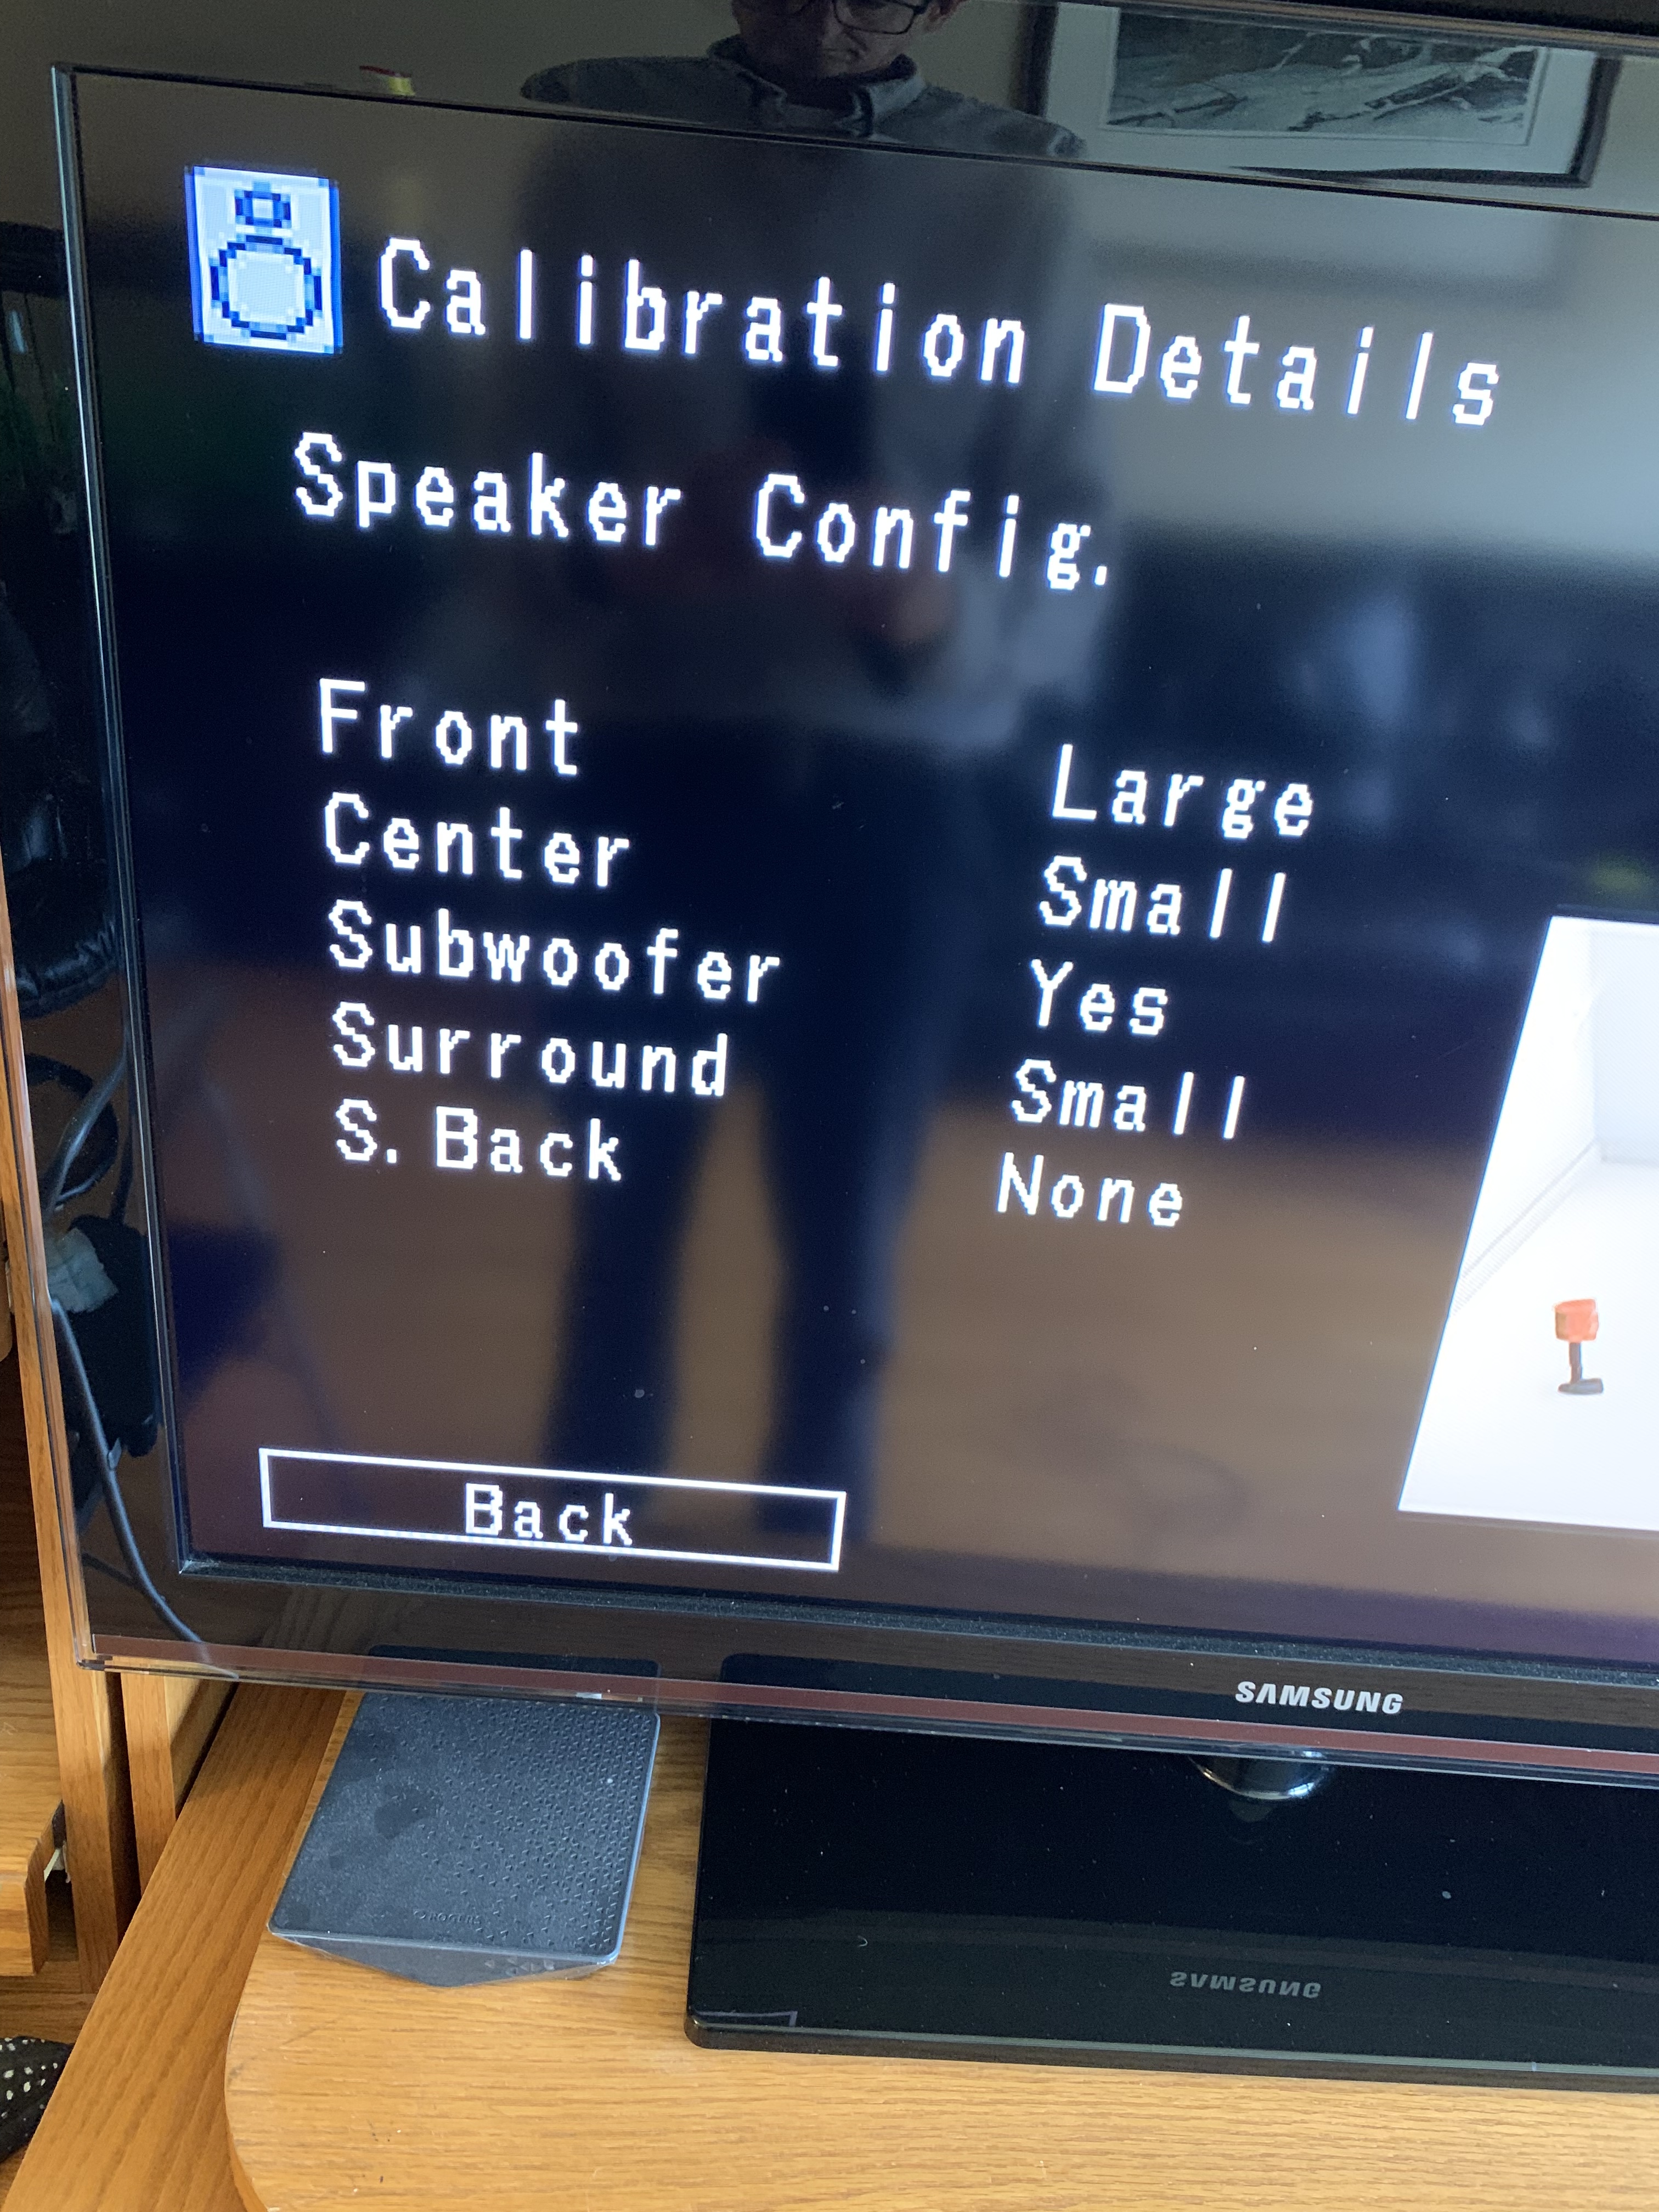
So with these improvements in place it’s now time to calibrate … My very old Denon came with a mic you plug in and then place it 6 places around the room so I dragged out my old trusty tripod and got it done. At the end of the calibration it tells you details about what it heard …


As always you need to be careful with where your content comes from … I download most of my TV/movies and use Kodi to play them back on an Amazon Fire TV stick. The Fire stick is plugged into the Denon receiver over HDMI. Kodi tells you pretty clearly if it’s recorded in 5.1 or not. Most of my TV is not. So I choose wisely when downloading a movie to insure it’s 5.1. Over the Air (OTA) TV seems VERY hit or miss on 5.1, I’d say more miss … I don’t have the room for 7.1 (two more rear speakers) and finding 7.1 content requires even more care … To get the best sound out of OTA TV I have an optical cable that runs from the TV back over to the Denon receiver. So in all the speakers on the TV are doing nothing. Honestly, my speakers are so much better than the TVs, it’s worth the bother …
So now onto Top Gun … that scene where the one MIG goes between the two fighters and whoosh you can hear it go right past you … It’s so much more immersive. The center speaker was expensive, and I’m not sure it’s 100% worth spending that much, but heh, speakers last a LONG time and we watch a fair bit of TV/Movies so why not!
Performance tuning Adobe Lightroom classic
When I was deciding on what to upgrade my main machine to, performance of Lightroom was one of the considerations. But what do you need to consider? Adobe has a page on the subject but it lacks quantitative numbers. Well, with that I decided to run some experiments. I was coming from an older Lenovo T480s Core i5 5300 dual core, hyper threaded, 8G RAM with an SSD. It was clear I needed some more bang for the buck as I became more efficient with Lightroom.
For the purpose of these tests I am going to use a Lenovo L14 Core i7-1165G7 quad core, hyper threaded @2.8GHZ with 16G of RAM and an SSD, running on Win 11, as well as a VMware VM running on Xeon E5-2660 V2 @2.2HGZ with the VM on an SSD running Win 10.
It’s worth noting, I am a basic Lightroom user, and have not as yet delved into some of the more complicated things it can do, so this article and these tests are written from that perspective.
Memory
For starters Adobe recommend a min of 12G, so obviously this was an area to focus on. I ran a few different tests starting at 16G, and 32G and found Adobe happily makes use of the larger amounts of memory but I didn’t see it push a whole beyond 16G. On the laptop it would bump up near the 16G, but in the VM it really never pushed beyond the 16G even when 32G was available. I recently upgraded my laptop from 16G to 32G and I noticed a much smoother experience while editing. I can’t really quantify it, but it was noticeable.
GPU
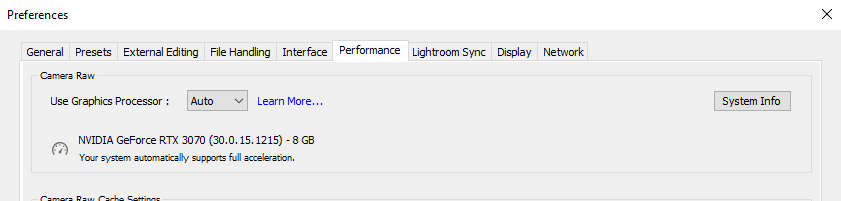
Most video cards have GPUs, a type of processor that’s REALLY good at floating point and the like. This is largely used by games but Adobe has an article on Lightroom’s use of a GPU … They are somewhat vague as to what actually uses it saying “speed up tasks of displaying and adjusting images”. So to put this to the test I borrowed a buddies powerhouse desktop with an NVIDIA GeForce GTX 3070 which clocks in at 11783 on Passmark’s test well exceeding the recommended 2000 limit. I rarely saw the GPU do much of anything throughout my import, edit and export of photos. So little you shouldn’t spend a dime on it IMHO. On my Iris embedded GPU I have seen no more than a little use of the GPU, which BTW scores in at 1424 below the recommended min from Adobe. To be sure I checked the settings for performance, as you can see the NVIDIA supports “Full acceleration” while the IRIS supports only basic.

LAN
I put my working files on a LAN drive so they can be backed up while they are being worked on. This means Lightroom is pulling them from, and saving them on the LAN drive. To be captain obvious, the speed of the LAN will make a HUGE difference. Wireless connections for example will be a HUGE bottleneck but even wired connections are of course going to be slower than a local SSD. How much slower? Well exporting the files to a LAN drive took 186 seconds with a 16 core VM with the processors being slowed by the network connection. Compare that with doing the same export to a local drive it took 157 seconds or 16% faster. As you can see in the performance graph the LAN is getting pushed but not max’d at 500Mb/s. The files were coming off a spinning drive so this too limited the speed to/from the LAN. This is on a wired 1G connection. The export ends up being around 1.48G in size.


Processor
So now onto what I expected to be the more interesting part of this little experiment, playing with processors. By running on a VM I can easily adjust the number of processors, do a repeated task and see what difference it makes. For the purpose of this experiment I am going to use a directory of 109 RAW Canon images (CR2s) as well as 36 Nikon JPGs for a total of 145 images. I will import the images, manipulate them by batch adding lens correction to the CR2s, and then export them full size, as well as with a watermark imposed on them as well as resizing. The images are coming off a LAN drive
The import on the laptop took 56 seconds pretty much pounding all cores, while a 16 Core VM clocked in at 47 seconds with the cores waiting on the network and not maxing out, as discussed above. So the extra cores ended up about 16% faster.
Let’s look at exporting to a LAN drive from the laptop which clocked in at 295 seconds Vs a 16 core VM at 186 or 37% faster.
So the results of both of these tests tell me that cores help, to a point, especially when saving to a lan. The Quad core laptop processor max’d out. And what I can also say is that the laptop processor bumped into thermal limiting, a topic of another post I recently did. Basically the CPU slows down under heavy load when it is over heating. It’s a lot harder to cool a CPU in a space constrained laptop than a desktop. On the other extreme, at 16 cores on the VM (it’s running on a 10 core hyper threaded so some of those are not physical cores) the CPU did not max out and exceeded requirements. Again, saving to the local local SSD and pulling from the SSD would likely increase the CPU utilization significantly IMHO.
So … if your buying a new machine, cores are king, to a point, don’t spend on a GPU for lightroom, and make sure you have LOTS of memory. If your workflow can tolerate finding a way to have your files on a local SSD this can definitely help.
Update: I was reminded of a synthetic benchmark written for Lightroom, that runs as a plug in called Pugetbench. You can look into benchmarks. There’s an old saying benchmarks don’t lie, but only liars use benchmarks … I digress.
So let’s look at Pugetbench and compare two Core i9 results, one using Intel’s discrete video and one using an NVIDA RTX 4070, a card that’s worth $800 BTW:
As you can see the NVIDIA made NO difference in the benchmark, which agrees with what I had previously seen.
Let’s compare some processor results:
| i7-1165G7 4 core hyper thread 8 threads laptop processor | 634.5 | 67.1 | 59.8 | Results |
| i7-8700 6 core hyper thread 12 thread | 795.2 | 67.3 | 91.2 | Results |
| i7-10700 8 core hyperthread 16 thread | 916.6 | 85.4 | 97.9 | Results |
| i9-12900K 8P 8E 24 threads | 1402.5 | 108.2 | 172.3 | Results |
| i9 13900K 8P 16E 32 threads | 1665 | 98.1 | 235.4 | Results |
What you can see is this benchmark is all about threads. Interestingly enough, the efficiency cores of the new processors hold up ok. I include the first processor, because it’s what’s in my laptop. So let’s do some comparisons:
First and second line in the table … going from 8 threads to 12 is 25% faster
First and third line in the table … going from 8 threads to 16 is 44% faster
Neat stuff … and while it’s obviously not a straight line, 50% more threads only yielded 25% faster, and 100% more threads only yielded 44% faster.
BTW this benchmark does NOT seem to cover off Macs, not even Intel based …
This article is a start, and by no means complete, or thorough, I need to do more digging/testing, but for now I’ll leave it at that.
Laptop and CPU thermal throttling
I’ve been having some instability with my laptop recently and wondered if it might be heat related so I started to look into CPU speeds/throttling, it turned out to be an interesting topic. Almost all modern desktop and laptop CPUs have thermal based throttling, that is to say as the CPU starts to overheat it slows down. Let’s take my CPU as an example, an Intel Core i7 1165G7 in a Lenovo L14 Gen2. The CPU speed is ramped up and down based on needs with a base frequency of 2.8GHZ (to save power) and a turbo speed of 4.7GHZ. Actually seeing this throttling isn’t all that easy, hearing it is pretty easy as the fan starts to make more and more noise. Desktops are a lot better at heat management, they aren’t as compact and can move a LOT more air quietly.
To see throttling I tried a number of tools but the easiest one to visualize it is Open hardware monitor which is free. To see it you want to look at a graph of core temperature and CPU frequency. If you start to see a ledge where the CPUs are being capped, that’s what your looking for as an example of CPU throttling. The tool allows you to see a graph of them both.

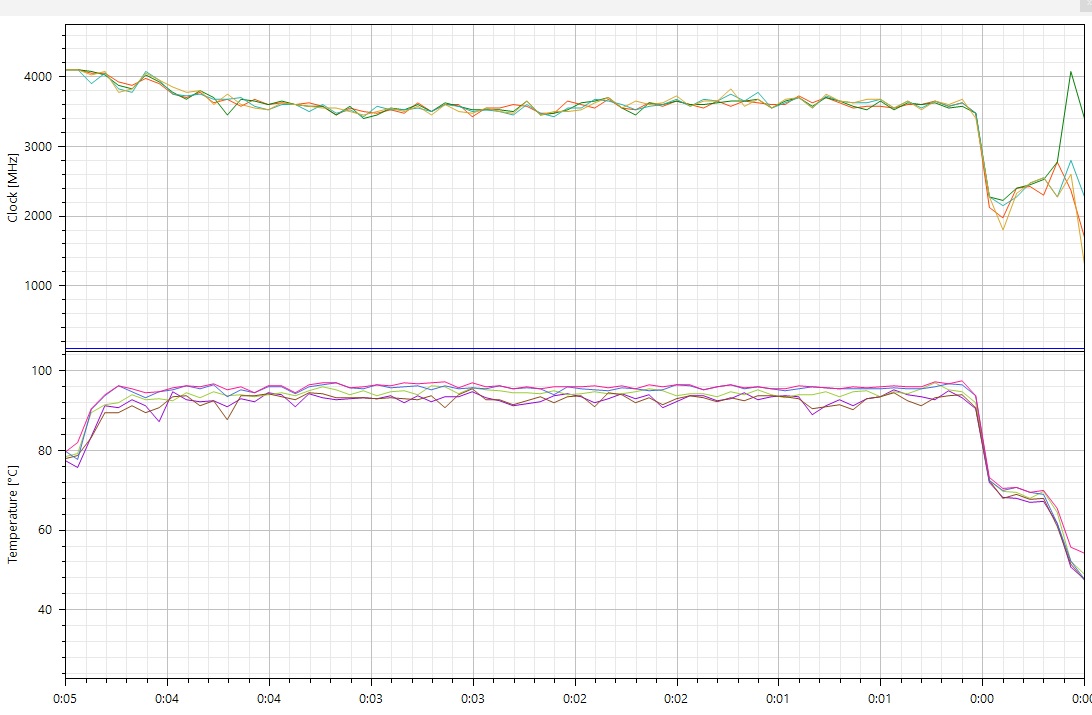
Throttling starts as the CPU approaches it’s max temp of 100C. In this graph you can see two levels of throttling. First on the left you see it bringing the speed down from 4+GHZ down to around 3.8GHZ, and then a second throttling kicks in because the temperature did not come down enough and it slows the CPU down to the base 2.8GHZ which as you can see has an immediate and profound affect on the temperature.
In this second example you can see the CPU dropped even below the 2.8GHZ base speed all the way down below 2GHZ. Now while it’s great that the CPU is protected itself from melting down, the performance impact of this dramatic reduction in speed will be obvious. Now if your doing something like video editing this will be VERY important to find a way to limit.
Normally my laptop sits right on top of my desk, it pulls air from the underside of the laptop and blows it straight through the CPU and out. When sitting on the desk, or my lap for that matter the airflow is constrained. You can see the affect this has on the CPU temp in that the fan comes on sooner, and stays on longer, like 10 mins vs 3. Now a simple solution is to raise the laptop off the desk and make the airflow easier and this did absolutely help.
There is another way to see your CPU is being throttled. In task manager you will see that your CPU utilization from an OS point of view but the frequency of the CPU is not at max. In this case my CPU speed at 1.75GHZ Vs the max of 4.7GHZ.

As an interesting side note, while I could definitely see the CPU fan running longer, thus the CPU taking longer to cool, the time it took to export from Lightoom did not change measurably between on the desk and raised, which is curious to me.
VEEAM and immutable backups
As I always say … there are only two kinds of people in the world … those that have had data corruption (or loss) and those that will … Hard drives fail, computers crash and data gets corrupted, and even more commonly, people inadvertently delete stuff … commonly referred to as fat fingers 😉 So … backups … At this point I use Aeomi Backupper to create backups in chunks that are super easy to send offsite to my buddy Lance’s house over our site to site VPN … thanks Lance! I use VEEAM community edition to backup my VMs and to provide a secondary backup to my MOST critical files … I stumbled upon a new to me concept called Immutable Backups. Now what these are, is that the files once written are locked from being changed or deleted. The idea is to keep your backups safe from Viruses, Malware, Ransomware and the like.
I scratched my head and thought … hmmm this in interesting … I wonder if I can find a way to add this into my digital world, simply, and cost effectively? Well … It turns out VEEAM introduced Immutable backups in V11, but only added it for file share or NAS in V12. So first off I had to upgrade to V12. That went shockingly well … And low and behold it is there. So how this works is you create a minimal install of Linux (I went with Ubuntu as they recommended it) with an XFS partition. It took me a couple tries at installs but in the end I did was install Ubtunu to a small 30G ext4 partition and then the rest of the drive was left for XFS, that would be used for VEEAM. This insures that the backups don’t fill up the boot drive. You can add additional drives and they can become also available to VEEAM. This document walks you through the Ubuntu install …
Once done you simply point VEEAM at this as a repository and tell it to do Immutable! On the Linux system you can see that your files are Immutable using the command lsattr which you see a tag on them, once you get down to the actual backup files. Now once you’ve established this, be aware cleaning things up is at best messy. Honestly the easiest way to clean up is to reformat the partition 😉 Even root can’t delete these immutable files without first making them not immutable using the chattr command.

Now you can make this a VM if you want, but that leaves you at risk, albeit a tiny risk that the attack could compromise your ESX host and wipe this out at a VMDK level. I chose to go ahead and dedicate a machine to this purpose. This also lets me relocate this machine somewhere else in the house for some minimal additional piece of mind. Now to make this as low cost as possible, what I chose to do was make these backups happen once a week … So during the other 6 days of the week the machine can be offline, drawing no power, and with no wear on drives fans etc. As it happens the machine I chose has wake on lan! So … Once installed on Ubuntu I created a cron job to power off the machine at a particular time of day … This was pretty easy … using crontab -l and adding:
30 21 * * * poweroff
So at 9:30PM everyday power off. So I run the backups at 10PM so they have from 10PM to 9:30PM to complete. Ok, so onto power up … VEEAM has the ability to run a script before a backup runs … Perfect so I will simply run a command that wakes the machine, waits 5 mins and then backups up! I use the utility wolcmd. In case your unfamiliar this is easiest to be run on the same subnet …
Want to read more about how immutable backups work?
And believe it or not … with that you have set it up!
Update: Ok I now have this running and in place. I chose an older HP Elite 8200 with a Core i5 2600 processor and 16G of RAM running Ubuntu 22.04 based on VEEAMs recommendation, but I suspect I could have used almost any Linux distro. I used an old 8TB archive drive, created a mount point for it, and formatted it with XFS (XFS is needed to implement immutable). For now I am going to just use 1 drive but I may in the future want to mirror it. So I created a mirror’d raid drive in Linux with a single drive, It means I can add a second drive if I want to. I followed this guide to set it up and just added one drive to the mirror. I had some issues with Ubuntu loosing the raid configuration and ending up in Emergency mode. I decided to hard code the raid config by using this command:
sudo mdadm --create --force /dev/md0 --level=mirror --raid-devices=1 /dev/sdb1
Since this is a set it and forget it kind of device I wanted to insure I was checking and testing smart for the drives. After installing smartmonctl I created a script at boot to manage that:
sudo smartctl -t short /dev/sda
sudo smartctl -t short /dev/sdb
if sudo smartctl -H /dev/sda | grep -q 'PASSED'; then
  echo "matched"
  insert your preferred email method in scripts here for passed
else

  insert your preferred email method in scripts for failed smart check
fi
Personally I use mailgun in my scripts for mailing … To monitor the drive temps while the job is running I use the command:
sudo smartctl -a /dev/sda | grep Temperature
I installed lmsensors following this guide to allow me to monitor CPU temperatures.
With these specs running an immutable, backup the Hardened server was almost all IO bound which I could see using atop which I installed, I find it easier to understand than top. I was maxxing out the network from time to time, hitting close to the Gb/s, but by far, according to atop, it was IO bound. 16G was excessive in memory and could have done fine with 8, maybe even 4G. The processors were not busy at all. My backup is BIG, at 2.7TB, 353880. The initial backup took 21 hours and 16 mins with an average underwhelming speed of 38MB/s, with the target being the gate.

On second run, it went really well, VEEAM is VERY good at figuring out what’s changed. Here’s the second run …

The drive, a 8TB archive drive that is well known for slow sustained writes is the issue limiting the speed. So let’s try something a little more interesting … Lets do an immutable backup to a local SSD in the exact same system. And low and behold this is a much more reasonable backup speed.

VEEKTOMX Mini Power Bank 10000mAh review
I last reviewed the Luxtude battery pack for an iPhone and loved it, and it’s still soldiering on. Small, light weight, has a built in cable and a fast efficient quick charger. As our phones are aging the batteries are getting weaker. My iPhone XS for example sits at 85% of it’s original capacity after almost 3.5 years (Nov 2019), come to think of it, this is probably the longest I’ve kept a phone … And this is with all of Apple’s so called battery charging optimizations. And the GF’s iPhone 8, which she inherited from me, is even worse. So battery packs have been the simple solution. You can pay to have battery replaced but is it worth it?
So I thought I would grab another battery pack … I would have just bought another Luxtude, but the seller had jacked the price from $31 which I thought was excellent, to $75, which irked me. Well spoiler alert 4 packs later I actually, finally, have one that REALLY is a quick charger for an iPhone. For reference, and for me what is the benchmark the Luxtude charges the iPhone XS from 9% to 57% in 30 mins for an average of 1.54%/min. Here’s the wonderful design of the Luxtude.

So first up I tried the TNTOR Portable Charger,Ultra Slim Power Bank with Built in Cables,5000mAh which managed a pathetic 14 to 35% in 30 mins or a measly 0.7%/hr … The specs said it could output the full 10W an iPhone can take at low charge … NOT. So back it went. SKIP IT

Next up I tried another product from the same company, which also said it could do 10W TNTOR Portable Charger for iPhone Built in Lightning Cable(MFi Apple Certified), 3500mAh Ultra Slim External Battery Pack, Fast Charging Power Bank. Not surprisingly this one also came in with underwhelming charge numbers as well 14% to 35% in 30 mins or 0.7%/min. So once again, thank goodness for Apples return policy.

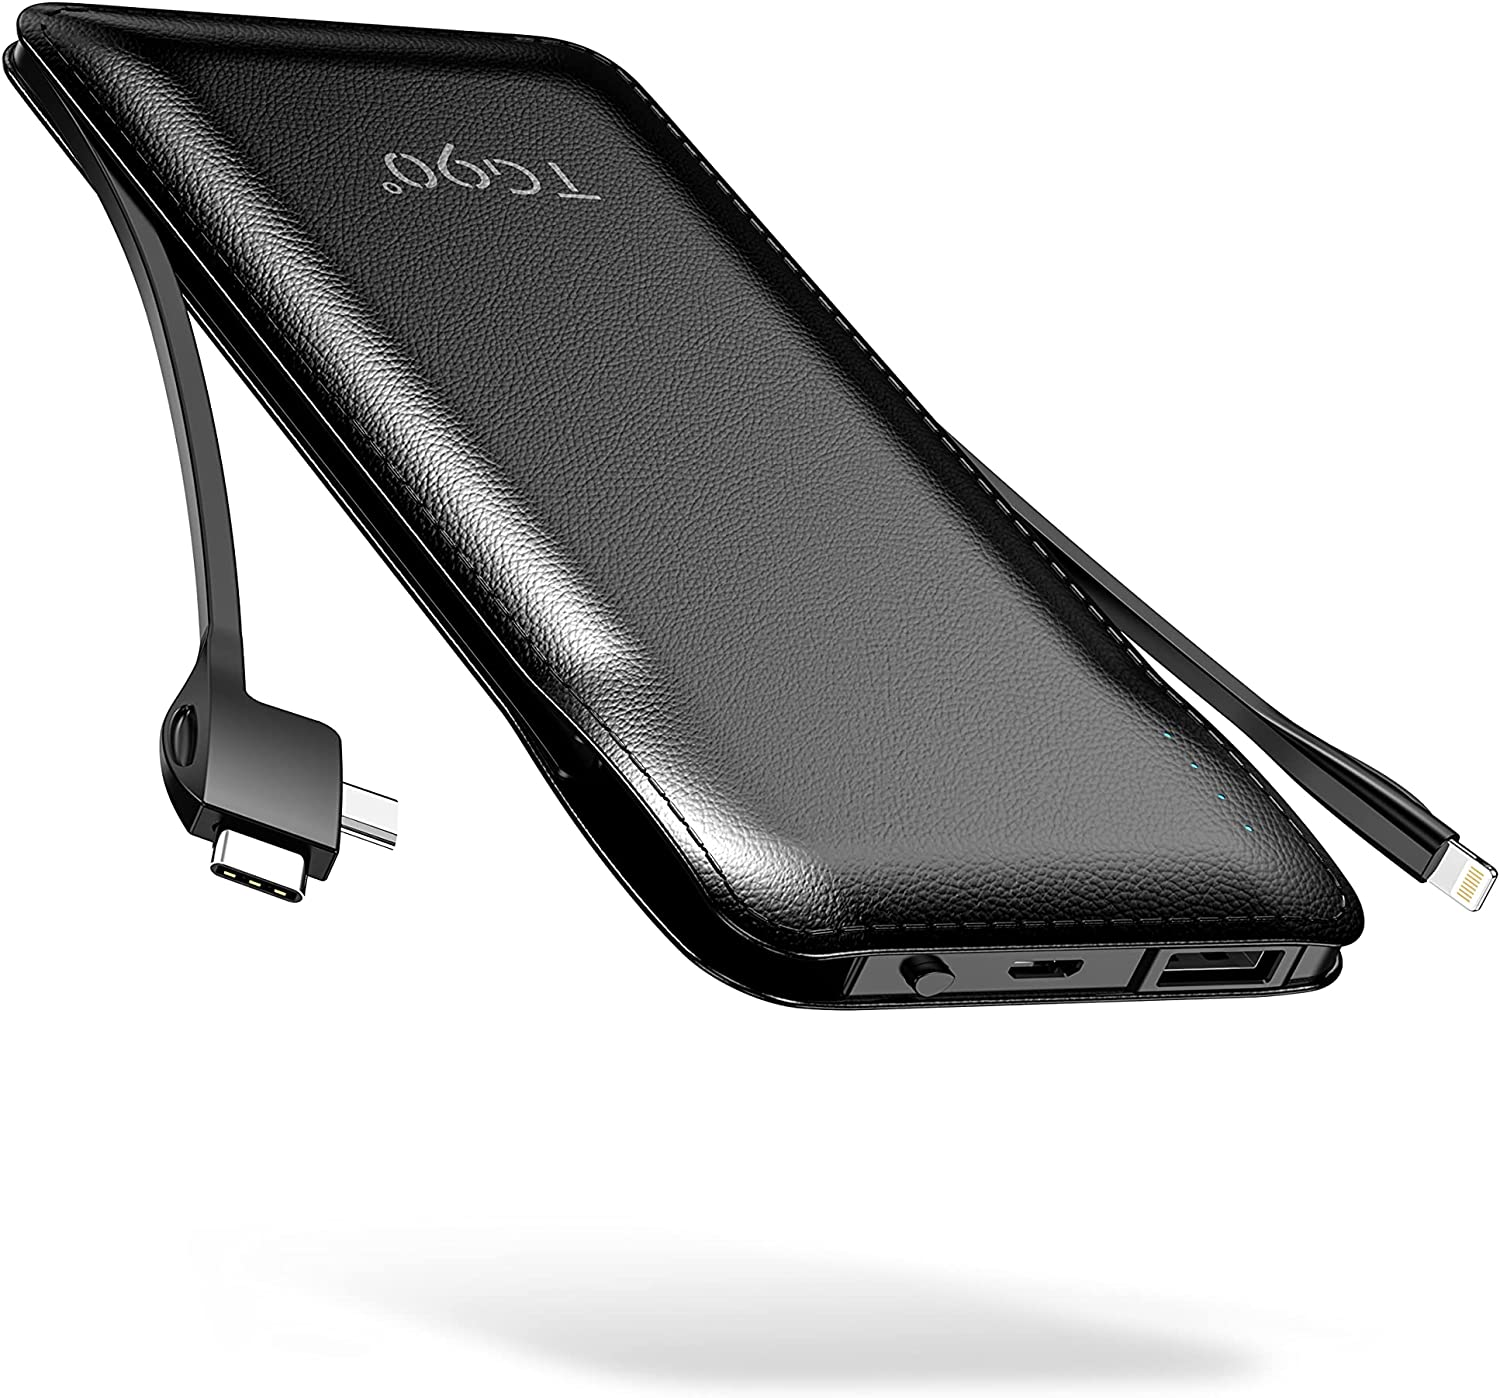
So I thought to myself, let’s get a bigger battery pack with more cells maybe that will be able to dish out the full 10W. Finding one with a lighting cable restricts you in choices, but I like the convenience. So I bought TG90 10000mAh Power Bank with Built in Lightning Cable, but only after I reached out to the seller and confirmed the pack supports quick charging of my iPhone XS. And indeed the specs once again say it can supply the full 10W. And yet again, the results were abysmal clocking in 12 to 34% in 30 mins or a turtle speed of .7%/hr … And again, another return. I don’t understand these companies, why embellish? Of course there’s an old joke, what’s the difference between a computer salesman and a car salesman? The car salesman knows he’s lieing … I digress as so often happens 😉
Ok with all that fan fair, we finally come to the topic of this post, a VEEKTOMX Mini Power Bank 10000mAh, Ultra Compact Small Portable Charger, PD 22.5W Fast Charge Battery Pack.

This is QUITE small a little larger than a credit card, but reasonably thick and it weighs in at 168g (the Luxtude was 135g for reference). It comes with a unique display that shows the exact percentage of the battery pack as well as a charge indicator, I really like this display. It can be charged by a USB-C or a Micro-USB, which, spec wise shows either Type-C Input 5V/3.0A 9V/2.0A or Micro USB Input 5V/2.0A 9V/2.0A, so it just depends on which charger you have as to how long recharging is gonna take. Output wise this can drive a USB-C, or a USB-A, again spec wise this means USBA Output 4.5V/5.0A 5V/4.5A 9V/2.0A 12V/1.5A or Type-C Output 5V/3.0A 9V/2.2A 12V/1.5A. This should EASILY be able to have an iPhone, my iPad and in an emergency, power but not charge my laptop, MAYBE. So first up I used the Apple supplied lightning cable plugged into USB-A and charging went from 8 to 52% in 30 mins or a rate of 1.47%/min which is pretty close to the Luxtude’s 1.54%/min meaning in 30 mins the difference is ONLY 4%. I bought a USB-C, MFI (made for iPhone/iPad) certified 6″ cable which will be more convenient for the pocket. It was not cheap at $16. Oh well … with that cable the iPhone went from 10% to 59% in 30mins or 1.63%/min, which is actually above the Luxtude ever so slightly. From an efficiency point of view I measure the battery pack is about 73% efficient which is below the Luxtude’s 83%, but honestly the number for Luxtude is not quite as accurate. The percent indicator on this pack makes this a LOT easier. Recharge from a USB-C adapter pulled 20W and charged from dead in 3 hr 22 mins.
So overall this is a good, well made, flexible battery pack that delivers what it says!
About
I do these reviews for personal interest and amusement. I buy the devices out of my own pocket. If you would like to send along a donation it would be much appreciated.
![]()
-
Recent
- Amazon air quality monitor mini review
- iPhone 15 Pro review
- CodeProject AI with iSpy mini review
- Reolink 510A and 811A security cameras and all things related
- Reolink 1212A mini review
- Reolink Argus 3 Pro solar security camera
- Dekco DC4L (super mini) review
- iSpy review and camera wrap up
- Mac M1 Pro performance in Lightroom Classic
- Dekco DC8L security camera review
- Windows photos raw support
- Birding in Long Boat Key Florida!
-
Links
-
Archives
- April 2024 (4)
- March 2024 (6)
- February 2024 (2)
- January 2024 (4)
- December 2023 (1)
- November 2023 (6)
- October 2023 (1)
- September 2023 (6)
- July 2023 (1)
- June 2023 (6)
- May 2023 (2)
- April 2023 (6)
-
Categories
-
RSS
Entries RSS
Comments RSS
