iSpy review and camera wrap up
So now that we have some security cameras working time to investigate iSpy. Now I must say, when I first started this venture I didn’t understand how iSpy worked … and trying to get both iSpy and the cameras properly tuned at the same time given my misunderstanding was challenging …
So what is iSpy … it is a free to use for personal use network video recorder to work with security cameras. There is an open industry standard called ONVIF that allows interoperability, well somewhat.
Loading iSpy was easy, I had it up and running as a container pretty quickly under docker, but I quickly realized this was a REALLY bad place for it. iSpy is quite processor intensive and seems (at least on containers to be single threaded. This processor heavy is true even if your not doing detections. Even having someone streaming the cameras uses a good deal of processing power. So I moved the installation to a physical PC to avoid my container host getting bogged down. Again installing was easy, and under Windows it does seem to be multi threaded. I didn’t find iSpy under Windows 10 to be rock solid. So I loaded it up on Debian and that resolved all instabilities.
I decided to play a bit with it’s ability to use NVIDIA GPUs … I have a 1050TI, so I loaded up Debian but had issues with getting the NVIDIA drivers loaded. So I backed off to Ubuntu to give that a try. Getting that going was no small feat … I’ll bore you you the details to get that going … So the first step is to see if once Ubuntu is loaded the NVIDA card is seen, which it is, but no drivers are loaded:
lspci|grep NVIDIA
01:00.0 VGA compatible controller: NVIDIA Corporation GP107 [GeForce GTX 1050 Ti] (rev a1)
01:00.1 Audio device: NVIDIA Corporation GP107GL High Definition Audio Controller (rev a1)
- hardware is seen

cat /proc/driver/nvidia/version
- no drivers installed
So off to the NVIDIA web site to download the Linux drivers … The install is long, gives a lot of warnings but in the end it get’s the drivers recognized under Ubuntu:
jgalea@ubuntu-ispy:~$ nvidia-smi
Thu Apr  4 10:51:41 2024
+-----------------------------------------------------------------------------------------+
| NVIDIA-SMI 550.67                 Driver Version: 550.67         CUDA Version: 12.4     |
|-----------------------------------------+------------------------+----------------------+
| GPU  Name                 Persistence-M | Bus-Id          Disp.A | Volatile Uncorr. ECC |
| Fan  Temp   Perf          Pwr:Usage/Cap |           Memory-Usage | GPU-Util  Compute M. |
|                                         |                        |               MIG M. |
|=========================================+========================+======================|
|   0  NVIDIA GeForce GTX 1050 Ti     Off |   00000000:01:00.0 Off |                  N/A |
| 30%   26C    P0             N/A /   75W |       0MiB /   4096MiB |      0%      Default |
|                                         |                        |                  N/A |
+-----------------------------------------+------------------------+----------------------+

+-----------------------------------------------------------------------------------------+
| Processes:                                                                              |
|  GPU   GI   CI        PID   Type   Process name                              GPU Memory |
|        ID   ID                                                               Usage      |
|=========================================================================================|
|  No running processes found                                                             |
+-----------------------------------------------------------------------------------------+
Now with this loaded and supported your ready to head over to your iSpy server configuration for playback where you can turn on the GPU. And immediately you can see the GPU doing STUFF using the nvidia-smi command from above.

On my NVIDIA 1050Ti with one camera on max res and max FPS it used about 30% of the GPU. You could immediately see a decrease in CPU use. 2 cameras bumped that up to 60% … I did play a bit with GPU use under Windows but ran into issues with the hardware I had, nothing to do with iSpy, but did see about the same GPU use as in Debian. Of course, getting it going under Windows was a LOT easier.
The most confusing part about iSpy for me, was to realize that iSpy has it’s own detection of motion. I assumed it was triggering off the cameras detection, which it does not (by default). Simple detection within iSpy catches so much it’s useless for notifications. It’s less of an issue to have iSpy doing excessive recordings, would always rather have more than less. So this, for me becomes problematic for iSpy notifications. You can however configure iSpy to detect and notify if a camera goes offline (or stolen ;). I found one way to mitigate this is to use a schedule and change the sensitivity to higher are night.
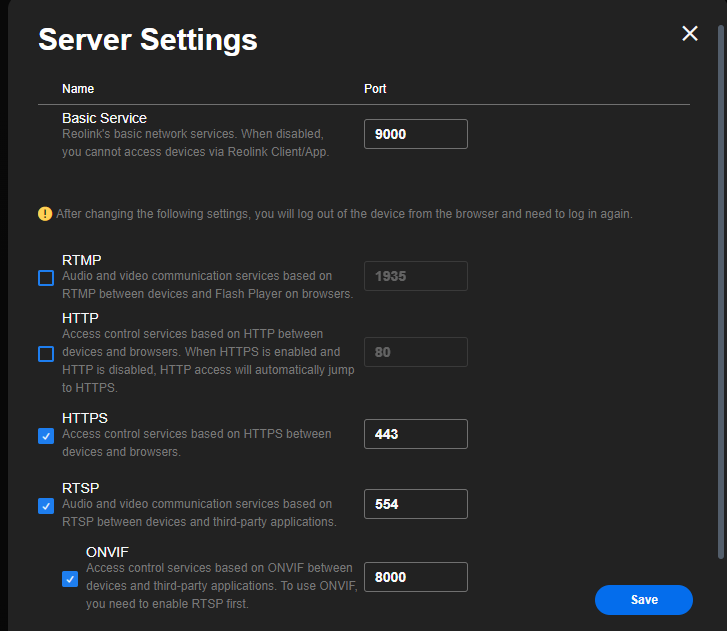
So there are a list of cameras iSpy support, and instructions on how to setup Reolink cameras from iSpy. There was also instructions from Reolink on how to setup their cameras in iSpy. Sadly, both documents, IMHO are WRONG. So I’ll give you my take. I’m going to use my Reolink 510A and 1212A for the purpose of this post … So by default Reolink do not enable ONVIF or RTSP. So install your cameras, get them on the network and either load the Reolink for Windows app or logon to the web interface for each camera. The Reolink Windows app, or the iPhone/Android app can tell you the IP of the camera. Click on the network tab and then click advanced and slide down until you see server settings. Here you will see how to setup ONVIF.

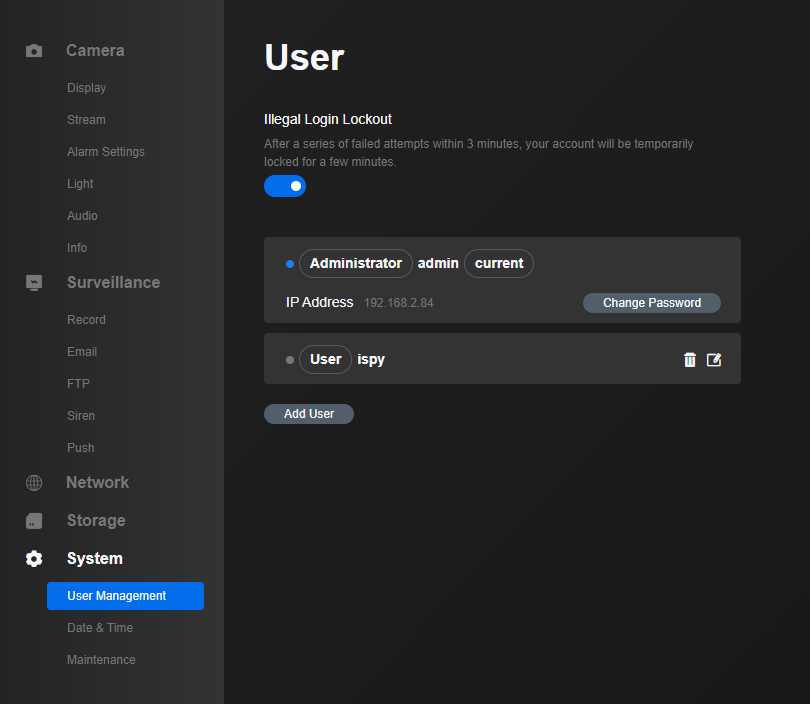
Now if you wanna get paranoid you can setup a read only used for the cameras to insure nothing on the camera gets changed by iSpy.
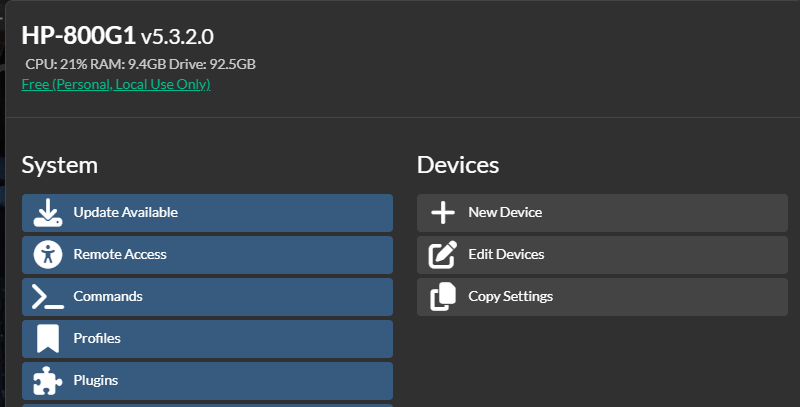
Ok the cameras are now setup, iSpy is loaded and your ready to go … So now logon to your iSpy interface and click the button next to the lock icon in the top left corner, then click new device.

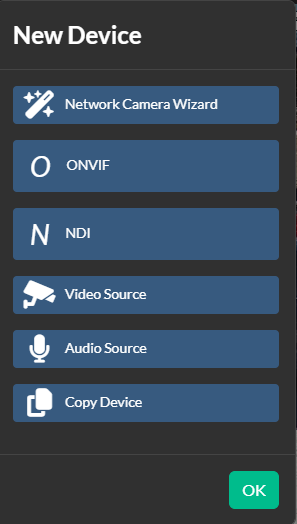
Now click the plus sign

Select an ONVIF decide and then click the three dots to configure the camera
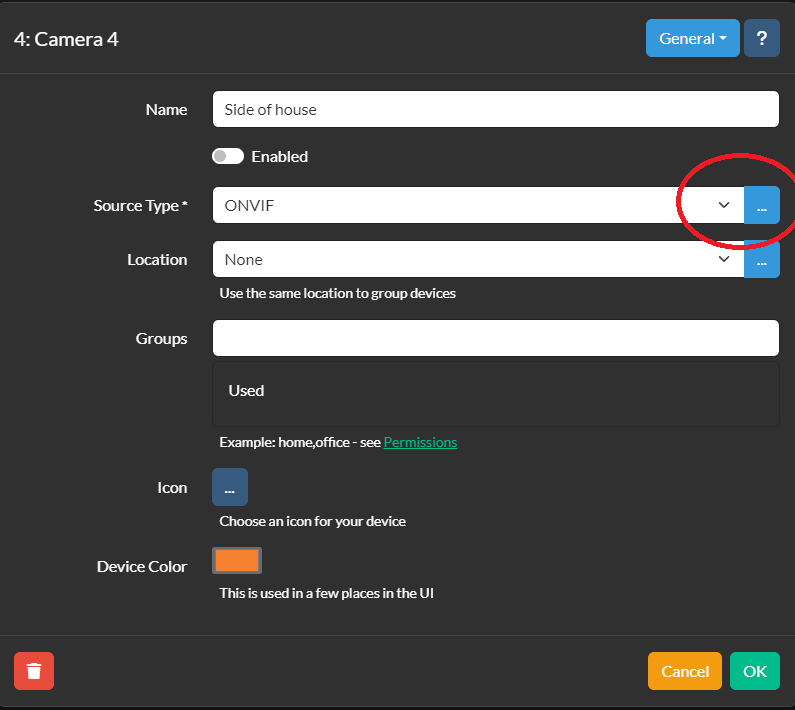
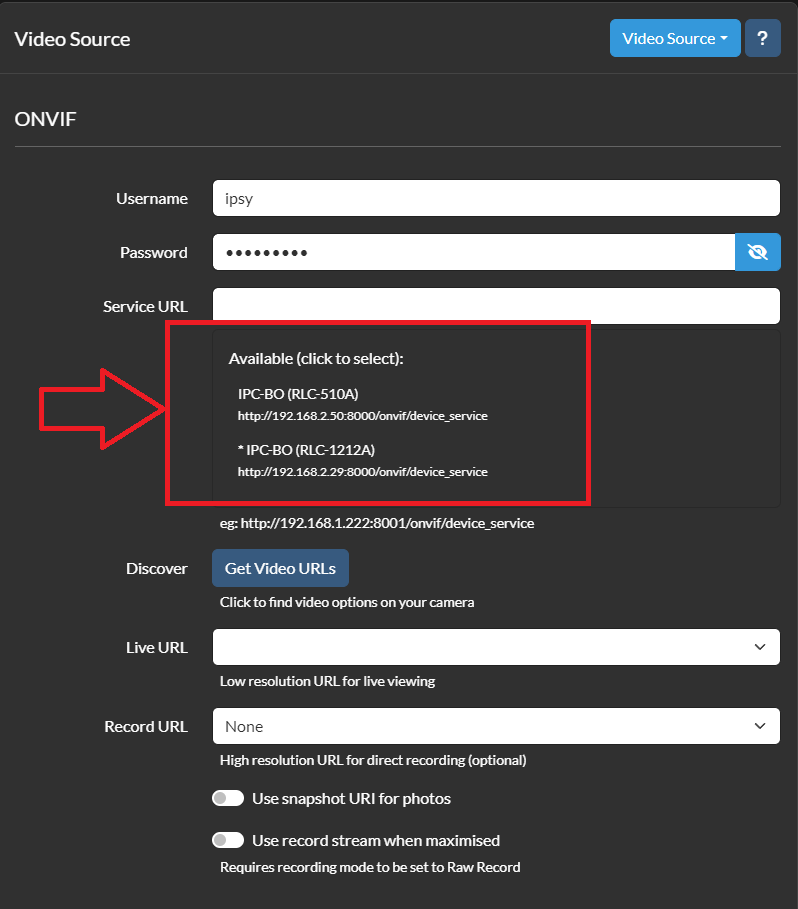
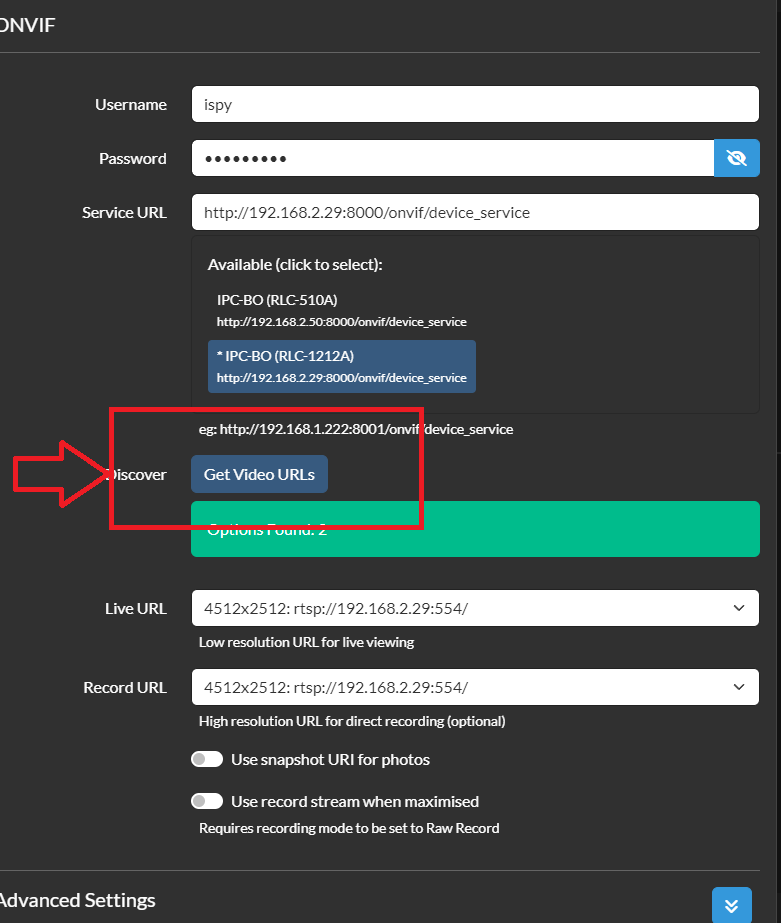
Enter your camera’s userid and password. By default the Reolink is admin for the userid but I create an account just for iSpy. If your lucky your camera will be found automatically by iSpy scanning your network. If not, it gives you hint and you can manually enter the service URL for the camera. If it does detect you camera, as mine did (after a little while) you can then click the camera you wanna setup and your on your way to clicking the get video URLs. Which allows you to choose your resolution.
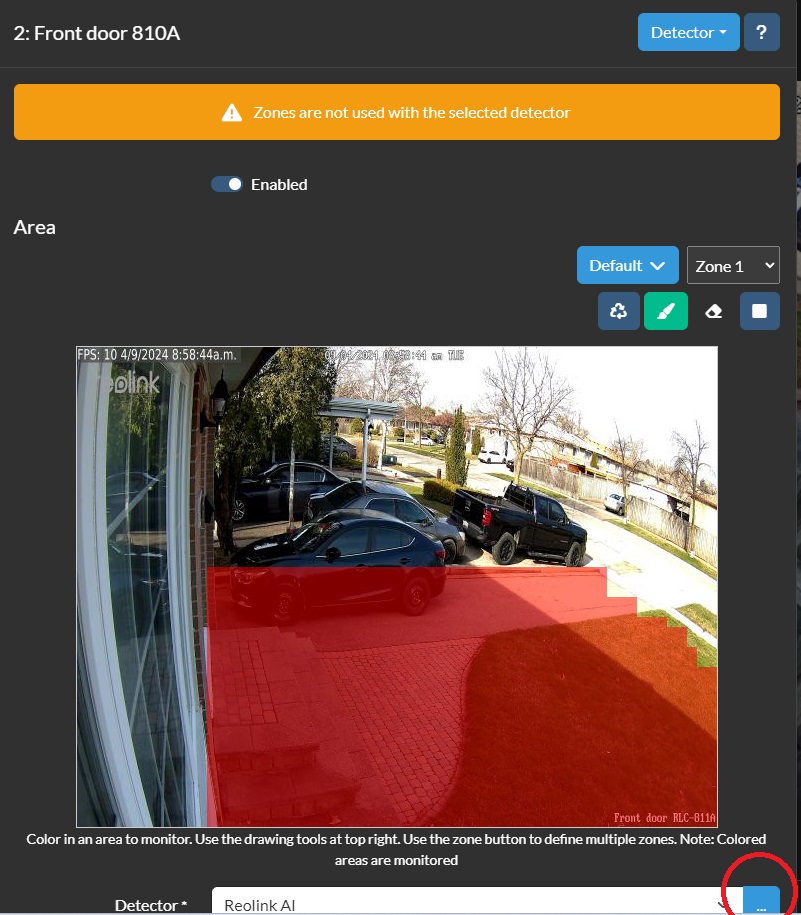
And with that your camera is in ISpy … But at this point it won’t do anything other than display the camera. And maybe that’s all you want. But next up would be to edit the device(s) and for each device setup your detector, any detection zones, and sensitivity for the detector.
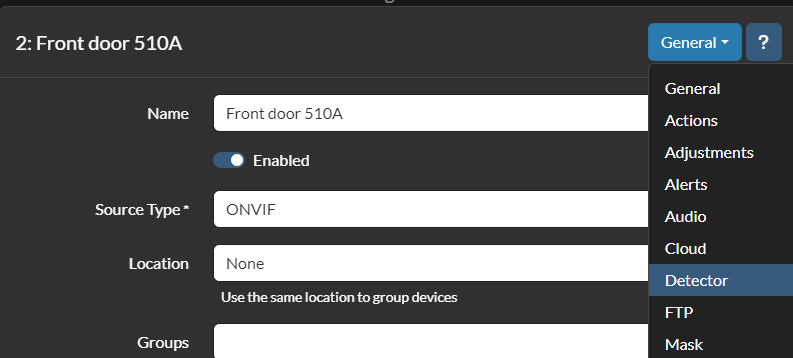
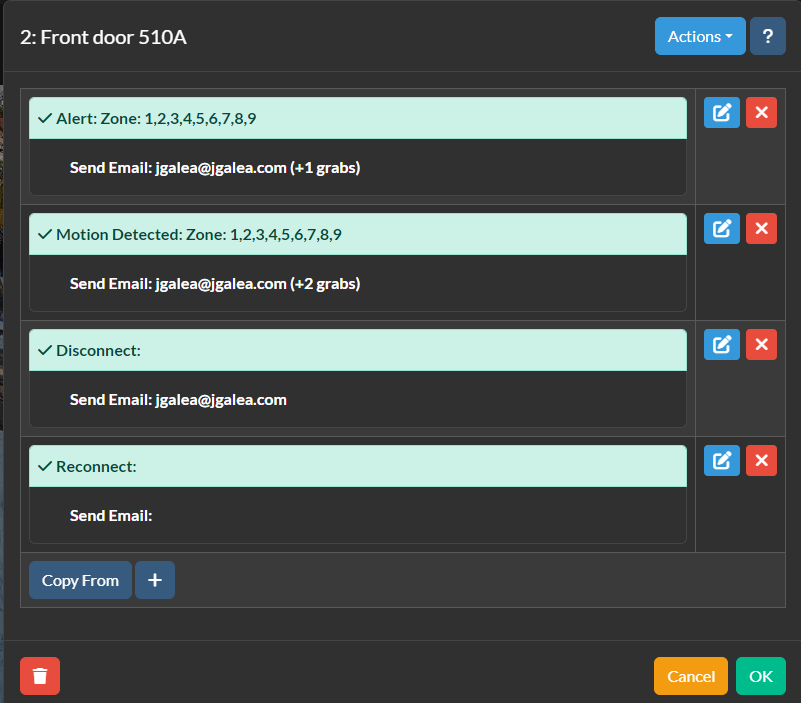
Once a detector is setup your now ready to define any actions you want to take, like notifications.
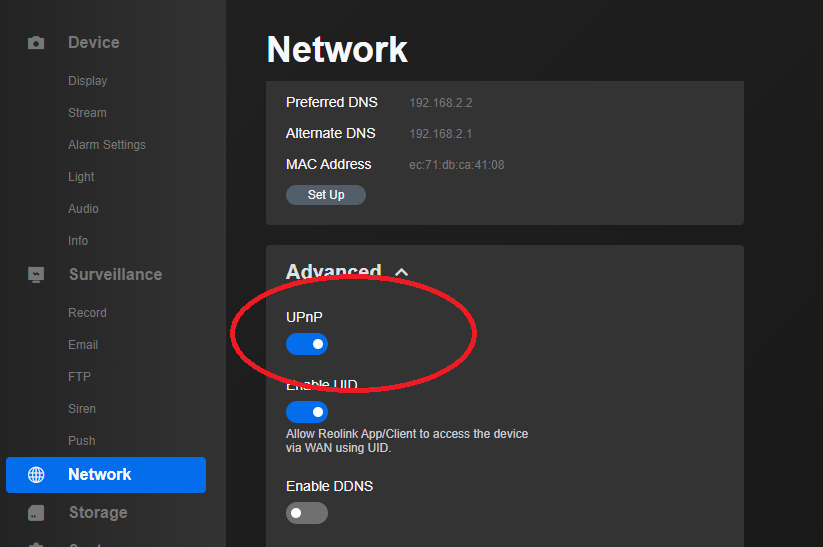
This is actually an updated article now, I did manage to get ONVIF detector working which works ok, I didn’t spent a lot of time on it, it worked sometimes and not others. I had issues getting Reolink AI detection going so I posted on the forums, and pretty quickly got back an answer. The solution to getting this working is to enable UPNP on the camera through the web (or PC app). From the web interface of the camera click, network, advanced where you will see the setting.
Once this is enabled go back to the camera setup in iSpy and select the Reolink AI detector, change it to SSL and change it to AI.

With this setup, you can now setup ONLY the camera with what you need for areas, sensitivity etc and it will in turn kick off iSpy. I was surprised to see, that while it decreased the processor use of iSpy, not as dramatically as I expected.
So next up I decided to try out constant recording. For this I am going to use default settings for encode to minimize CPU, and the 811A 8Mp Reolink camera (just one camera). I’ll divide the recordings into 15min chunks. It took 675M to record 15mins (and the file is an mkv), or 2.7G/hr, so it would take 65G to have 24 hours of on loop recording. iSpy can manage the space in the recordings settings, you can adjust how much space to limit iSpy to so it doesn’t just fill up and die. You can also schedule your recordings as well. I did not see much change to the CPU use with recording on/off. Speed wise it’s going to consume ~ .75MB/s so not a lot at all, and very manageable from an IO point of view. Even with constant recording on you still get event driven triggers!
The iPhone the iSpy app was easy to get going and allows you to see your cameras in an array that’s convenient. But push notifications are a paid service, there’s no siri integration and integration with Home Assistant is minimal at best.
Well this post is long enough so I’ll spin off a new post for CodeProject AI with iSpy.
No comments yet.
About
I do these reviews for personal interest and amusement. I buy the devices out of my own pocket. If you would like to send along a donation it would be much appreciated.
![]()
-
Recent
- Amazon air quality monitor mini review
- iPhone 15 Pro review
- CodeProject AI with iSpy mini review
- Reolink 510A and 811A security cameras and all things related
- Reolink 1212A mini review
- Reolink Argus 3 Pro solar security camera
- Dekco DC4L (super mini) review
- iSpy review and camera wrap up
- Mac M1 Pro performance in Lightroom Classic
- Dekco DC8L security camera review
- Windows photos raw support
- Birding in Long Boat Key Florida!
-
Links
-
Archives
- April 2024 (4)
- March 2024 (6)
- February 2024 (2)
- January 2024 (4)
- December 2023 (1)
- November 2023 (6)
- October 2023 (1)
- September 2023 (6)
- July 2023 (1)
- June 2023 (6)
- May 2023 (2)
- April 2023 (6)
-
Categories
-
RSS
Entries RSS
Comments RSS

Leave a comment