Mac M1 Pro performance in Lightroom Classic
I’ve seen a number of non specific quotes about how efficient and fast Lightroom is on a Mac, but I’ve had difficulty finding real numbers. So I decided to run a test, my PC against my boss’s M1 based Macbook. Special thanks for Frank for taking the time … Here are the belligerents in the battle:
In the first corner:
Dell Precision 3640
64G memory
kxg60znv512g kioxia NVME M2
Core i7 10700@ 3.8GHZ 8core hyperthreaded Circa Q22020
NVIDIA 1070Ti 551.61 drivers
Adobe Lightroom Classic 13.2 RAW 16.2 with the GPU acceleration fully enabled
Windows 11 22H2

In the second corner is:
14-inch MacBook Pro Circa October 2021
Apple M1 Pro with 8-core CPU, 14-core GPU, 16-core Neural Engine
16GB unified memory
1TB SSD storage
MacOS: Sonoma Version 14.2.1
Lightroom:  13.2 Build[202402141005-bf1aeb84]
Camera Raw 16.2
For the test I decided to do three experiments, the same images were used on both machines and are Canon RAW files.
First a simple denoise using Adobe’s built in function. On the PC this took 71 seconds, on the Mac 36 seconds, 51% of the time of the PC …
Test two took two images, applied a subject mask inverted, adjusted the background, applied a subject mask and adjusted the subject. Then copied this and applied it to a second image. On the PC this took 6 seconds, on the Mac 3, pretty much, again ~50% of the PC …
Lastly we are simply going to export the images to local … I chose this because I had seen a number of early results saying Macs sucked here … On the PC this took 16 seconds, on the Mac 8 seconds.
Now I have to say, I am positively shocked. Now neither machines are brand new, but are roughly equally old. I have no idea if the M3 based system might be even faster, but I have little expectation that a faster PC would be anything more than marginally faster. Watching perfmon on the PC says these operations are heavily using the NVIDA GPU. The 1070Ti is by no means high end, there are a LOT faster cards.
Masking in Lightroom Classic
Every now and then you run into a photo that presents some editing challenges. For example, let’s say you have a picture of a bird that’s in a shadow but the background is bright, maybe snow, or a bright sky … In this case if you equally apply exposure and shadowing enhancements to the entire photo, the bird is going to become washed out as you unnecessarily brighten the already bright background. Here’s an example. I’ve also made a Youtube video to demonstrate if you prefer.

So what’s one to do? Well … there’s actually a simple concept called masking and what it does is select a part of the image and apply the exposure, and shadows (or whatever edits you want) only to a portion of the image, in this case the bird in shadows … You can manually select the mask or you can tell Lightroom to mask a “Subject”. It’s in the develop part of Lightroom Classic, on the top right of the screen:

And then you get the choice of how to do the masking. I often find subject masking which is pretty quick, is good enough, but it is not the only way. The part of the subject is highlighted in red and then the edits are ONLY applied to this area of the photo. You can also select a brush and manually select the area of the photo you want edit.

Here’s an example where I selected background, so in this case, you could, for example dial down the exposure on the background if it was snow or a bright sky. Again the section of the image being edited becomes red.

In this example, it becomes literally the opposite of the subject mask. And, you can easily select the invert of the mask with one button. So as an example, here is the before and after of the first image. I didn’t want to brighten the already bright background, but DID want to bring the bird out of the shadows. Not necessarily the best example, but it does illustrate the concept …


Update 2029/2024 – I’ve really been finding masking so powerful … I found another trick that makes it even more efficient … Often you can have several shots in a sequence that are very similar. So you can copy the mask and adjustments you’ve made on one photo right into another. By default, the mask is not copied, but you can manually select it when you copy … and then when pasted it will apply it. It may take a little bit for this to process, but none of your time!

Masking makes use of the GPU, so your performance will be greatly effected by a slow GPU. From what I saw, even with GPU turned off in the performance settings, it still used it for masking, so even if you have a fast processor, and a slow GPU, your still limited by the GPU. This is particularly notable for embedded video controllers as are common on Intel laptops. I ran a test and did a copy of a double mask and found runtime went from 4 seconds to over 8. Now while this isn’t unusable, if your doing a LOT it may get that way …
Performance tuning Adobe Lightroom classic
When I was deciding on what to upgrade my main machine to, performance of Lightroom was one of the considerations. But what do you need to consider? Adobe has a page on the subject but it lacks quantitative numbers. Well, with that I decided to run some experiments. I was coming from an older Lenovo T480s Core i5 5300 dual core, hyper threaded, 8G RAM with an SSD. It was clear I needed some more bang for the buck as I became more efficient with Lightroom.
For the purpose of these tests I am going to use a Lenovo L14 Core i7-1165G7 quad core, hyper threaded @2.8GHZ with 16G of RAM and an SSD, running on Win 11, as well as a VMware VM running on Xeon E5-2660 V2 @2.2HGZ with the VM on an SSD running Win 10.
It’s worth noting, I am a basic Lightroom user, and have not as yet delved into some of the more complicated things it can do, so this article and these tests are written from that perspective.
Memory
For starters Adobe recommend a min of 12G, so obviously this was an area to focus on. I ran a few different tests starting at 16G, and 32G and found Adobe happily makes use of the larger amounts of memory but I didn’t see it push a whole beyond 16G. On the laptop it would bump up near the 16G, but in the VM it really never pushed beyond the 16G even when 32G was available. I recently upgraded my laptop from 16G to 32G and I noticed a much smoother experience while editing. I can’t really quantify it, but it was noticeable.
GPU
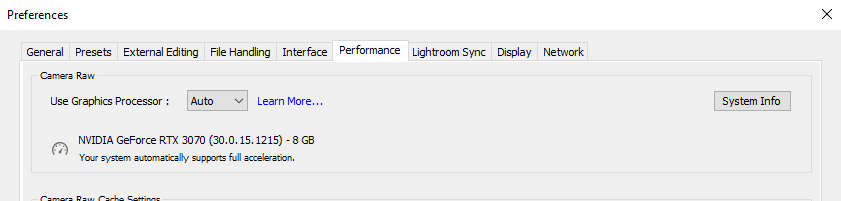
Most video cards have GPUs, a type of processor that’s REALLY good at floating point and the like. This is largely used by games but Adobe has an article on Lightroom’s use of a GPU … They are somewhat vague as to what actually uses it saying “speed up tasks of displaying and adjusting images”. So to put this to the test I borrowed a buddies powerhouse desktop with an NVIDIA GeForce GTX 3070 which clocks in at 11783 on Passmark’s test well exceeding the recommended 2000 limit. I rarely saw the GPU do much of anything throughout my import, edit and export of photos. So little you shouldn’t spend a dime on it IMHO. On my Iris embedded GPU I have seen no more than a little use of the GPU, which BTW scores in at 1424 below the recommended min from Adobe. To be sure I checked the settings for performance, as you can see the NVIDIA supports “Full acceleration” while the IRIS supports only basic.

LAN
I put my working files on a LAN drive so they can be backed up while they are being worked on. This means Lightroom is pulling them from, and saving them on the LAN drive. To be captain obvious, the speed of the LAN will make a HUGE difference. Wireless connections for example will be a HUGE bottleneck but even wired connections are of course going to be slower than a local SSD. How much slower? Well exporting the files to a LAN drive took 186 seconds with a 16 core VM with the processors being slowed by the network connection. Compare that with doing the same export to a local drive it took 157 seconds or 16% faster. As you can see in the performance graph the LAN is getting pushed but not max’d at 500Mb/s. The files were coming off a spinning drive so this too limited the speed to/from the LAN. This is on a wired 1G connection. The export ends up being around 1.48G in size.


Processor
So now onto what I expected to be the more interesting part of this little experiment, playing with processors. By running on a VM I can easily adjust the number of processors, do a repeated task and see what difference it makes. For the purpose of this experiment I am going to use a directory of 109 RAW Canon images (CR2s) as well as 36 Nikon JPGs for a total of 145 images. I will import the images, manipulate them by batch adding lens correction to the CR2s, and then export them full size, as well as with a watermark imposed on them as well as resizing. The images are coming off a LAN drive
The import on the laptop took 56 seconds pretty much pounding all cores, while a 16 Core VM clocked in at 47 seconds with the cores waiting on the network and not maxing out, as discussed above. So the extra cores ended up about 16% faster.
Let’s look at exporting to a LAN drive from the laptop which clocked in at 295 seconds Vs a 16 core VM at 186 or 37% faster.
So the results of both of these tests tell me that cores help, to a point, especially when saving to a lan. The Quad core laptop processor max’d out. And what I can also say is that the laptop processor bumped into thermal limiting, a topic of another post I recently did. Basically the CPU slows down under heavy load when it is over heating. It’s a lot harder to cool a CPU in a space constrained laptop than a desktop. On the other extreme, at 16 cores on the VM (it’s running on a 10 core hyper threaded so some of those are not physical cores) the CPU did not max out and exceeded requirements. Again, saving to the local local SSD and pulling from the SSD would likely increase the CPU utilization significantly IMHO.
So … if your buying a new machine, cores are king, to a point, don’t spend on a GPU for lightroom, and make sure you have LOTS of memory. If your workflow can tolerate finding a way to have your files on a local SSD this can definitely help.
Update: I was reminded of a synthetic benchmark written for Lightroom, that runs as a plug in called Pugetbench. You can look into benchmarks. There’s an old saying benchmarks don’t lie, but only liars use benchmarks … I digress.
So let’s look at Pugetbench and compare two Core i9 results, one using Intel’s discrete video and one using an NVIDA RTX 4070, a card that’s worth $800 BTW:
As you can see the NVIDIA made NO difference in the benchmark, which agrees with what I had previously seen.
Let’s compare some processor results:
| i7-1165G7 4 core hyper thread 8 threads laptop processor | 634.5 | 67.1 | 59.8 | Results |
| i7-8700 6 core hyper thread 12 thread | 795.2 | 67.3 | 91.2 | Results |
| i7-10700 8 core hyperthread 16 thread | 916.6 | 85.4 | 97.9 | Results |
| i9-12900K 8P 8E 24 threads | 1402.5 | 108.2 | 172.3 | Results |
| i9 13900K 8P 16E 32 threads | 1665 | 98.1 | 235.4 | Results |
What you can see is this benchmark is all about threads. Interestingly enough, the efficiency cores of the new processors hold up ok. I include the first processor, because it’s what’s in my laptop. So let’s do some comparisons:
First and second line in the table … going from 8 threads to 12 is 25% faster
First and third line in the table … going from 8 threads to 16 is 44% faster
Neat stuff … and while it’s obviously not a straight line, 50% more threads only yielded 25% faster, and 100% more threads only yielded 44% faster.
BTW this benchmark does NOT seem to cover off Macs, not even Intel based …
This article is a start, and by no means complete, or thorough, I need to do more digging/testing, but for now I’ll leave it at that.
About
I do these reviews for personal interest and amusement. I buy the devices out of my own pocket. If you would like to send along a donation it would be much appreciated.
![]()
-
Recent
- Lenovo Tab M9 Android tablet review for Home Assistant
- Creative Stage SE Under-Monitor Soundbar with USB Digital Audio and Bluetooth 5.3 mini review
- Lenovo K14 Gen 2 mini review
- Network isolation for your IOT and cameras
- Amazon air quality monitor mini review
- iPhone 15 Pro review
- CodeProject AI with iSpy mini review
- Reolink 510A and 811A security cameras and all things related
- Reolink 1212A mini review
- Reolink Argus 3 Pro solar security camera
- Dekco DC4L (super mini) review
- iSpy review and camera wrap up
-
Links
-
Archives
- May 2024 (4)
- April 2024 (4)
- March 2024 (6)
- February 2024 (2)
- January 2024 (4)
- December 2023 (1)
- November 2023 (6)
- October 2023 (1)
- September 2023 (6)
- July 2023 (1)
- June 2023 (6)
- May 2023 (2)
-
Categories
-
RSS
Entries RSS
Comments RSS
