iPhone 15 Pro review
- Introduction
- Physicals
- Screen
- USBC charging
- USBC cables/data/peripherals
- Cell/Wifi
- Setup/transfer
- Required add ons
- Cases/Protectors
- Conclusion
Introduction
Yup, that time again … time for a new iPhone. I kept my iPhone 6 for 1.5yrs and upgraded to an iPhone 8 (which my GF still uses) … Upgraded to an iPhone XS after 2yrs and now to the iPhone 15Pro now 4.5 years later. So I definitely got a lot more time out of the XS. Honestly, I’m upgrading primarily for two reasons … my app base has become so large I’ve had to continually pair down my music collection (my XS was 64G), and second the GFs iPhone 8 is out of support so she needs to move, so if I move then she gets a few more years out of my XS …
Gone are the days when you got a new phone as part of your plan, at least with my provider, and sadly, I’m restricted to Rogers or Fido because my employer installer a repeater in our building to resolve dead zones, but it only covers off Rogers/Fido …
When looking at models I went to the 15 Pro because I did not want the larger screen of a Max, but wanted the better camera of the Pro vS the 15, but not quite as good as the Pro Max. 15 – up to 2X optical zoom Vs 3X on the Pro and 5X on the Pro Max. Given memory was one of the limitations I ran into on the XS I decided to upgrade to the 256G for longevity reasons Vs the base 128 for an additional $150 CDN.
Physicals
The number of things that are new in this iPhone are HUGE, but most of them are to do with USBC, but let’s start by looking at the physicals and specs:
146.6 mm x 70.6 x 7.7 187g 6.1" display 2566x1179 460ppi 1000 nits
143.6 mm x 70.9 x 7.8 177g 5.8" display 2436x1125 458ppi 625 nits
Screen
The screen on the 15 Pro minimizes the speaker/camera gap to give a little more area, but as you can see for the most part it is quite similar, which is a good thing, other than brightness that’s good a good boost. It does however add an always on feature, something you can disable, and honestly I don’t much see the point. Your very limited (wallpaper and notifications only) to what can be on the always on screen. If they had made this more extensible to add, say weather, then this might have been something I’d use/appreciate it. I have no idea how much power this takes, and I can’t say for sure if being in your pocket turns this off or not.
USBC charging
The 15 Pro FINALLY moves off the lightning cable and goes to USBC, and honestly it’s by and large what is the MOST new on this phone. Apple got forced by the EU into moving to USBC. Now to be “environmentally friendly” Apple no longer include a headset, or a charger (ya I call BS). Apple in this article say for fast charging use a 20W or above. This Youtube video suggested 25W or above. By comparison the charger that came with your older iPhones was 5W and the XS could take a 10W charger for fast charging. That same Youtube video said after an hour from a dead iPhone 15 Pro Max charge percentage was 25/37/80/82% for 5/12/20/30W Apple official chargers. So you can see a huge improvement with a higher power adapter. Apple does include a USBC cable that they say supports fast charging. There are lots of choices on how you charge your phone and these may have a profound impact on battery life. There’s enough evidence that quick charging impacts a battery’s life that you want to do it when you need to, and use slow charging when you don’t. So for overnight charging, when speed is not an issue, you can use a standard 5W old style, USBA to USBC cable, and at this power, any old cable will do. When your on the go in the car or with a battery pack your going to want to add charge to the phone as quickly as possible and get back to life. This requires more care on both the charger and the cable.
USBC cables/data/peripherals
BTW the 15 Pro supports USBC speeds (up to 10Gb/s) while the 15 only supports USB2 speeds, (up to 480 Mb/s) (the old lightning cable was also limited to USB2 speeds). This Youtube article actually measured the speed difference, and it is VERY noticeable. So if your buying additional cables for your brand spanking new phone, you will need to make sure it can support >20W and 10Gb/s to avoid your cable being the limitation. Of the 7 USBC cables I have, only 3 supported USBC data speeds. For example, I connected an NVME SATA external hard drive that is limited to 350MB/s but connected with a slower cable it managed only 37MB/s (big B is bytes, little b is bits, so 296Mb/s) … On the positive side I had no issue with the external drive with it’s space being immediately visible within the files app, USBC card readers also worked fine. There is one limitation to be aware of … Apple’s design philosophy, if I can call it that, does not embrace the concept of cut/move. So if you want to move all your photos from your camera’s SD card for example, you have to copy them and then delete them. Honestly I HATE this, for crying out out loud just let me cut PLEASE. I would love to be able to have an app that would just move all my photos off my SD card from my camera onto the iPhone on the go. Or give me an app on the phone so simulate a USB flash drive. This would actually incentivize me to buy even more space on the iphone. So far I have not found either of these grail like apps …
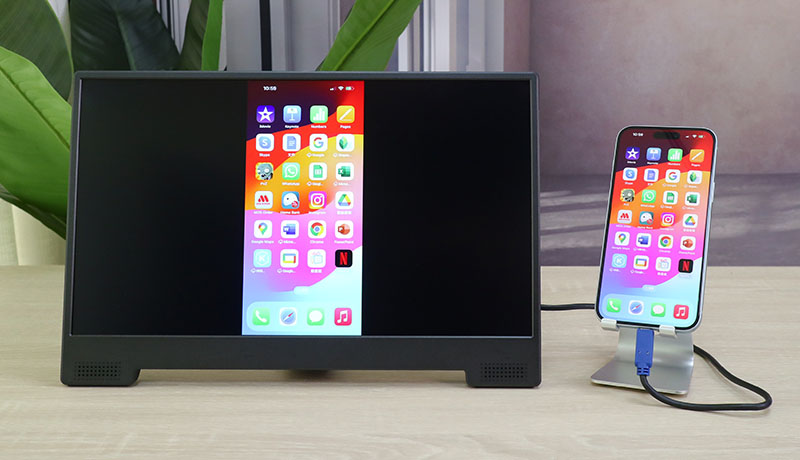
I had no issue getting USBC video working, but then you run into the usual issue. Apple do not support landscape home screens on an iPhone so you get this big less than useful letterbox version of your screen.
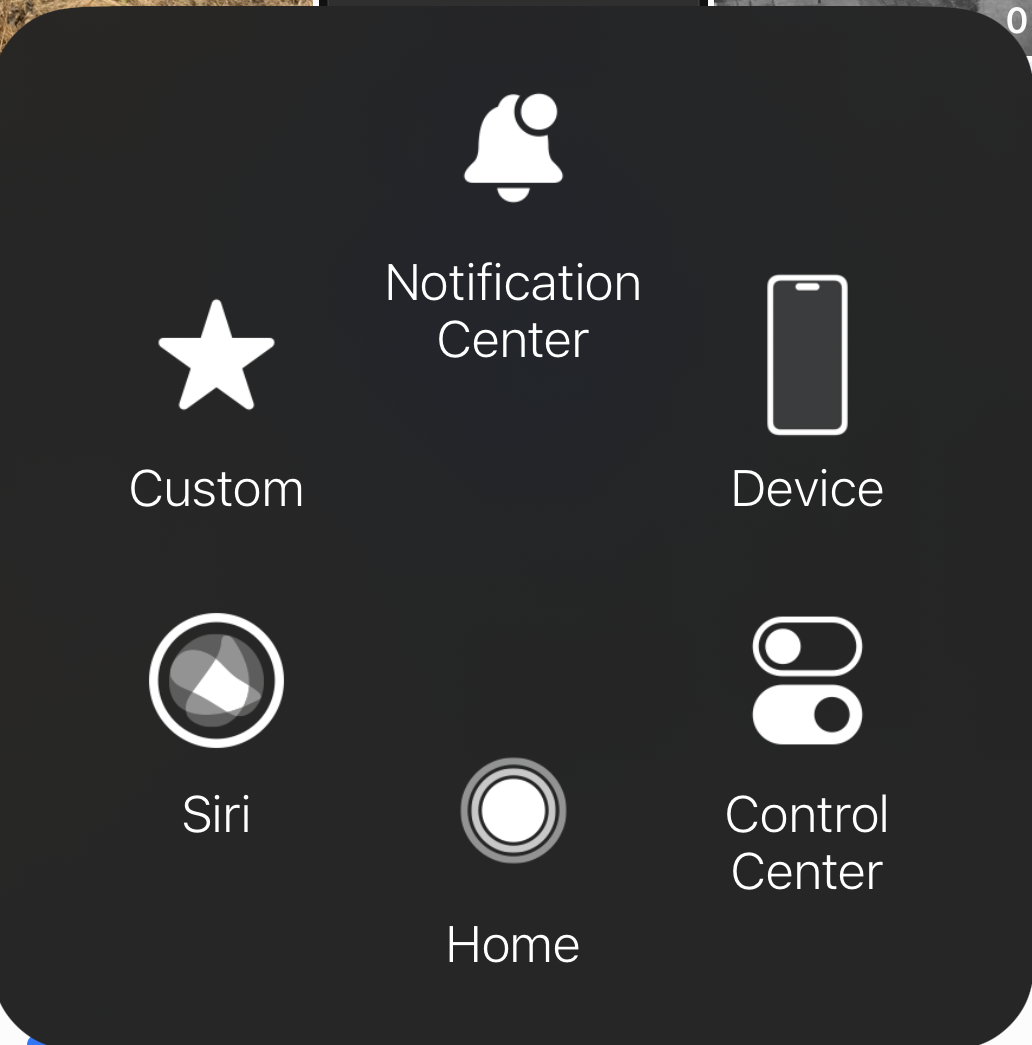
Physical keyboards are disabled by default hidden in Settings, Accessibility, Keyboards. Physical mice are also disabled by default hidden in Settings, Accessibility, Touch, Assistive touch, but be aware, a mouse on iPads/iPhones is really a simulated finger, so it’s really not a fine tool. And with the external mouse enabled you get a helpful (not) hovering ring you can select actions from, whether the mouse is connected or not. All this is to say, while I’m impressed how much of USBC actually works, it’s a hodge podge of dysfunctional, incomplete, largely unusable features. Honestly quite disappointing. Android in this space is MILES ahead, there’s no chance your going to use this as a make shift on the go laptop replacement, it’s just too poorly implemented IMHO. Moving on … again.
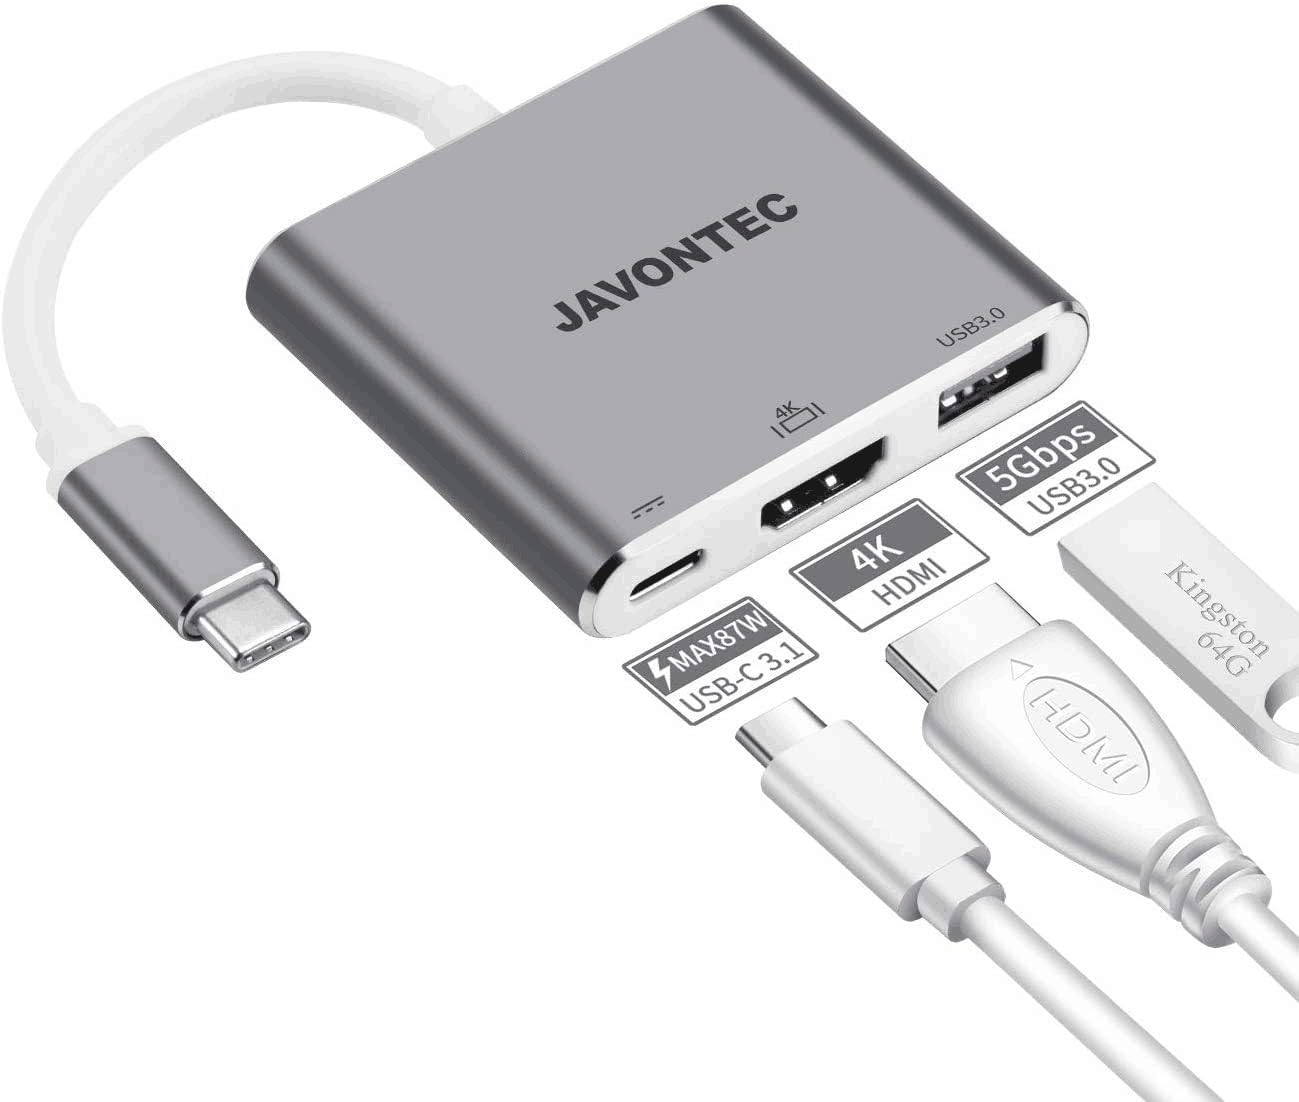
Here’s the USBC HDMI adapter I used, but it is no longer available on Amazon.
Cell/Wifi
The 15 Pro supports WIFI 6, but compared to my 5GHZ (not to be confused with 5G cell) speeds were unimpressive 800/742/642 (max/avg/min) Vs 803/713/593 as measured by iPerf. 5G cell was available in my suburbs, quite surprisingly, and yielded 315Mbps down and 31 up, and even 500Mps at times. Pretty good download speed, but underwhelming up. In general I found 5G cell coverage quite good, at this point Rogers has done a good job of tower upgrades to support 5G, at least in the areas I’ve been in for the last week and a bit since I got the phone. My organization has a cell repeater to help with dead zones in our building, as you can imagine this does NOT support 5G.
Setup/transfer
No one does setup/transfer quite like Apple and this is a good thing. I had anticipated using iTunes or the newer Apple devices/music apps, but nope the phone just sync’d up between them over the air. I ran into a few minor issues, first of all in the middle of transferring everything it sent me a text code to verify the transfer of the credit card to the wallet … I stupidly went over to the old phone to get it and interrupted the transfer, which sadly meant starting again … LMAO … Secondly I ran into an issue that Rogers eSims are NOT transferrable. So I had to go get a new eSIM … and interestingly Rogers do NOT issue eSims virtually to avoid fraud. I kinda get it, they want to validate by gov ID … I also found, in spite of renaming the phone the old name stubbornly remains in a few places (such as within Home assistant). Once everything has transferred your in for some manual work that includes re-setting up every single one of your bluetooth devices. So be sure and do this before you need the. For me this included everything from Carplay, AirPods, headsets, Garmin watch etc. Additionally, some apps required you to re-set them up, for example Signal. Overall be sure and leave time to move onto your new device, it will take more time than you expect/hope.
Required add ons
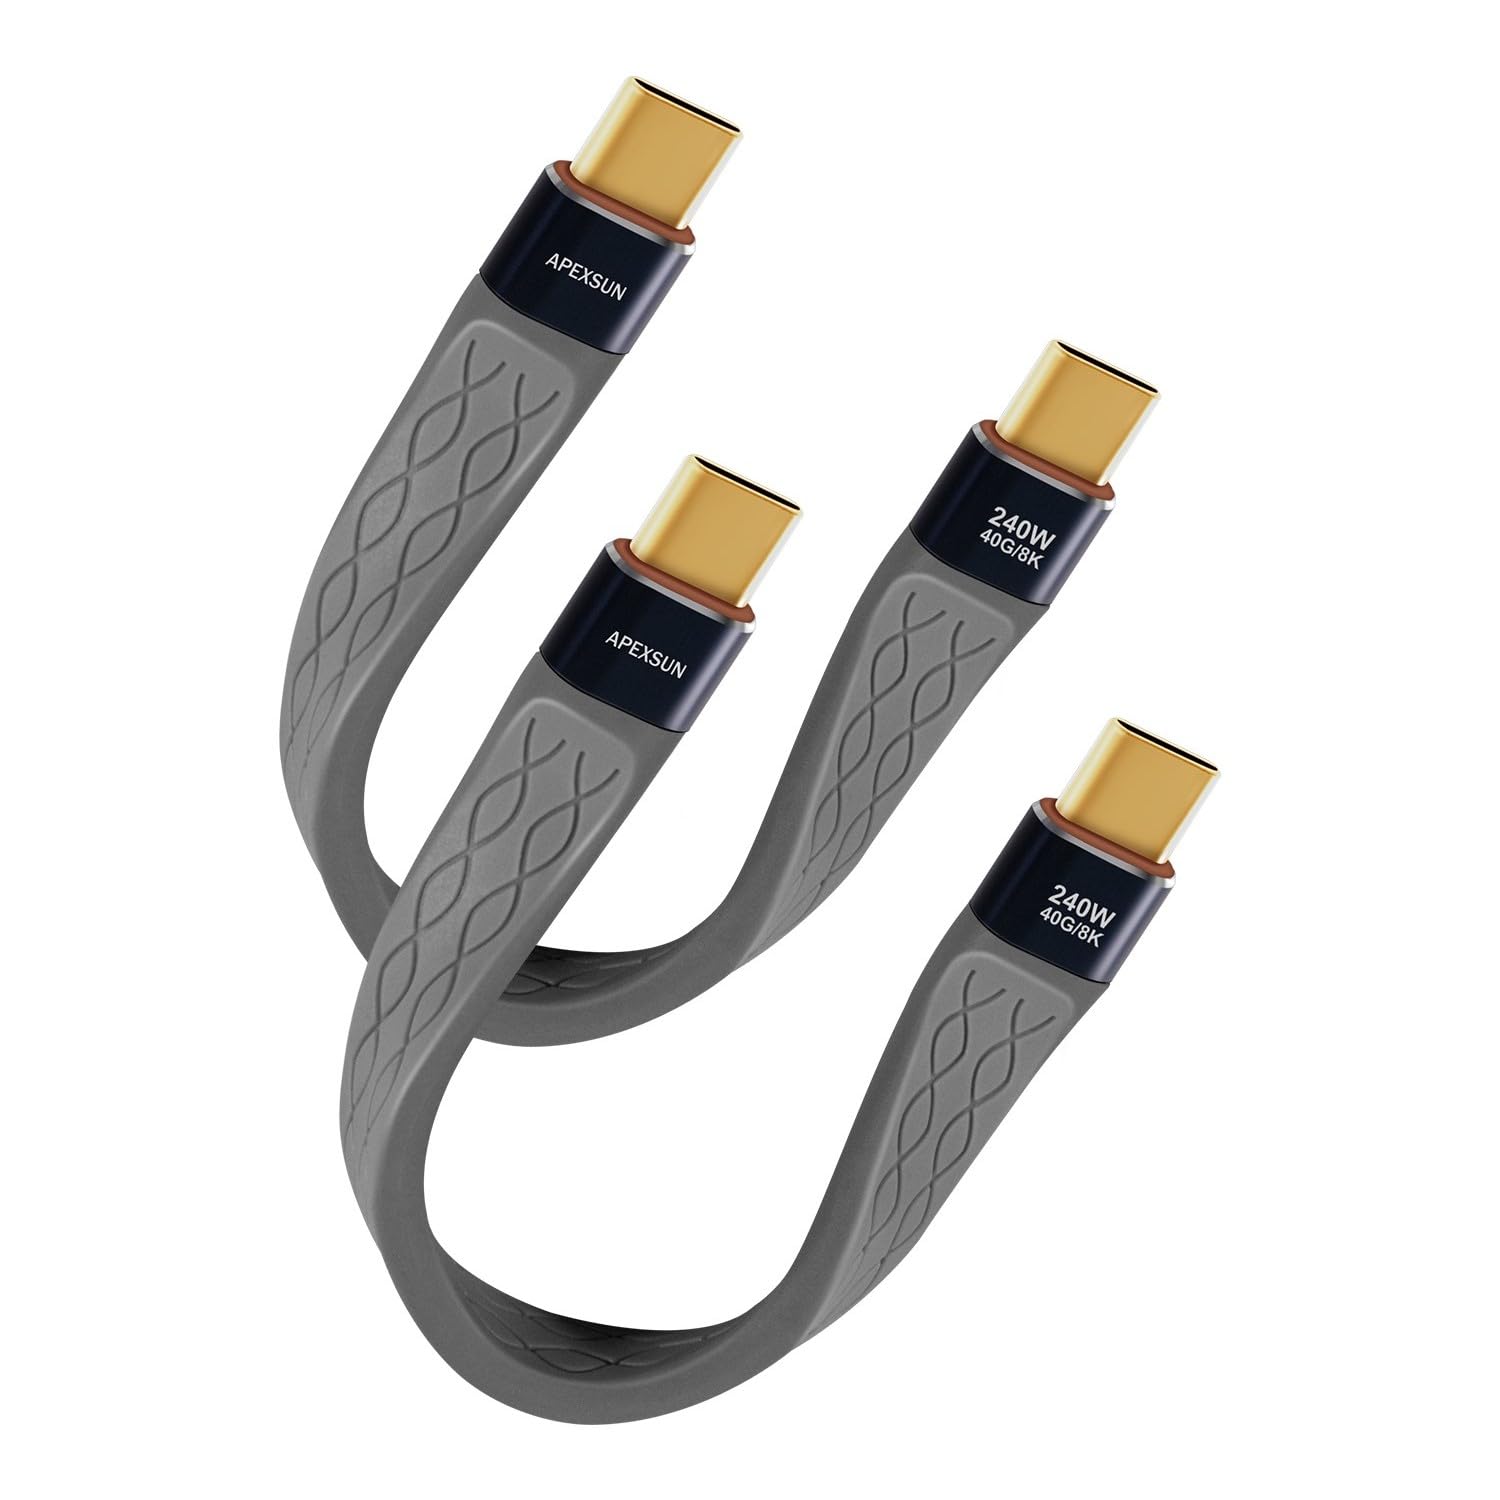
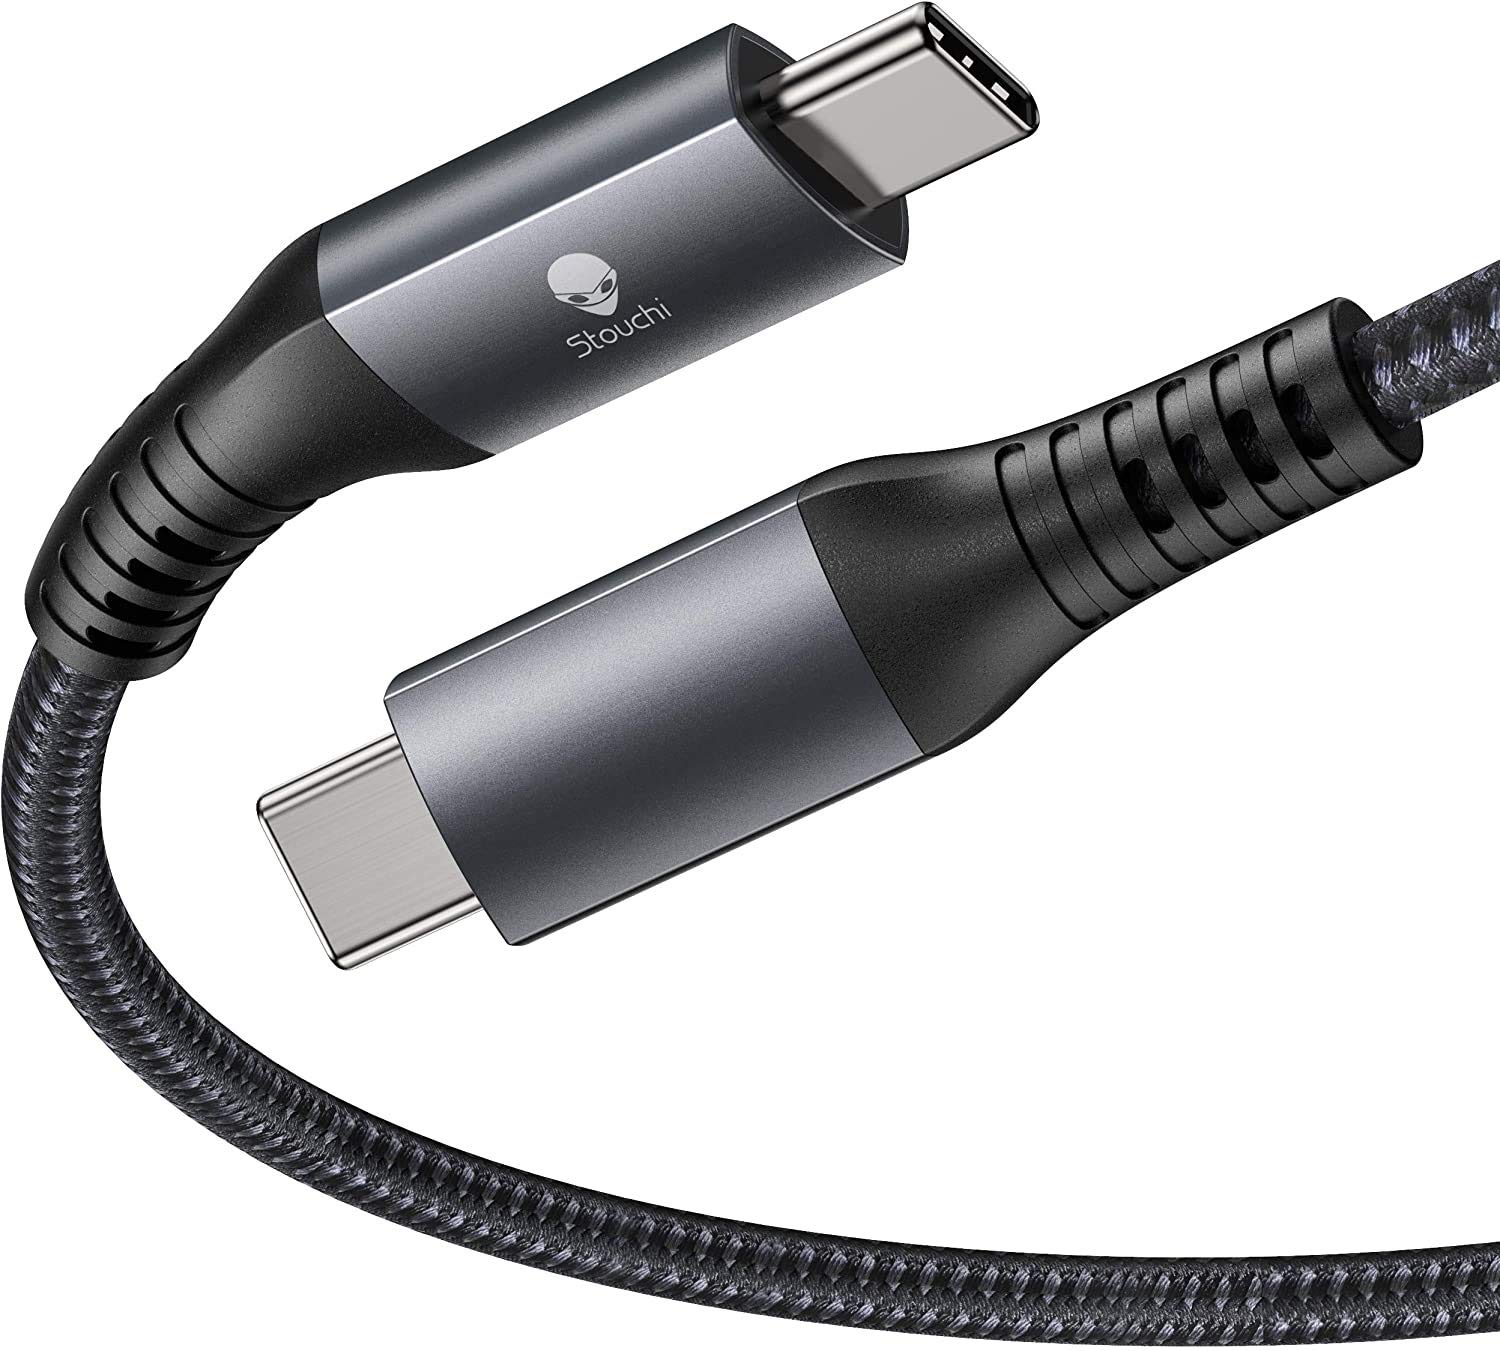
So let’s talk about the odds and sods your going to need to buy when you move into your new iPhone 15 Pro … Obviously your going to need some USBC cables, so be sure and buy ONLY ones that say right on them that the are 10Gb/s and fast charge. Read the ad carefully … if it doesn’t say it, don’t buy it. I bought this one from ApexSun on Amazon, perfect cable for my battery pack. Does exactly what it says and delivers on charge power and data speed.
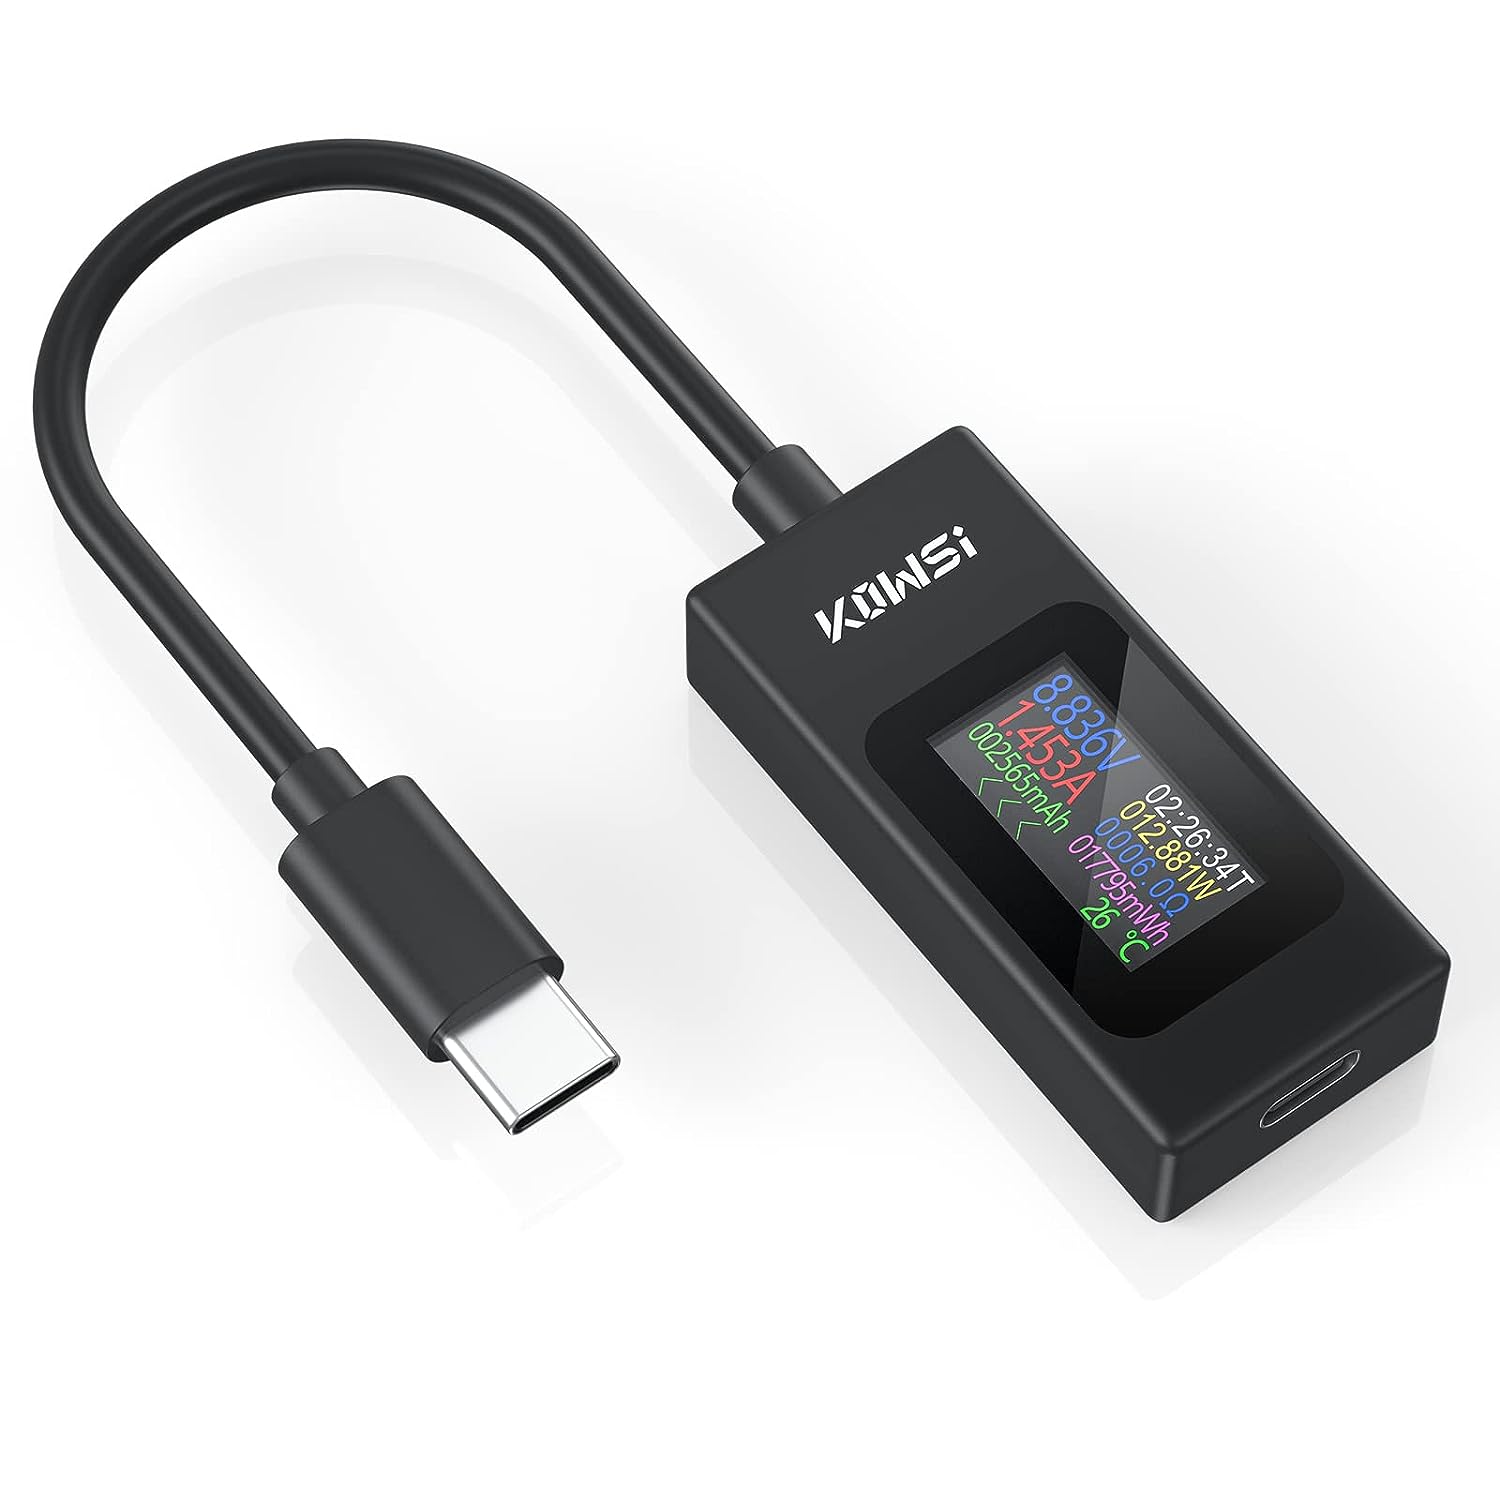
I bought this cheap USBC power meter, I love it, in a geeky kind a way, Amazon of course 😉
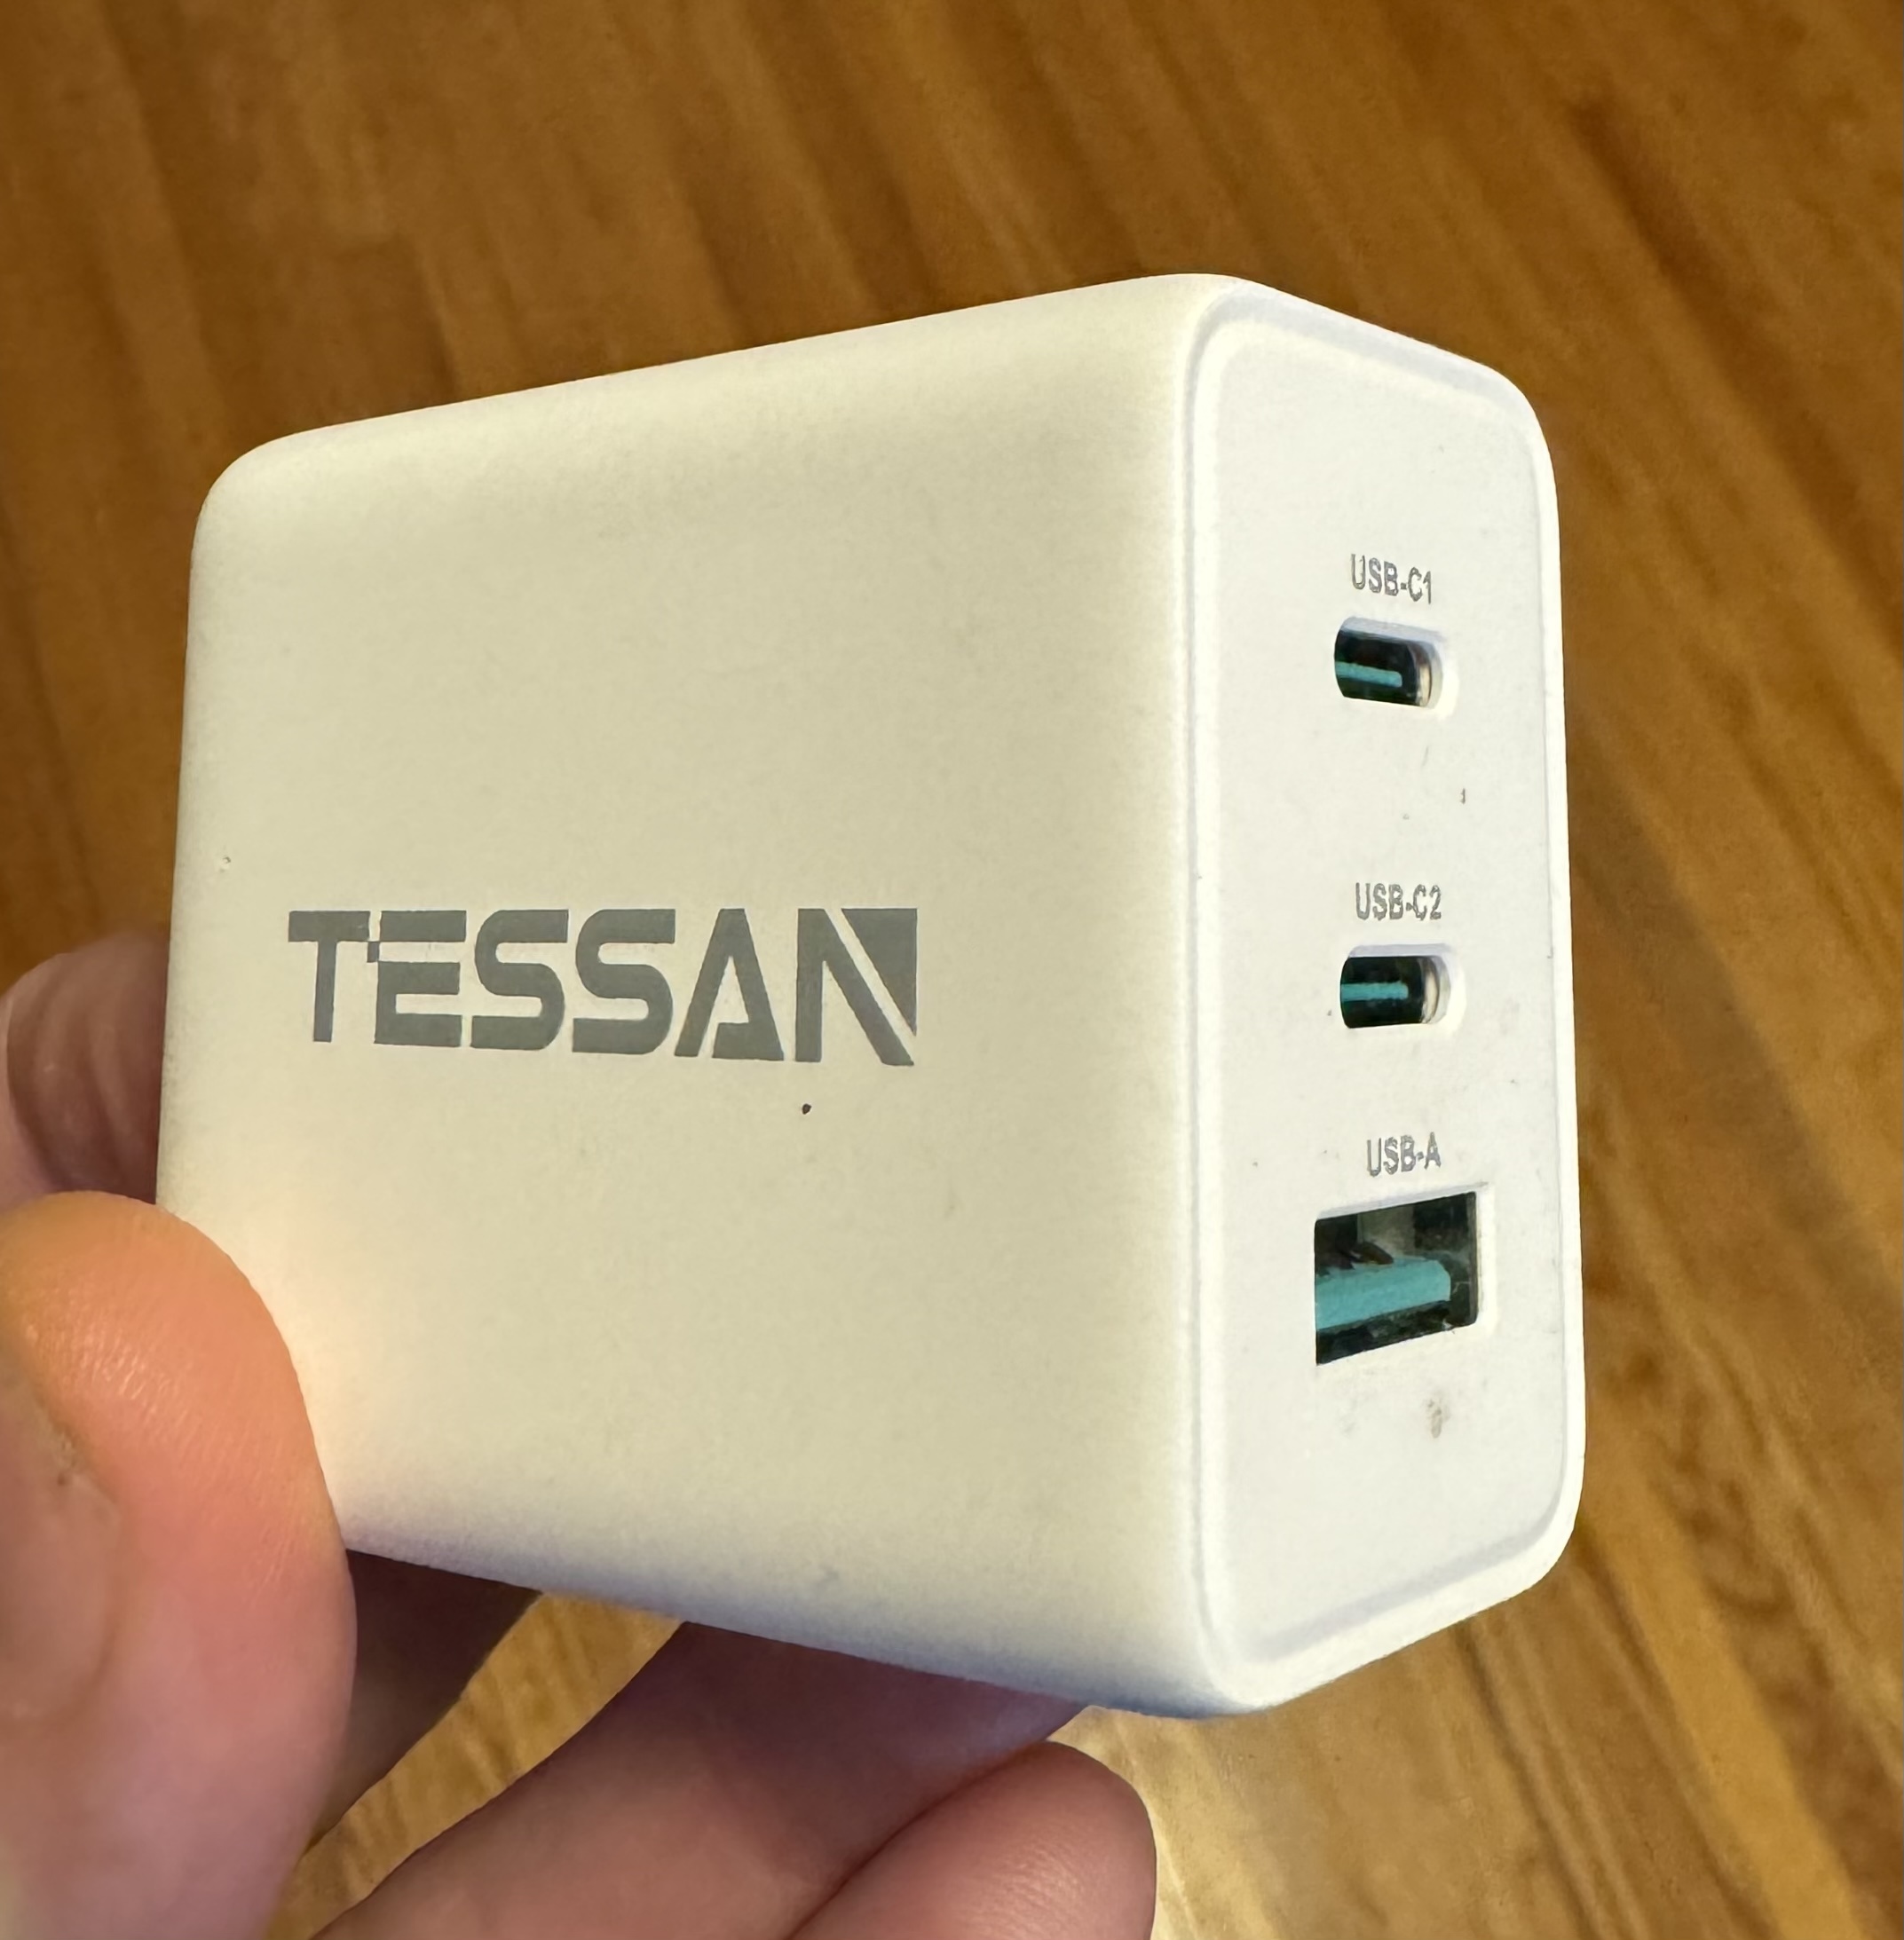
Your going to need a USBC power adapter if you don’t already have one. I bought a 65W USBC Tessan power adapter which is no longer available on Amazon. It works well, has a two USBC ports and a USBA port. I love these multi port devices especially when travelling. It works well even with my laptop, a Lenovo X390. On the iPhone 15 Pro this can pump out the iPhones max, 21W, so it’s a great charger. On my Lenovo X390 it can pump out 55W, which is above the 45W that Lenovo ships with the laptop.
For a longer, high quality data cable, I actually bought a Thunderbolt 3 cable off Amazon, and it works well. While overkill for what’s needed for the iPhone it just works.
A while back I bought a VEEKTOMX Mini Power Bank 10000mAh, 22.5W Fast Charging and it has been performing well and is SUPER flexible. It has a USBA, USBC and micro USB outlet. With the iPhone 15 Pro this pumps out a SOLID 21W to get you back charged up as quick as possible. I love the display on the unit to show you how charged it is, and it turns on automatically (no button to push) when you connect your phone. The size and weight are ok. It’s been reasonably durable.

Attempt two to find a decent USBC (failed attempt is included below) car charger landed on an Anker, a brand that has delivered the goods in the past … This time around Anker USB-C Car Charger, 67W 3-Port Compact Fast Charger, 535 Car Adapter, sure enough it delivers the iPhone 15 Pro max’s charge of 21W, and it can also deliver a full 58W into my Lenovo X390 laptop. So spot on! When your looking for max charge in the least time … This is THE device.
Cases/Protectors
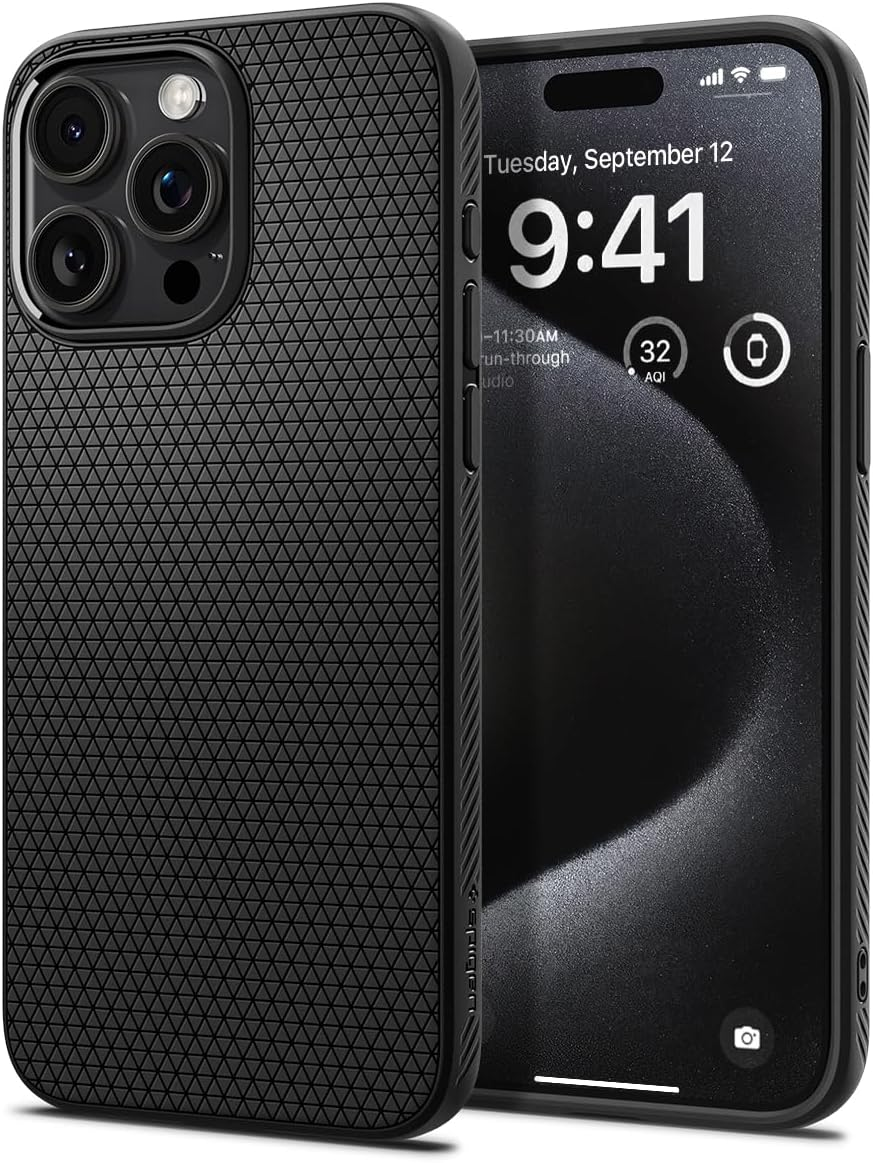
Cases etc … well I thought I was prepared and pre-ordered a case so I had it before the phone arrived. I bought a Spigen … Now I like the case, and in fact, of the three I ordered it’s the nicest of the three in the hand. BUT … it does not include any protection for the screen or the lenses, which are a collection of protruding circles.
I found a separate protector for the lenses and what I like about this one is that the resulting protector is flush across all the bits and bobbles. Now why Apple didn’t do this from the start is beyond me. it is compatible with the Spigen case and works well.

And lastly you will need a screen protector … I’ve had good luck with the Jettech’s and it includes a guide to make the installation smoother and more accurate.
The other option is to order something that includes all three, the case, the screen protector and the lens protector. In this category I bought two … First up and the one I recommend is the Jettech all in one. There’s lots to like, it includes multiple screen protectors, multiple lens protectors (that are flush), includes a guide for installing the screen protector and a case. Now the downside I find the case more slippery than I would care for, and it’s quite opaque meaning you can not see the color of the phone, but at least it doesn’t have that ghastly, prominent, mag safe ring …

Last but not least I bought the ESR kit that also includes one screen protector, one lens protector, and the case (as well as a guide to install the screen protector. Like the Jettech case it’s more slippery than I would care for, and is also more opaque than I like. I also hate the round mag safe enhancer, I just think it looks goofy. The lens protector is NOT flat and ends up with the usual collection of bumps to catch in your pocket. This is the least of my favorites.

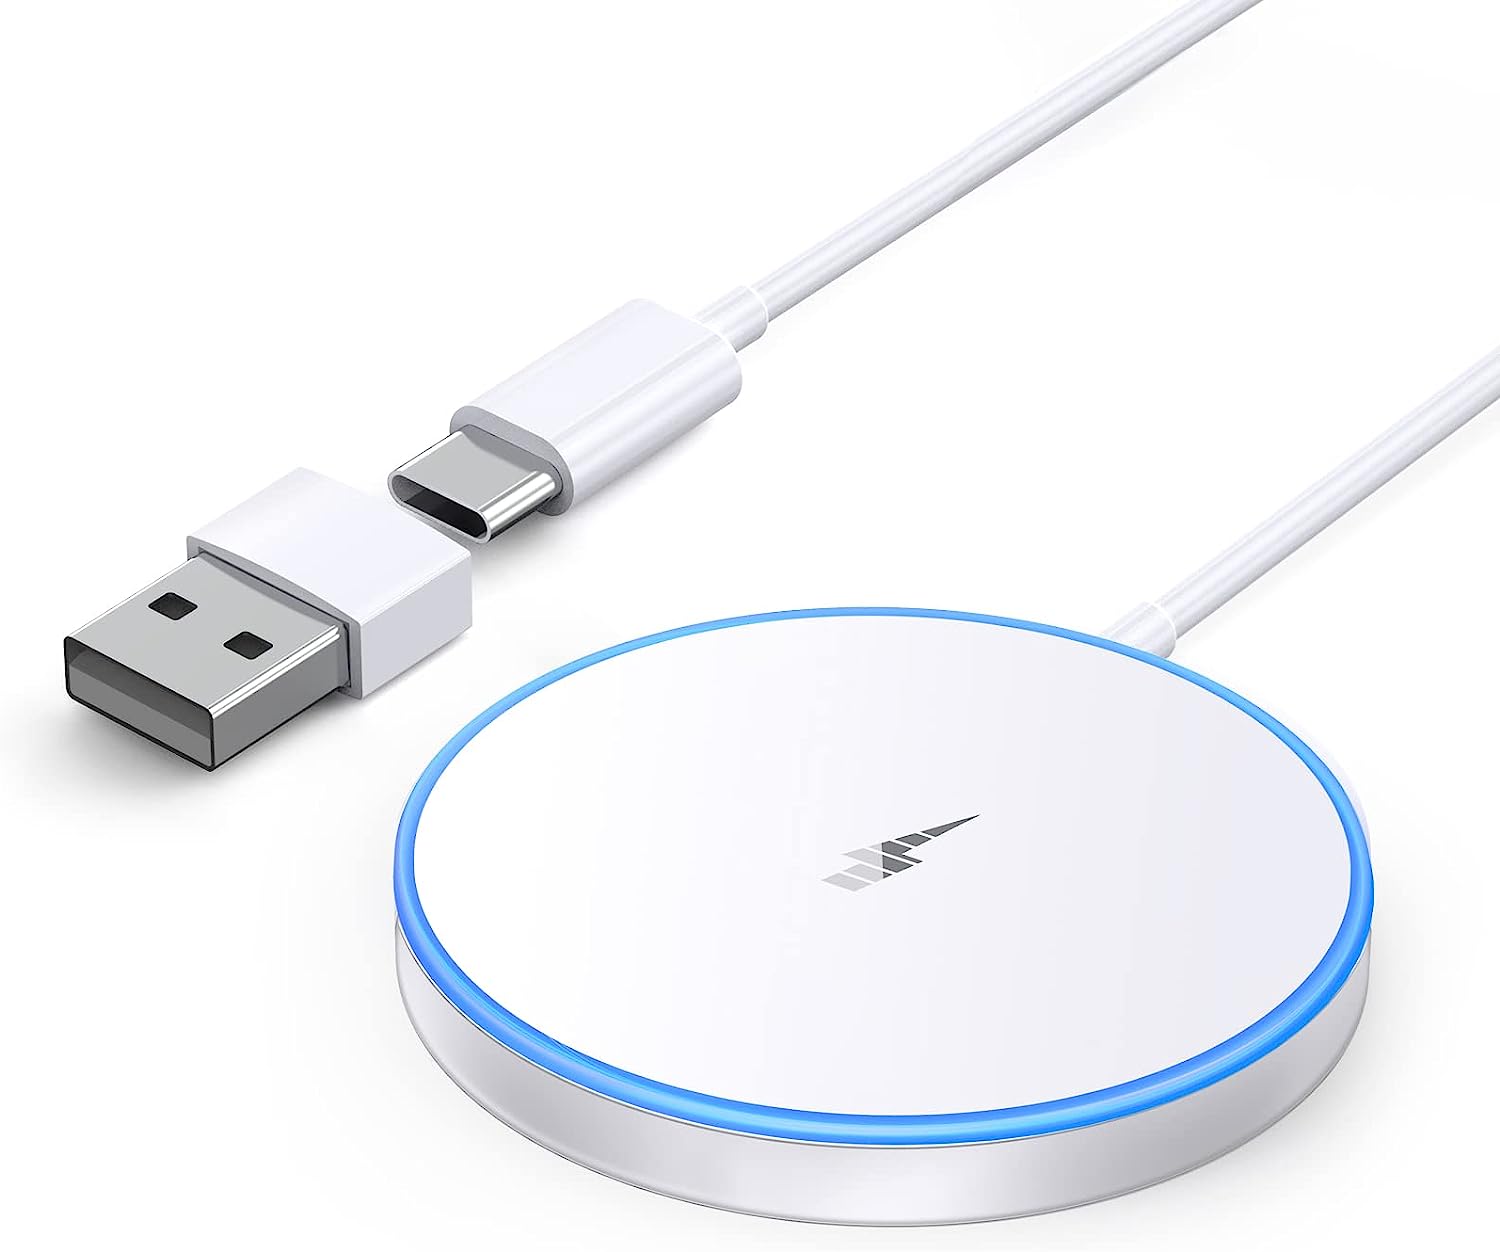
So far those are the things that did work … Now we can mention a few that did not live up to their own specs … I bought a new mag safe wireless charger to replace my older Qi, assuming it would be better … Nope this one is going back, it only managed 6W, while my old Qi pumped up to 7W, in spite of the specs that say it can do up to 15W. Honestly, I’m not sure I see the point of a strong magnate that you need to pull off the iPhone, what’s the point? Might as well be a cable?
I also bought a USBC car adapter from Anope that claimed it could pump out 56W … nope, my Lenovo X390 could only eek out 26W out of it (vs 55 on the Tessan mentioned above), and the iPhone 15 Pro only managed to get 16W (vs 21 from the Tessan). So this one is a let down, as well.

Conclusion
In the end, the majority of what’s new in this iPhone is the USBC port and all that it brings with it. This has been a long time coming. Pity it took Apple to be forced into this, but whatever. They should have done it years ago. The screen is nice incremental improvement minimizing of the speaker/camera gap, increasing brightness and supporting always on (something you can thankfully disable). Overall in the hand, the phone feels fine, and quite similar to the iPhone XS which is a good thing and exactly what I wanted.
CodeProject AI with iSpy mini review
So I stumbled upon Codeproject which allows you to run a self hosted AI that get’s called by iSpy for Object detection (as well as Face Recognition, and License Plate recognition). I tried loading this up on Debian (wanted to get NVIDIA GPUs going), and eventually gave up. Couldn’t get the drivers working. Loaded Ubuntu 23.10 server, got the NVIDIA Cuda drivers working, but then ran into an insurmountable road block that Python was at way too high a level for CodeProject to work and gave up here too. On Windows 10 CodeProject was dead easy to load, and even getting NVIDIA GPUs working was also easy. I didn’t find a lot of benefit to the GPUs, yes processing time was less but in my situation the detection is only used occasionally so it wasn’t worth the bother/power consumption.
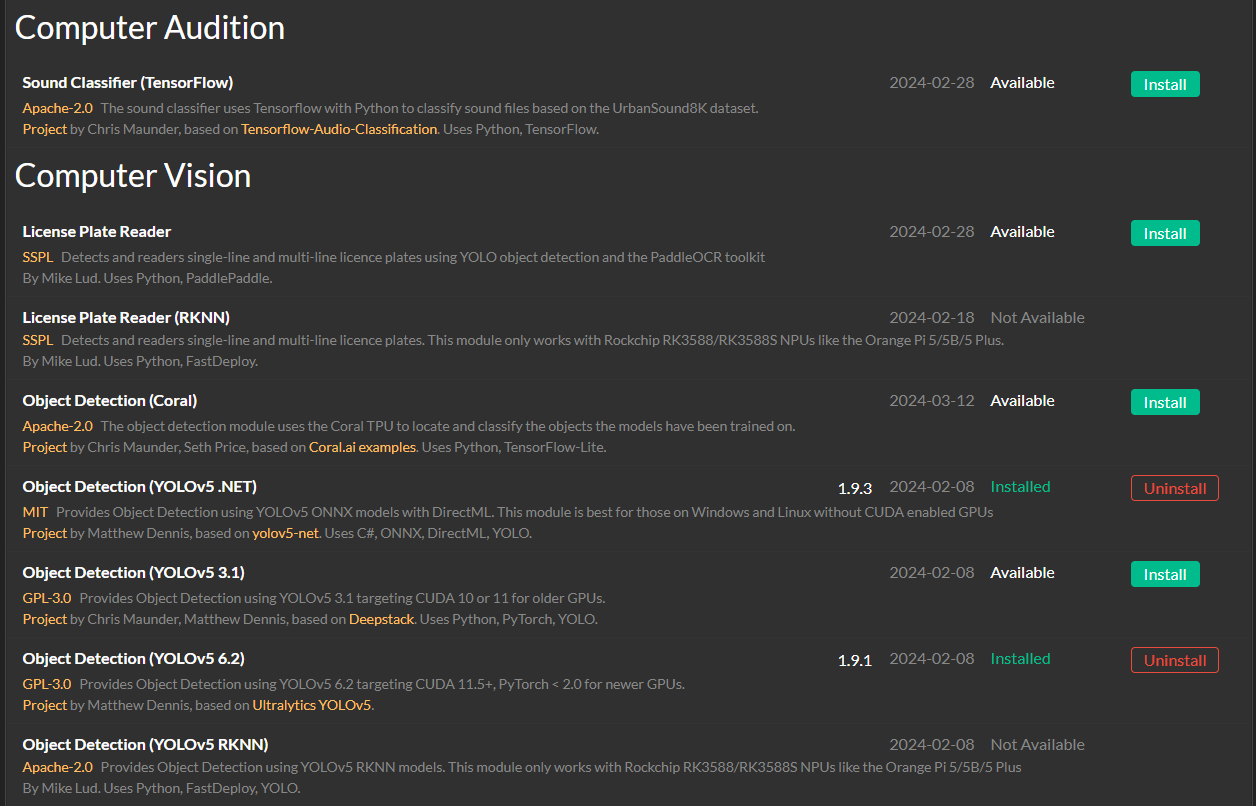
Within CodeProject you can load the modules you need, if you want face recognition, which object detections you want etc. (this is just a part of what’s available). For now I am just going to use grunt CPU, Yolo 5.3.1. Interestingly there is a USB device you can buy on Amazon $135 called a Google Coral TPU that CodeProject can use to speed up recognition (I didn’t). And you can see an object detection module that supports it.
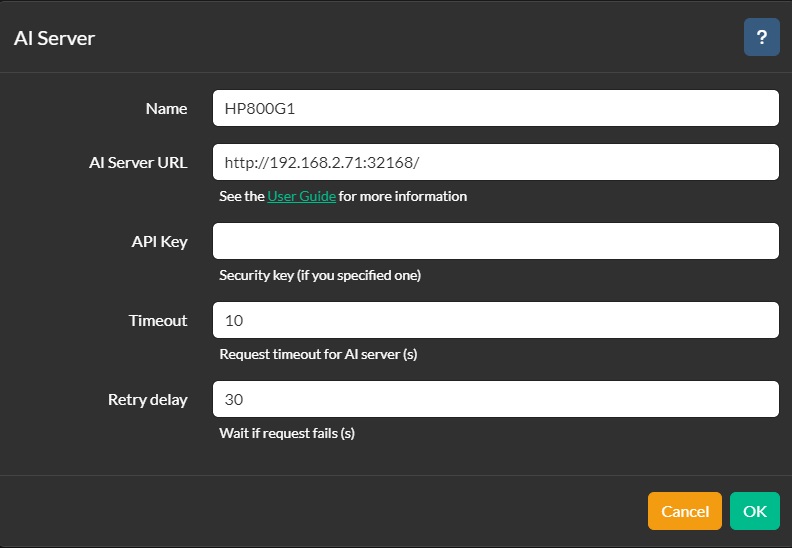
From within iSpy go over to your server settings, then AI servers and add your server by pointing it at the interface of CodeProject. It can be on a different machine from iSpy or the same.
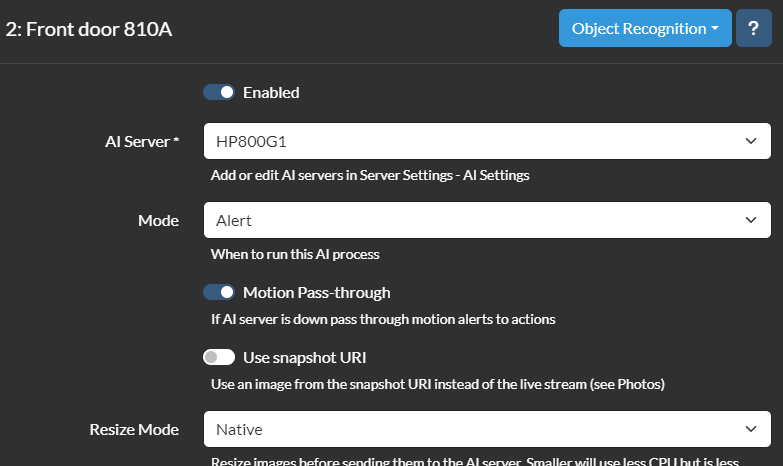
Now head over to each camera and select Object detection (or Face recognition or License plate recognition) and then enable it and point it at the AI server you added above:
Now slide down the same page and you can click get models, this will have iSpy talk to CodeProject to get it to tell you what Object recognitions are there.
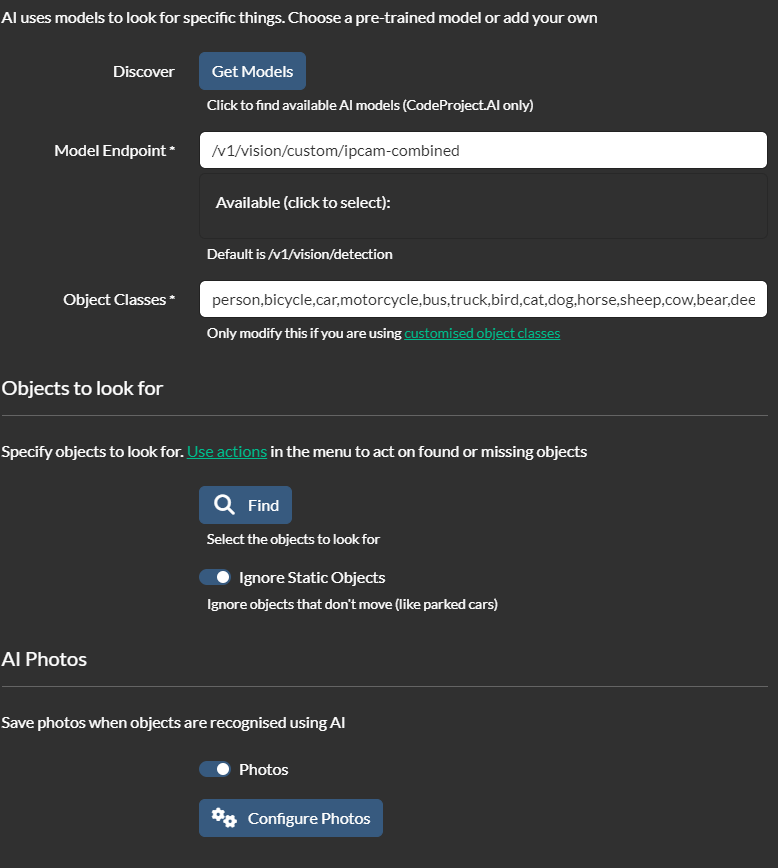
Each model has different in what it can detect, and the categories are odd IMHO. Now with this setup when there is a detection with iSpy, it will then call CodeProject, from the web interface for CodeProject you can see it working. For example …
09:14:57:Object Detection (YOLOv5 6.2): Detecting using ipcam-combined
09:14:57:Response rec'd from Object Detection (YOLOv5 6.2) command 'custom' (...08a6a9) ['Found car, car, car...']  took 282ms
And then you can have iSpy save the photo handed back from CodeProject and here’s the end results:
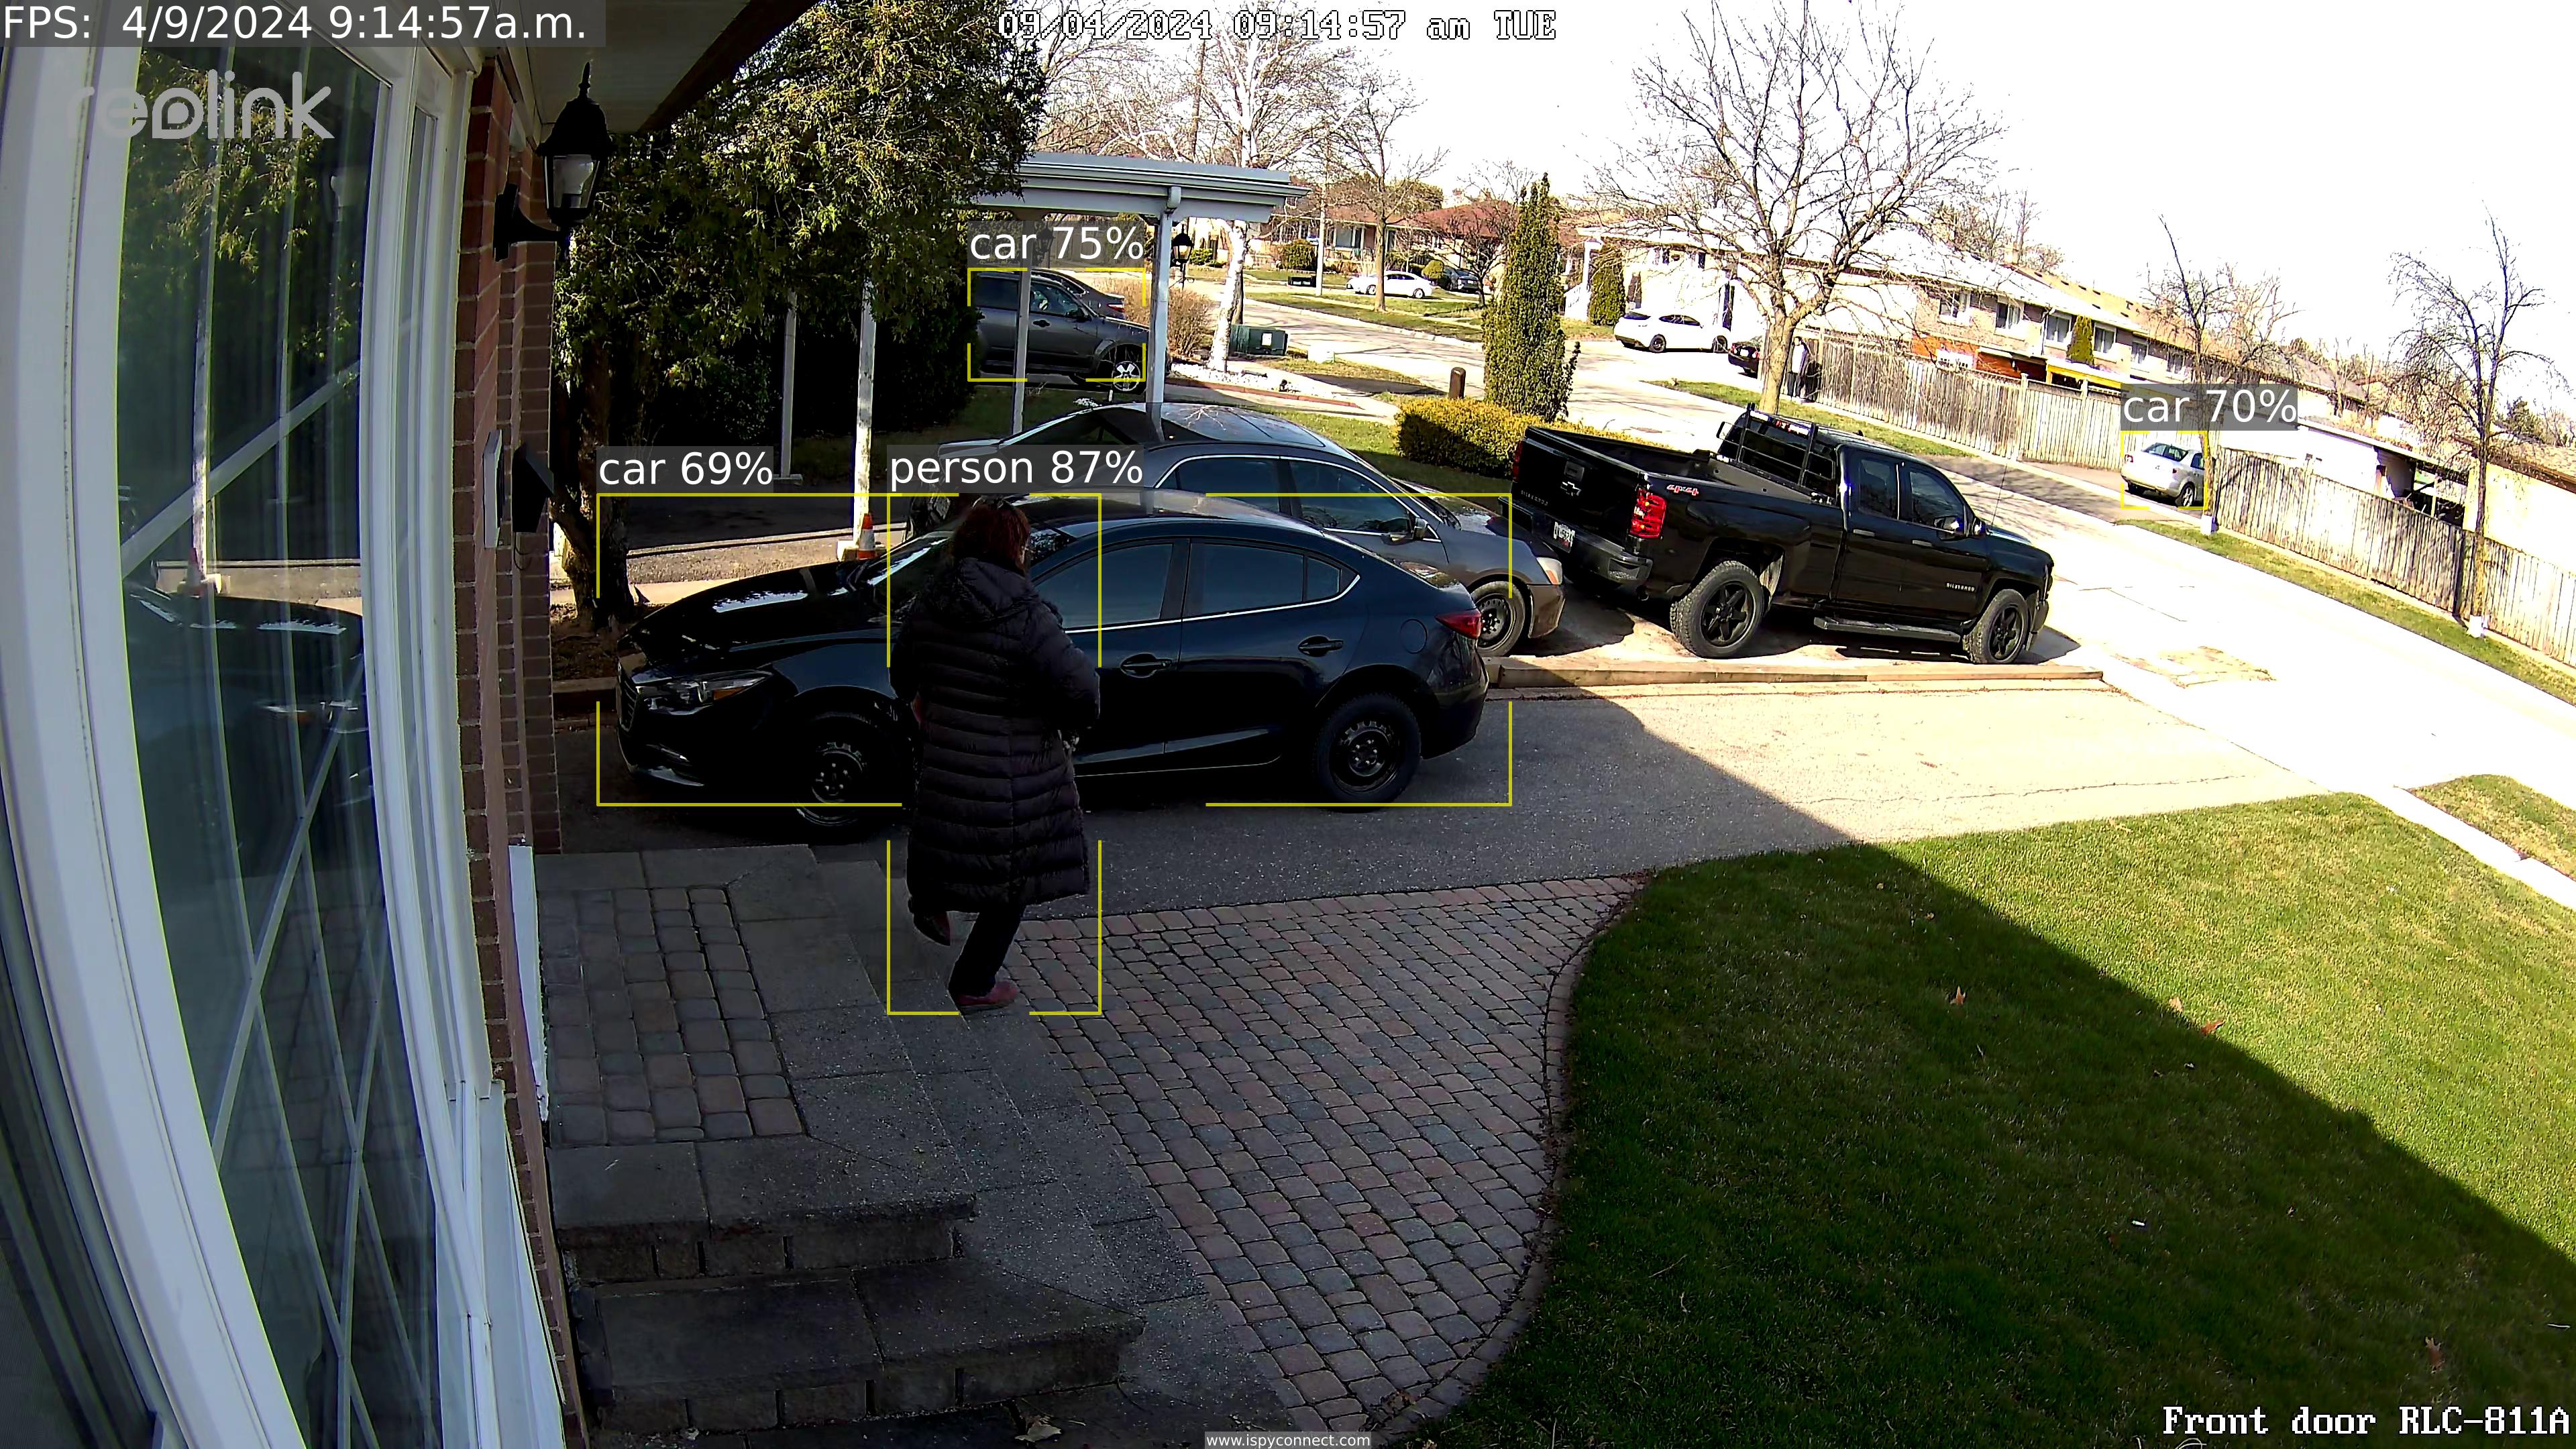
You can set the % threshold based on confidence.
For face recognition to work you have to train it to recognize people. To do this go to the CodeProject web site you setup/loaded and click on AI Explorer

From there you hand it pictures of people you want it to recognize and train it by registering a name/face.
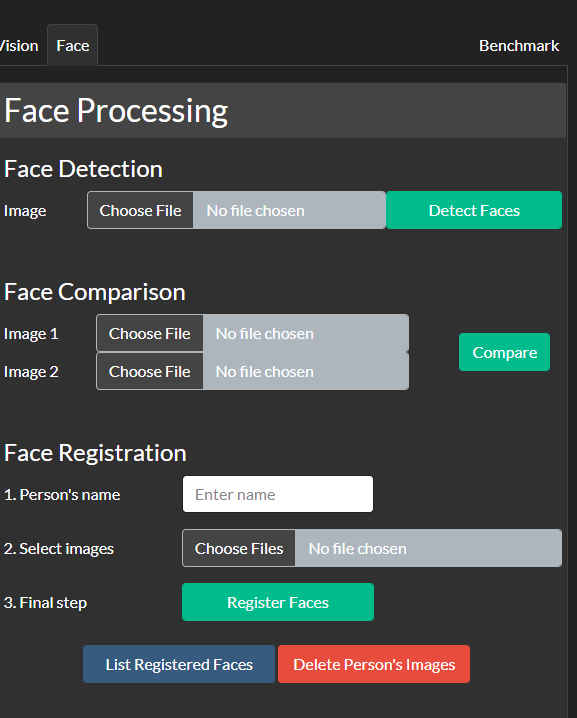
If you have face recognition enabled within iSpy, and if it can find a face it will attempt to do face recognition. I wasn’t very successful with this, maybe if I stood still and was close enough to the camera it might work, but more often than not, as a security camera, even at 8Mp it often did not even find a face.
09:15:09:Face Processing: No face found in image
It’s an interesting product, and ROCK solid, but of minimal use for my environment.
Reolink 510A and 811A security cameras and all things related
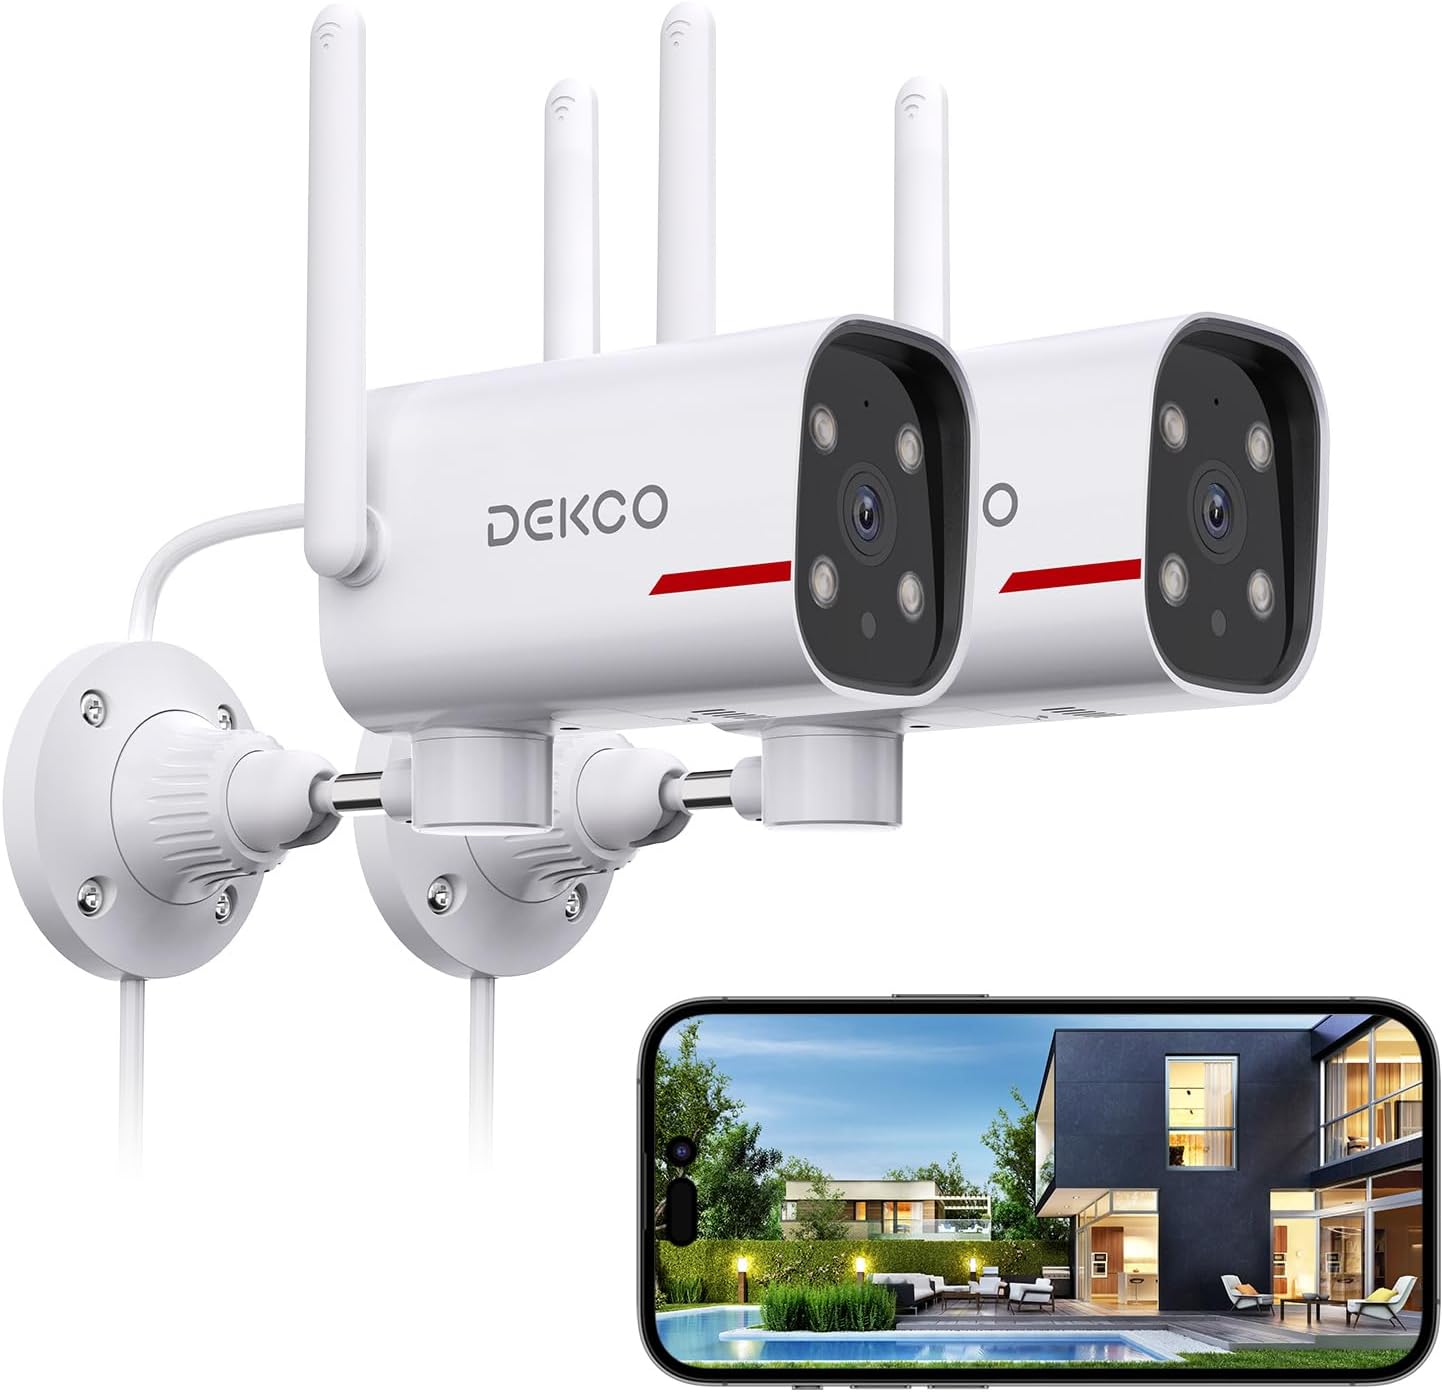
This post is going to be a bit of longer one covering off a review of two cameras and then how it all comes together … So, the first two cameras I played with were WIFI solar. Both cameras came pretty close to doing what I needed, which was pretty basic. The Dekco D8L missed the mark, just barely by not having anything other than push notifications, no email, no FTP. The Reolink Argus 3 for some bizarre reason did not have WIFI antennas (all the other Reolink WIFIs do), and the WIFI was a bit up and down.
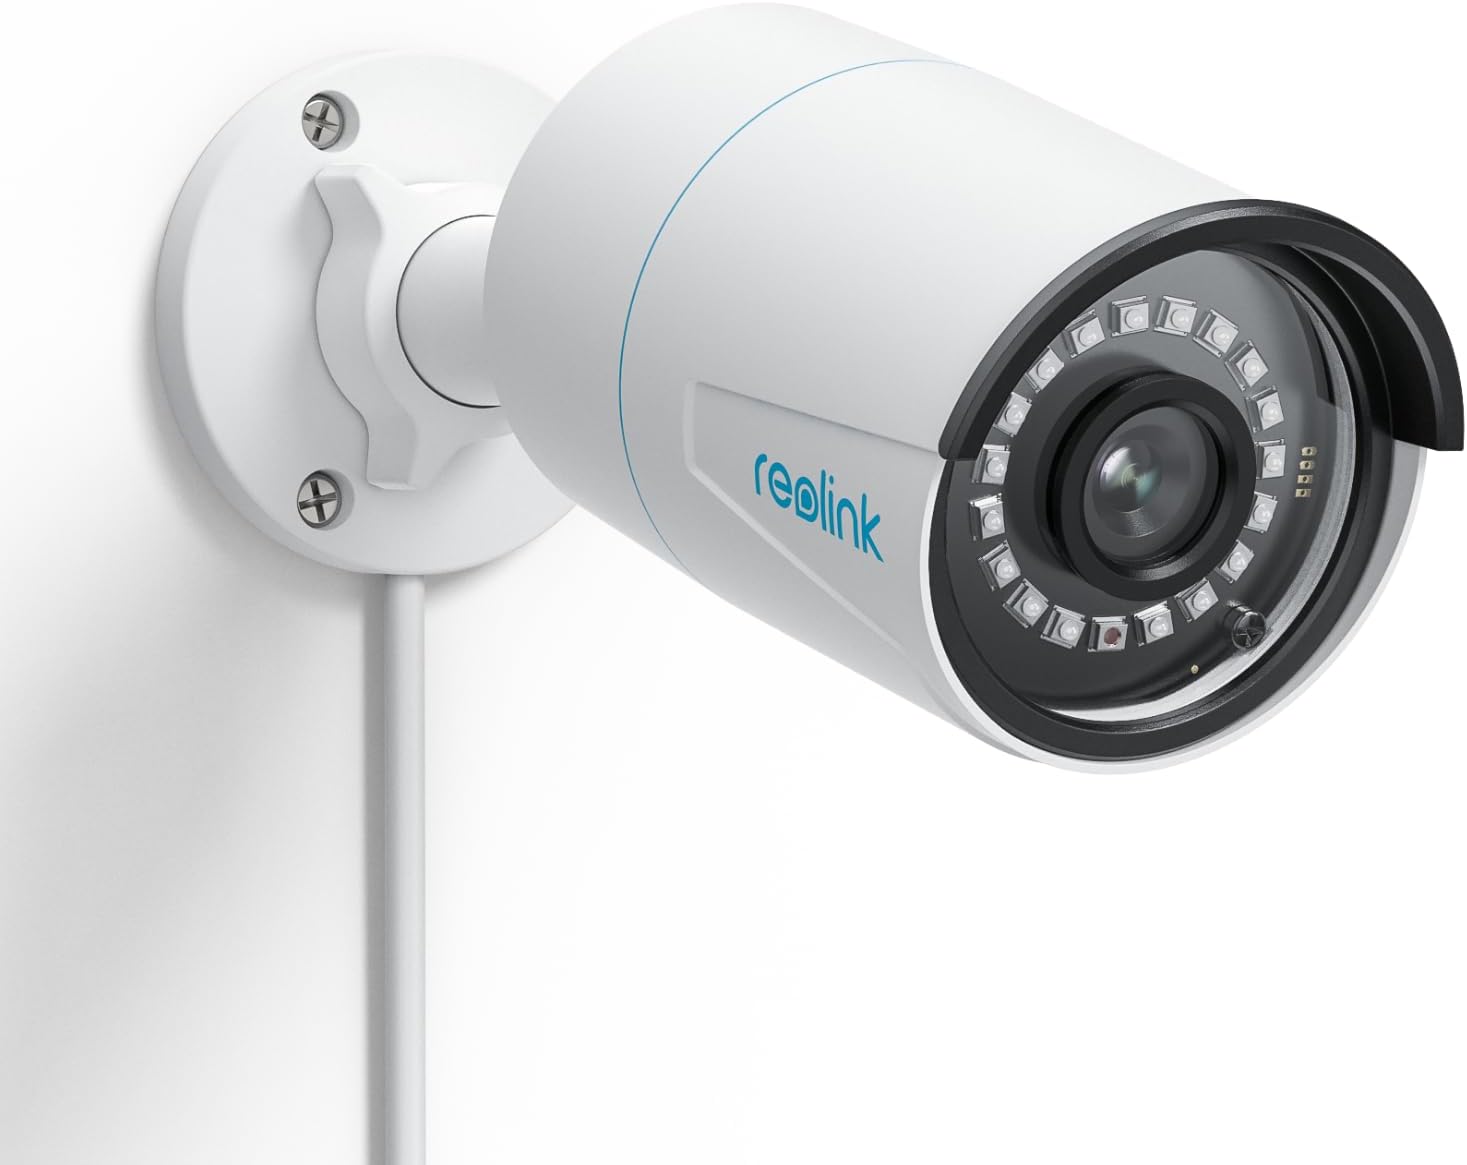
So now we come to a different category of cameras, powered … Some of them like the Dekco D4L use WIFI and have a power adapter, other rely on what’s called POE, or Power Over Ethernet. What POE does is embed a DC power in the same ethernet signal meaning you run one wire to the camera and you get ethernet and power. So I started looking around to see which might meet my needs. Setting your criteria can help save time, my criteria was … fluid? So do you want a light on the camera, what kind of connectivity do you want etc. I first bought the 510, and I have to say, of the 510, 811A, and 1212A the 510A is the pick of the litter. It mis-detects the least, is cheap, and overall just works. If it had a light I would have probably stayed with it. The 5Mp is kind of limited but usable. Night vision is ok, and smart detection works ok as well (more on smart detection in a bit). The 1212 was a disaster with constant mis-detections.
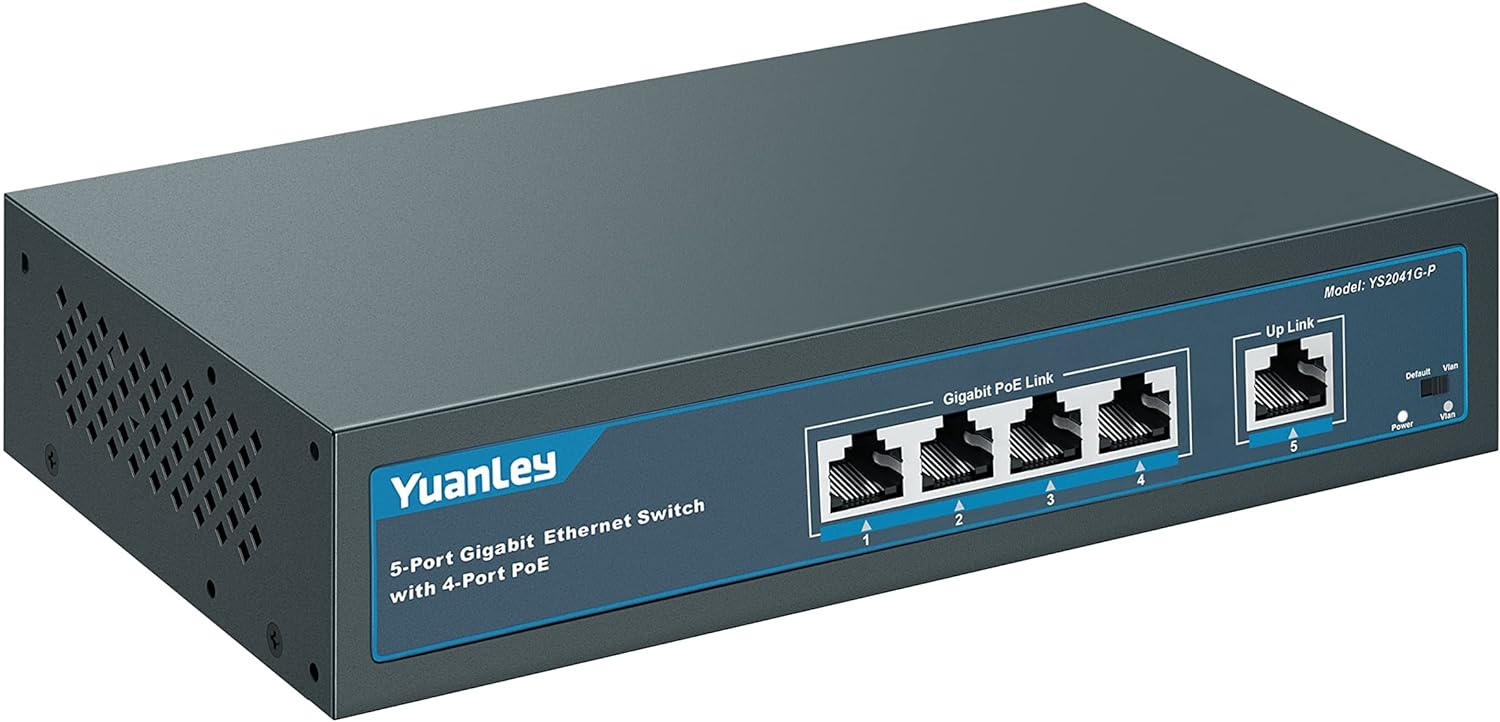
Ok, so POE … so you need to buy a switch that supports POE. I bought a YuanLey 5 Port Gigabit PoE Switch off Amazon for $39.99. It can handle up to 30W per port, to a max of 78W (no idea how you get that math). It’s well designed, solid, the power cable is a standard AC power adapter instead of a brick, has a dedicated uplink port and is VERY thrifty on power. The 510, 811 and the poe switch consumes a mere 10W, although that jumps to 15 when the light on the 811 turns on. If you plug the POE switch into a UPS, which I did, your cameras live on even with a power hit until the bitter end …
Next up is cable. I found some VERY thin flat cables and was amazed how well they feed through window sills of sliding windows with no drilling required. I did discover one BIG catch with these cables though, there are VERY difficult to work with, they tangle REALLY easily, and forget the thought of cutting them to length and putting a new connector on them. Even stripping the wire is brutal and good luck getting a crimper to put a new RJ45 end on them. The one I got was cheap $24 for 100ft.

Ok, so we got the cables run, the switch setup and we are ready to go. Now, I strongly suggest you setup the camera on the ground, in the house before mounting them. It’s just easier. I ran into a BIZARRE issue with the 811A, when I set it up initially I was lazy and had already mounted the camera (you get to learn from my error) so I pointed the app at the IP … Well after emailing Reolink, and their tech support is pretty darn good BTW (other than they are in China so a different time zone altogether), I discovered they sell two cameras under the same name. One comes with NVRs (network video recorders) and one stand alone. If you don’t scan the QR code the camera initializes as if it is with the NVR, and I had issues with smart detection and push notifications was missing. A complete restore and this time scanning the QR code resolved the issue.
So initial setup requires you to load the phone app. Plug the camera in your network, and then scan the QR code using your phone. You then give it a password for the camera and your off to the races.
There are a number of options for what to do with triggers (email, push and FTP) all of which need to be enabled, configured and setup. And this needs to be done for each camera. It’s all manual. Now there is a Windows/Mac app you can download that allows you to set the camera up from your desktop/laptop (and your going to need this app later on anyway IMHO).

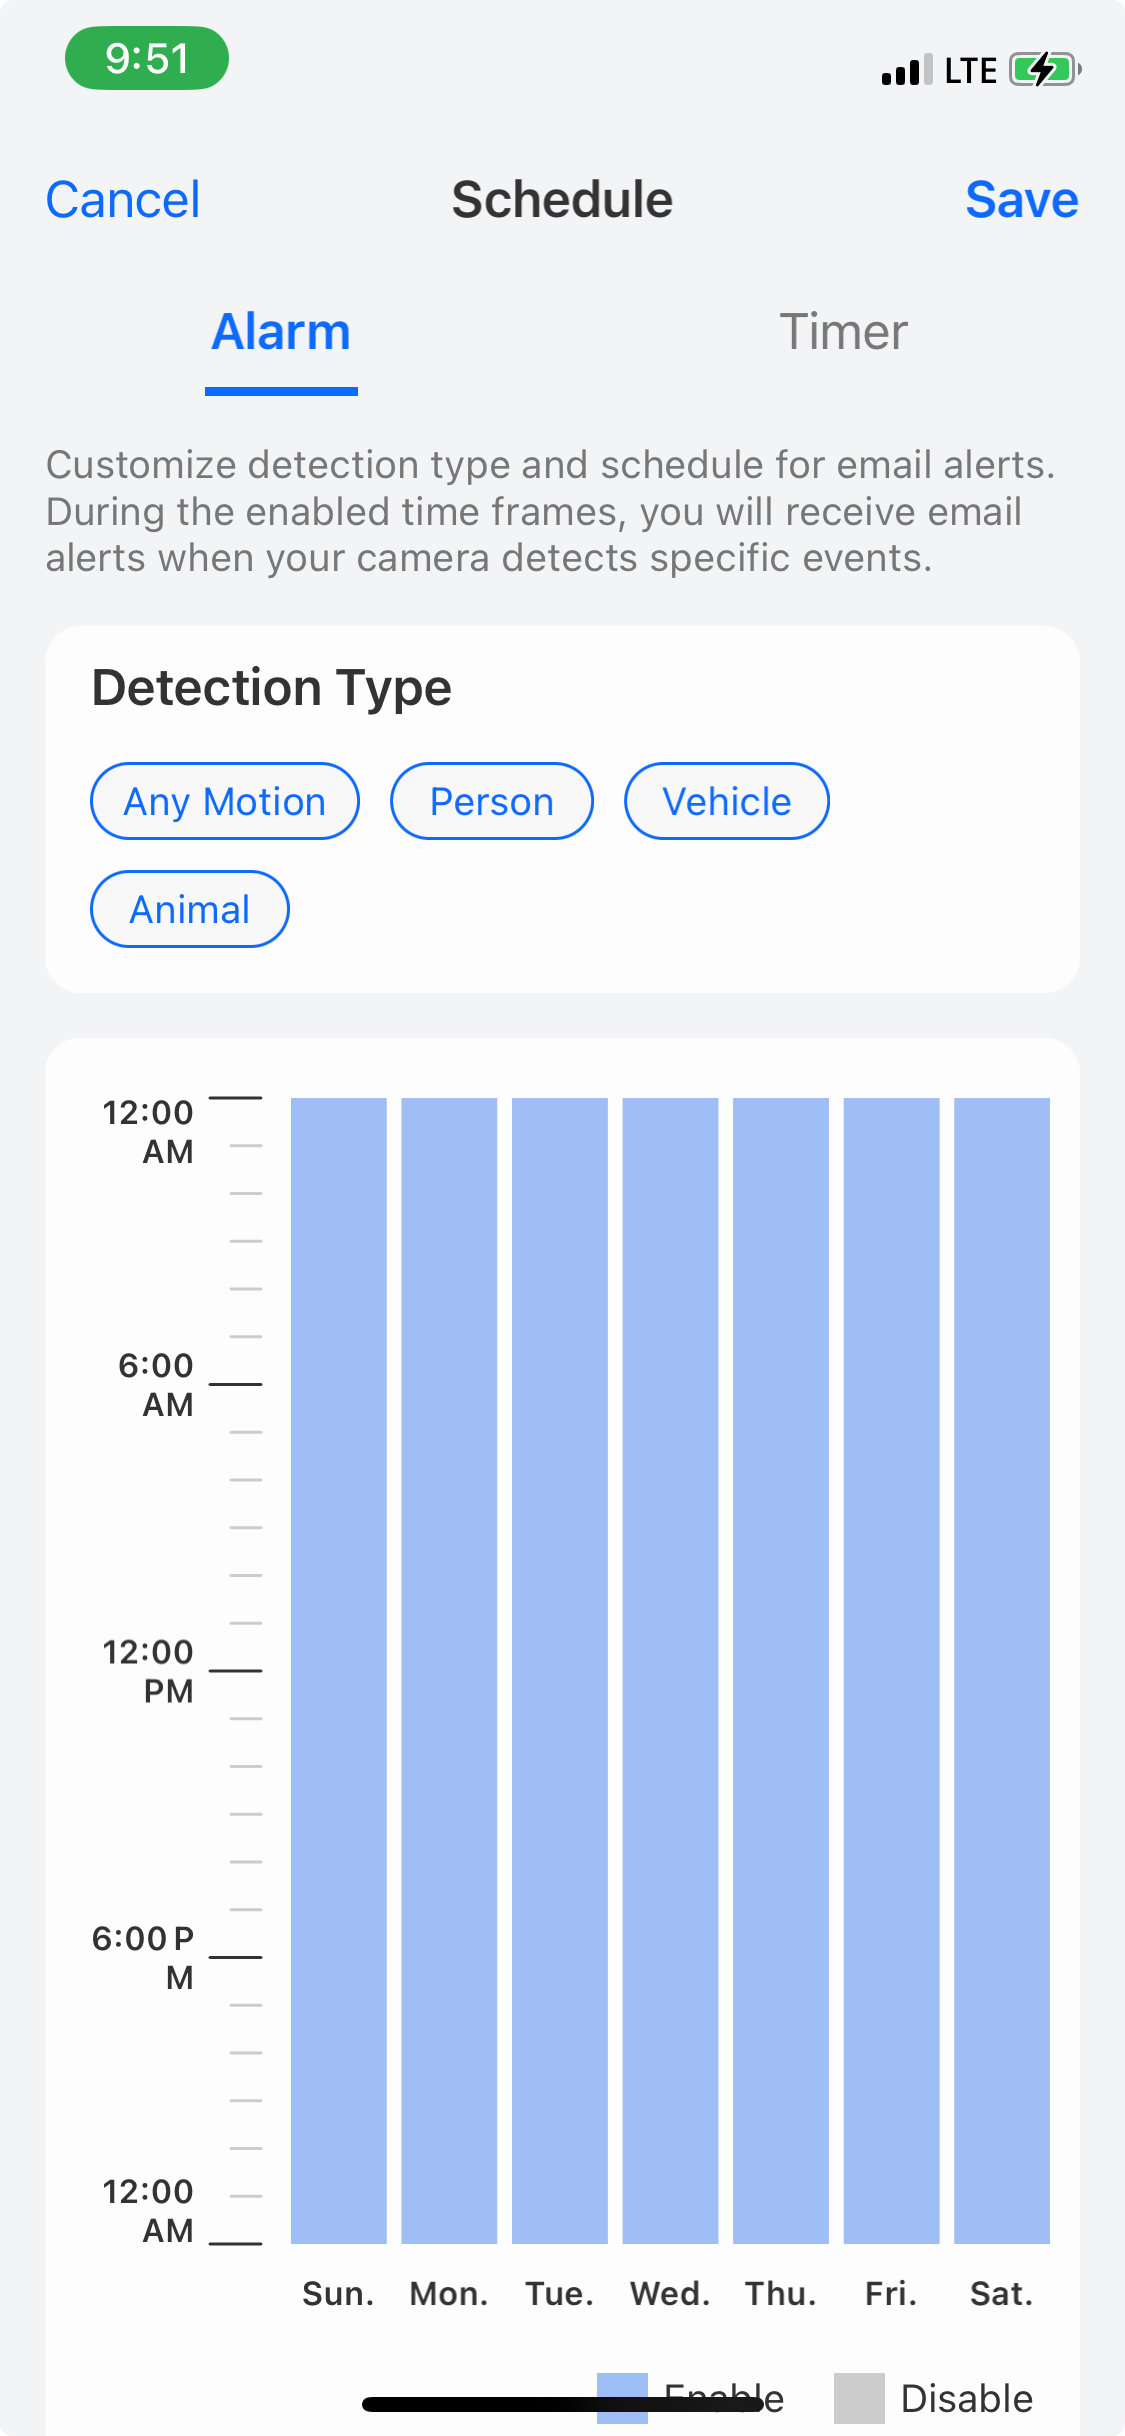
For email you need to configure an SMTP server, I couldn’t get gmail, yahoo or live to work for me, but luckily I was able to get Hotmail setup and working. Once setup you can set a schedule and set which type of events (any motion, smart detection person/animal/vehicle) you want to be emailed (same for push notifications). If there is anything missing I would have loved to be able to notify differently for different times of day. Finding out about a squirrel through the day is less interesting than the skunk in the middle of the night. Although, either way, I’m not getting outta bed … LMAO.
There’s an SD card slot, and if you don’t put one in, and none are included, you can NOT watch the captured video from the Reolink app. The SD card’s storage determines how quickly content get’s overwritten. The camera stores in H264 MP4s and records the mic as well, on the 511 this means a 2G card can store ~53mins of video before it starts over writing, and the 811 ~38mins, remembering though this isn’t constant recording, it’s even driven. So to give yourself a LOT more storage the cameras support FTP (or FTPS, not SFTP) and once a recording is done the video and picture are uploaded to the FTP server. This works VERY well BTW. You can setout a schedule for when events are recorded and can decide if you want to record any motion or only smart detects.
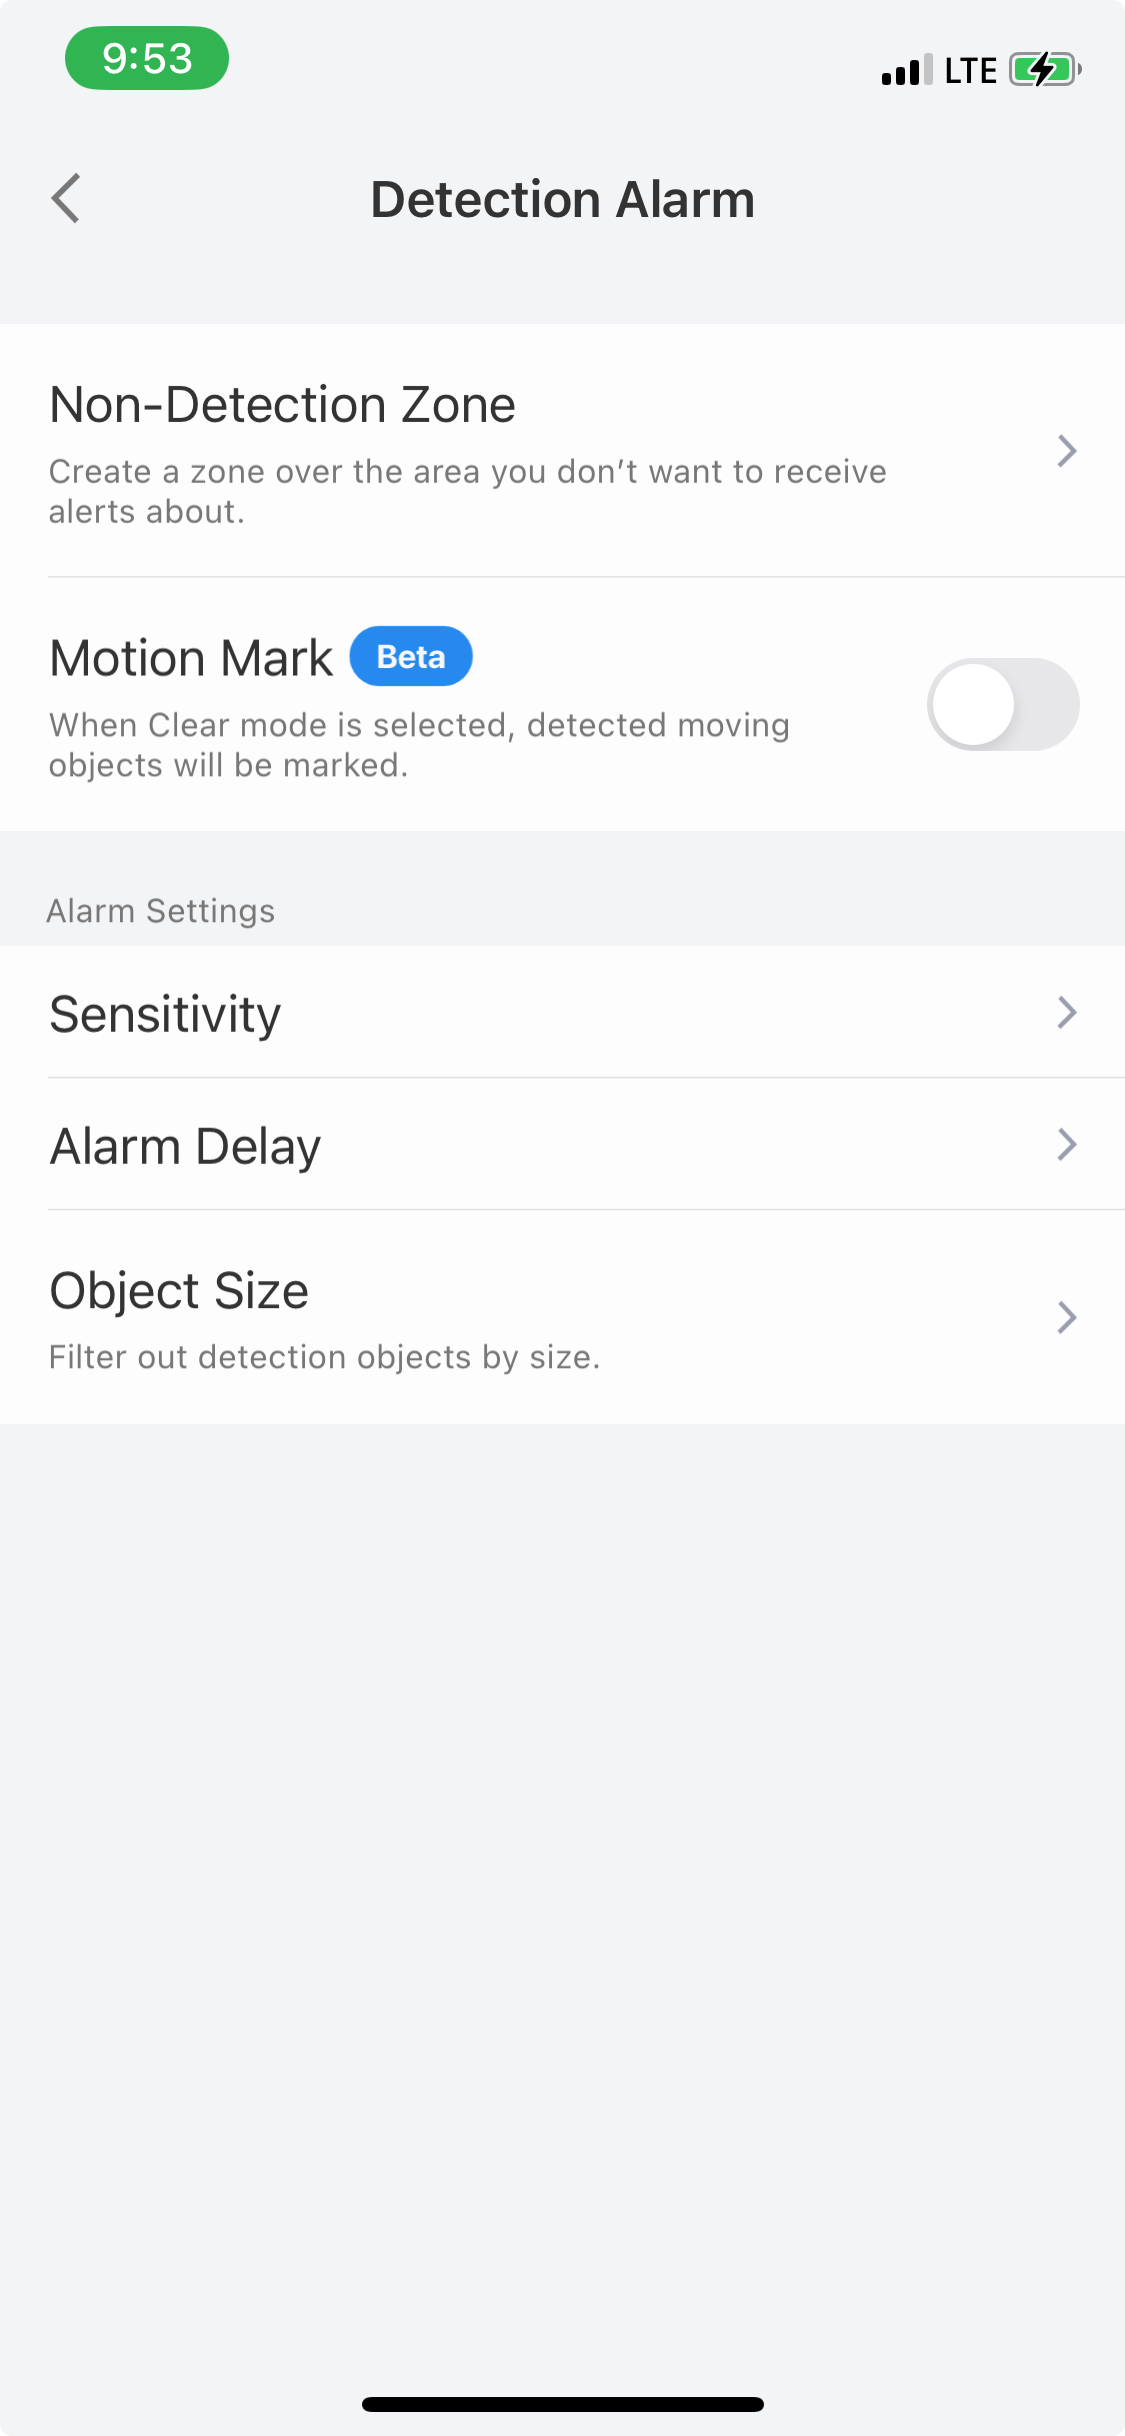
So how this camera works is it detects motion. You can control how sensitive the camera is on motion detect. You can also create a “no detection” zone to ignore motion in. Once motion is detected it is recorded. From there the camera uses “AI” in what they call smart detection to look for a person, animal or vehicle. If you dial your sensitivity down too low, the camera will see nothing, motion detection is the starting point. You can also control the size of the object (for smart detection) as well as the accuracy of the smart detection. You can use smart detection to determine if you are notified by email or push. You can turn notification on/off the schedule for both push and email. Think of smart detection as kind of filter for notifications for motion detections (or can be used that way). For the 1212 for example, if I had chosen to keep it, I would have had to disable notifications for motions and ONLY be notified for smart detections, the sensitivity on motion was that bad.
All in all, the smart detection works pretty well. Motion detection on the 510 was very good, jury is still out on the 811 (so far it’s not as bad as the 1212 but not as good as the 510 either), and the 1212’s motion detection was impossible to find a combination of seeing nothing and seeing everything. Tuning this is very important to insure you aren’t drowning in frivolous notifications, or you would miss the ones you actually want to know about.

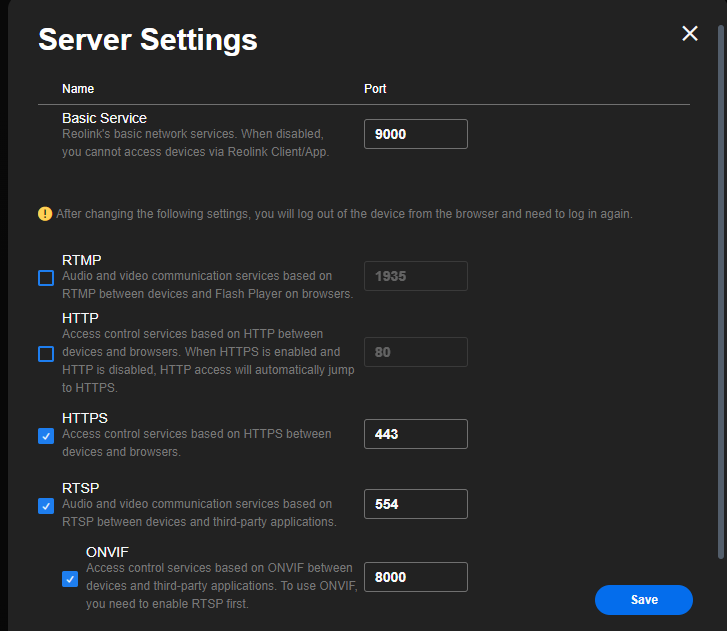
So at this point you are 100% within the Reolink ecosystem. And for some you just might be done … But if your not and you want to see just how much more you can do with your camera … On we go. So the starting point is to download the Windows/Mac app. By default the camera’s web interface as well as industry compatibility (called ONVIF) are disabled. Using the Windows/MAC app you can enable it. The Windows/Mac APP BTW does NOT receive any form of notifications … Start the app, click on Network, Advanced, Server setup and here’s where they hide the magic

ONVIF is an industry standard that allows other NVRs like iSpy, Frigate etc and other apps to talk to your cameras. I played a little with frigate but found it VERY time consuming to get working even a little.
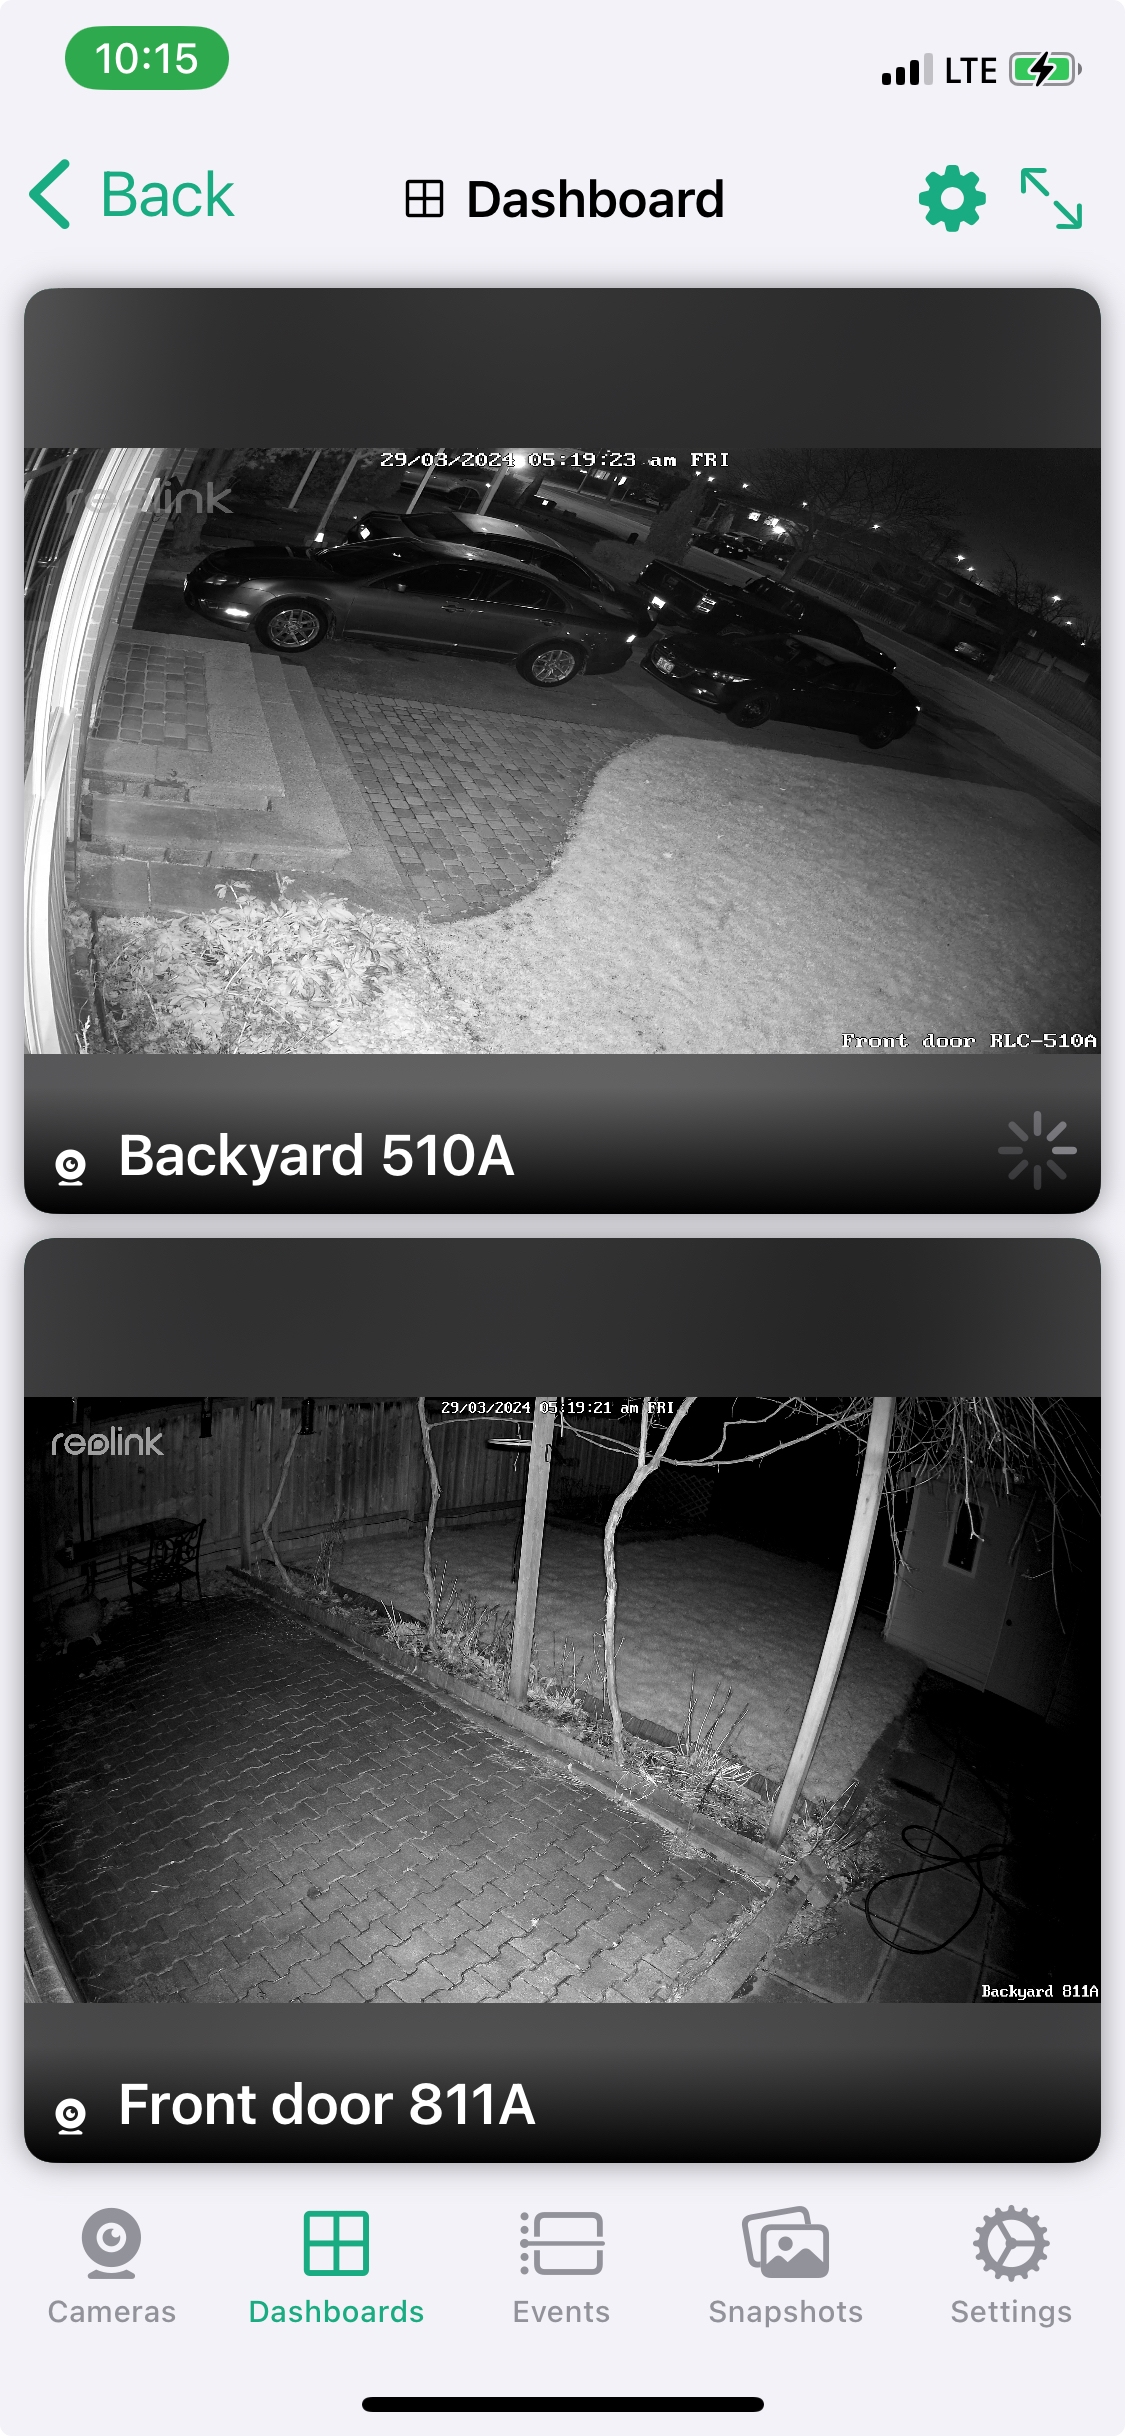
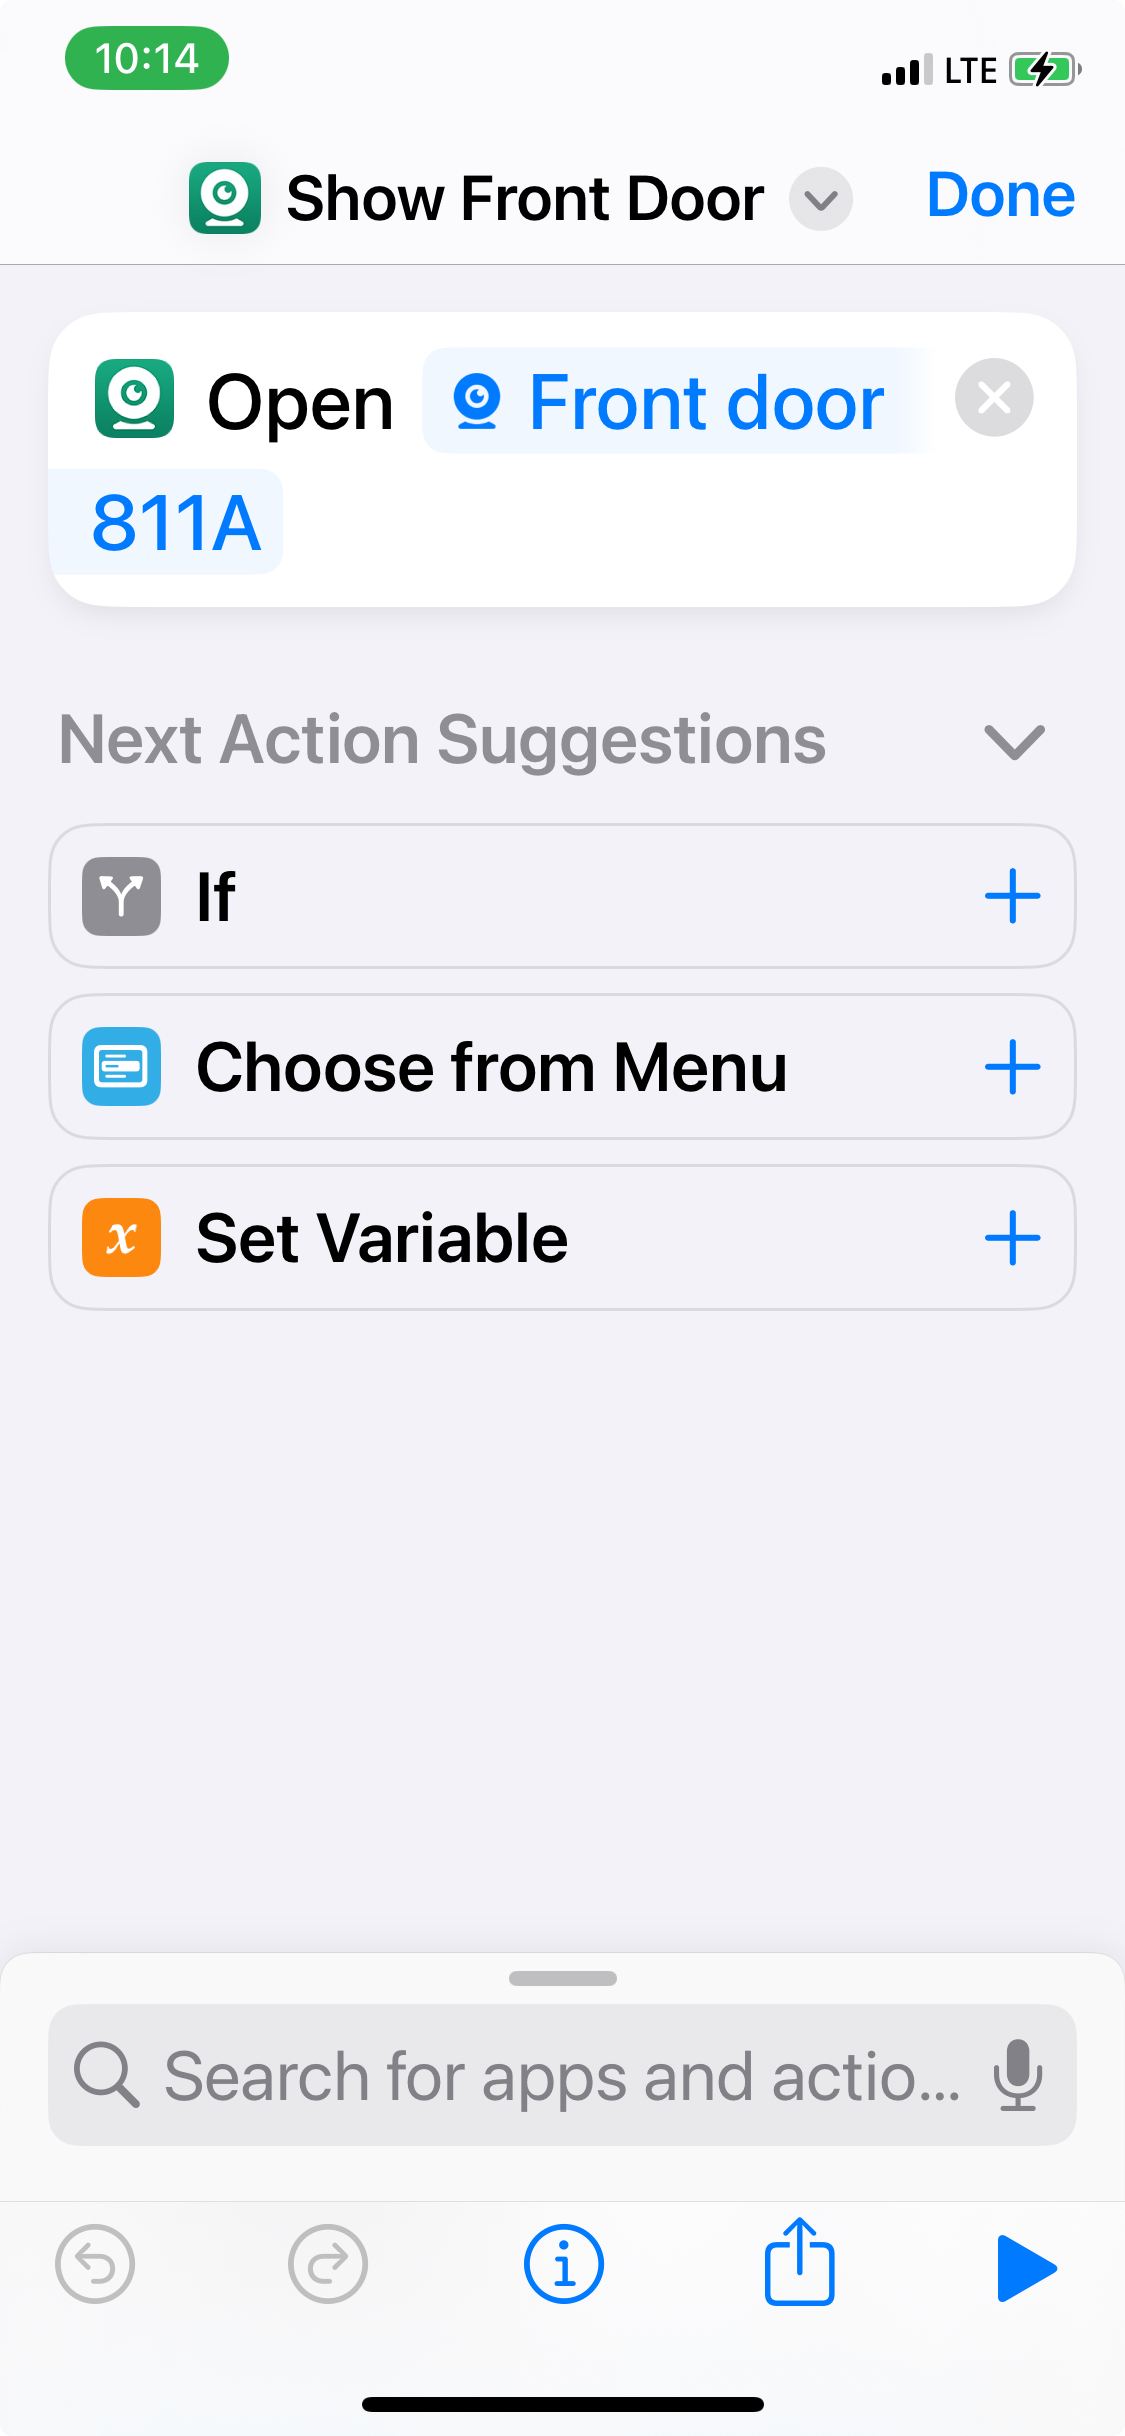
However, I found a great iPhone/iPad app called IpCams that even the free version lets you see the cameras in a dashboard. Additionally, you can use Apple shortcuts to setup SIRI to say, for example show me the front door!
Physically the 811 is a more solid mount, solid metal and you adjust it with a pair of allen keys, one on the neck and one on the stem. Amusingly the two are not the same size but they only provided one size allen key? WTF …

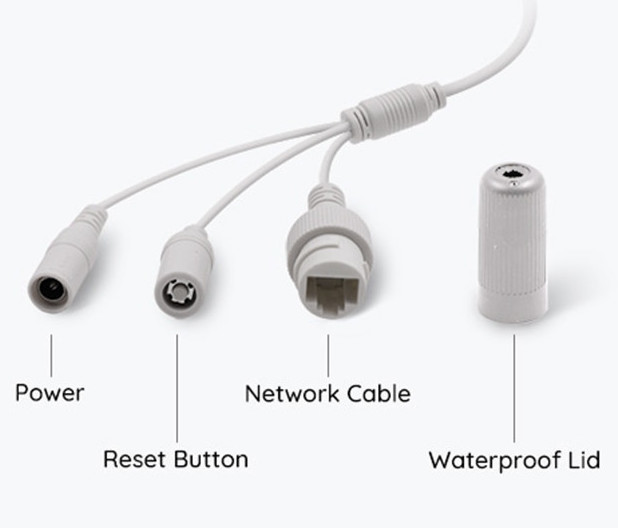
The one thing I REALLY don’t like about both cameras is they have this bizarre pigtail on the end with three wires coming out, ethernet, reset and power. They have provided a reasonably ok waterproof cover to go around the ethernet cable. I still would not want to hang this in a way water would run down the cable and straight in … No idea what they were thinking about this … They all do have covers over them, so I guess there is that?
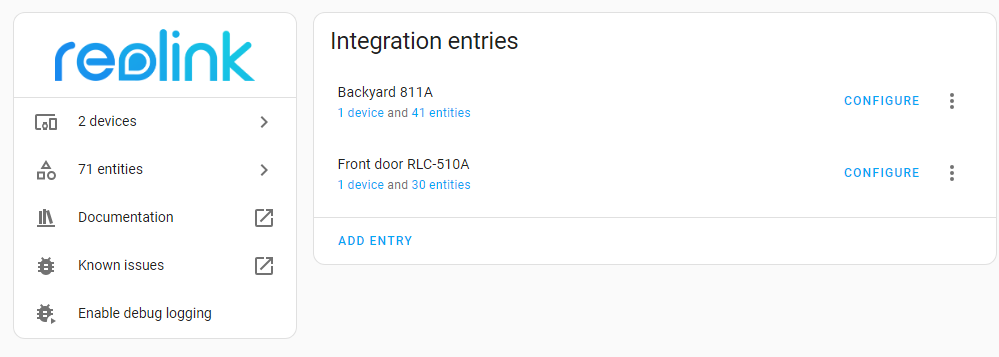
How everything plays together nicely can make a huge difference in potential! Fortunately, right off the bat there was a Reolink integration for Home Assistant and lots of potential shows up for triggering on events from the Cameras etc. You can control the light on the camera etc. I’ll update this post when I figure out useful things to do with this 😉
If your cameras were to go offline for some reason, died, stolen, cut cable whatever, you kinda wanna know … So to take care of that I added a simple ping test on Zabbix. iSpy can also notify on source disconnected as well.
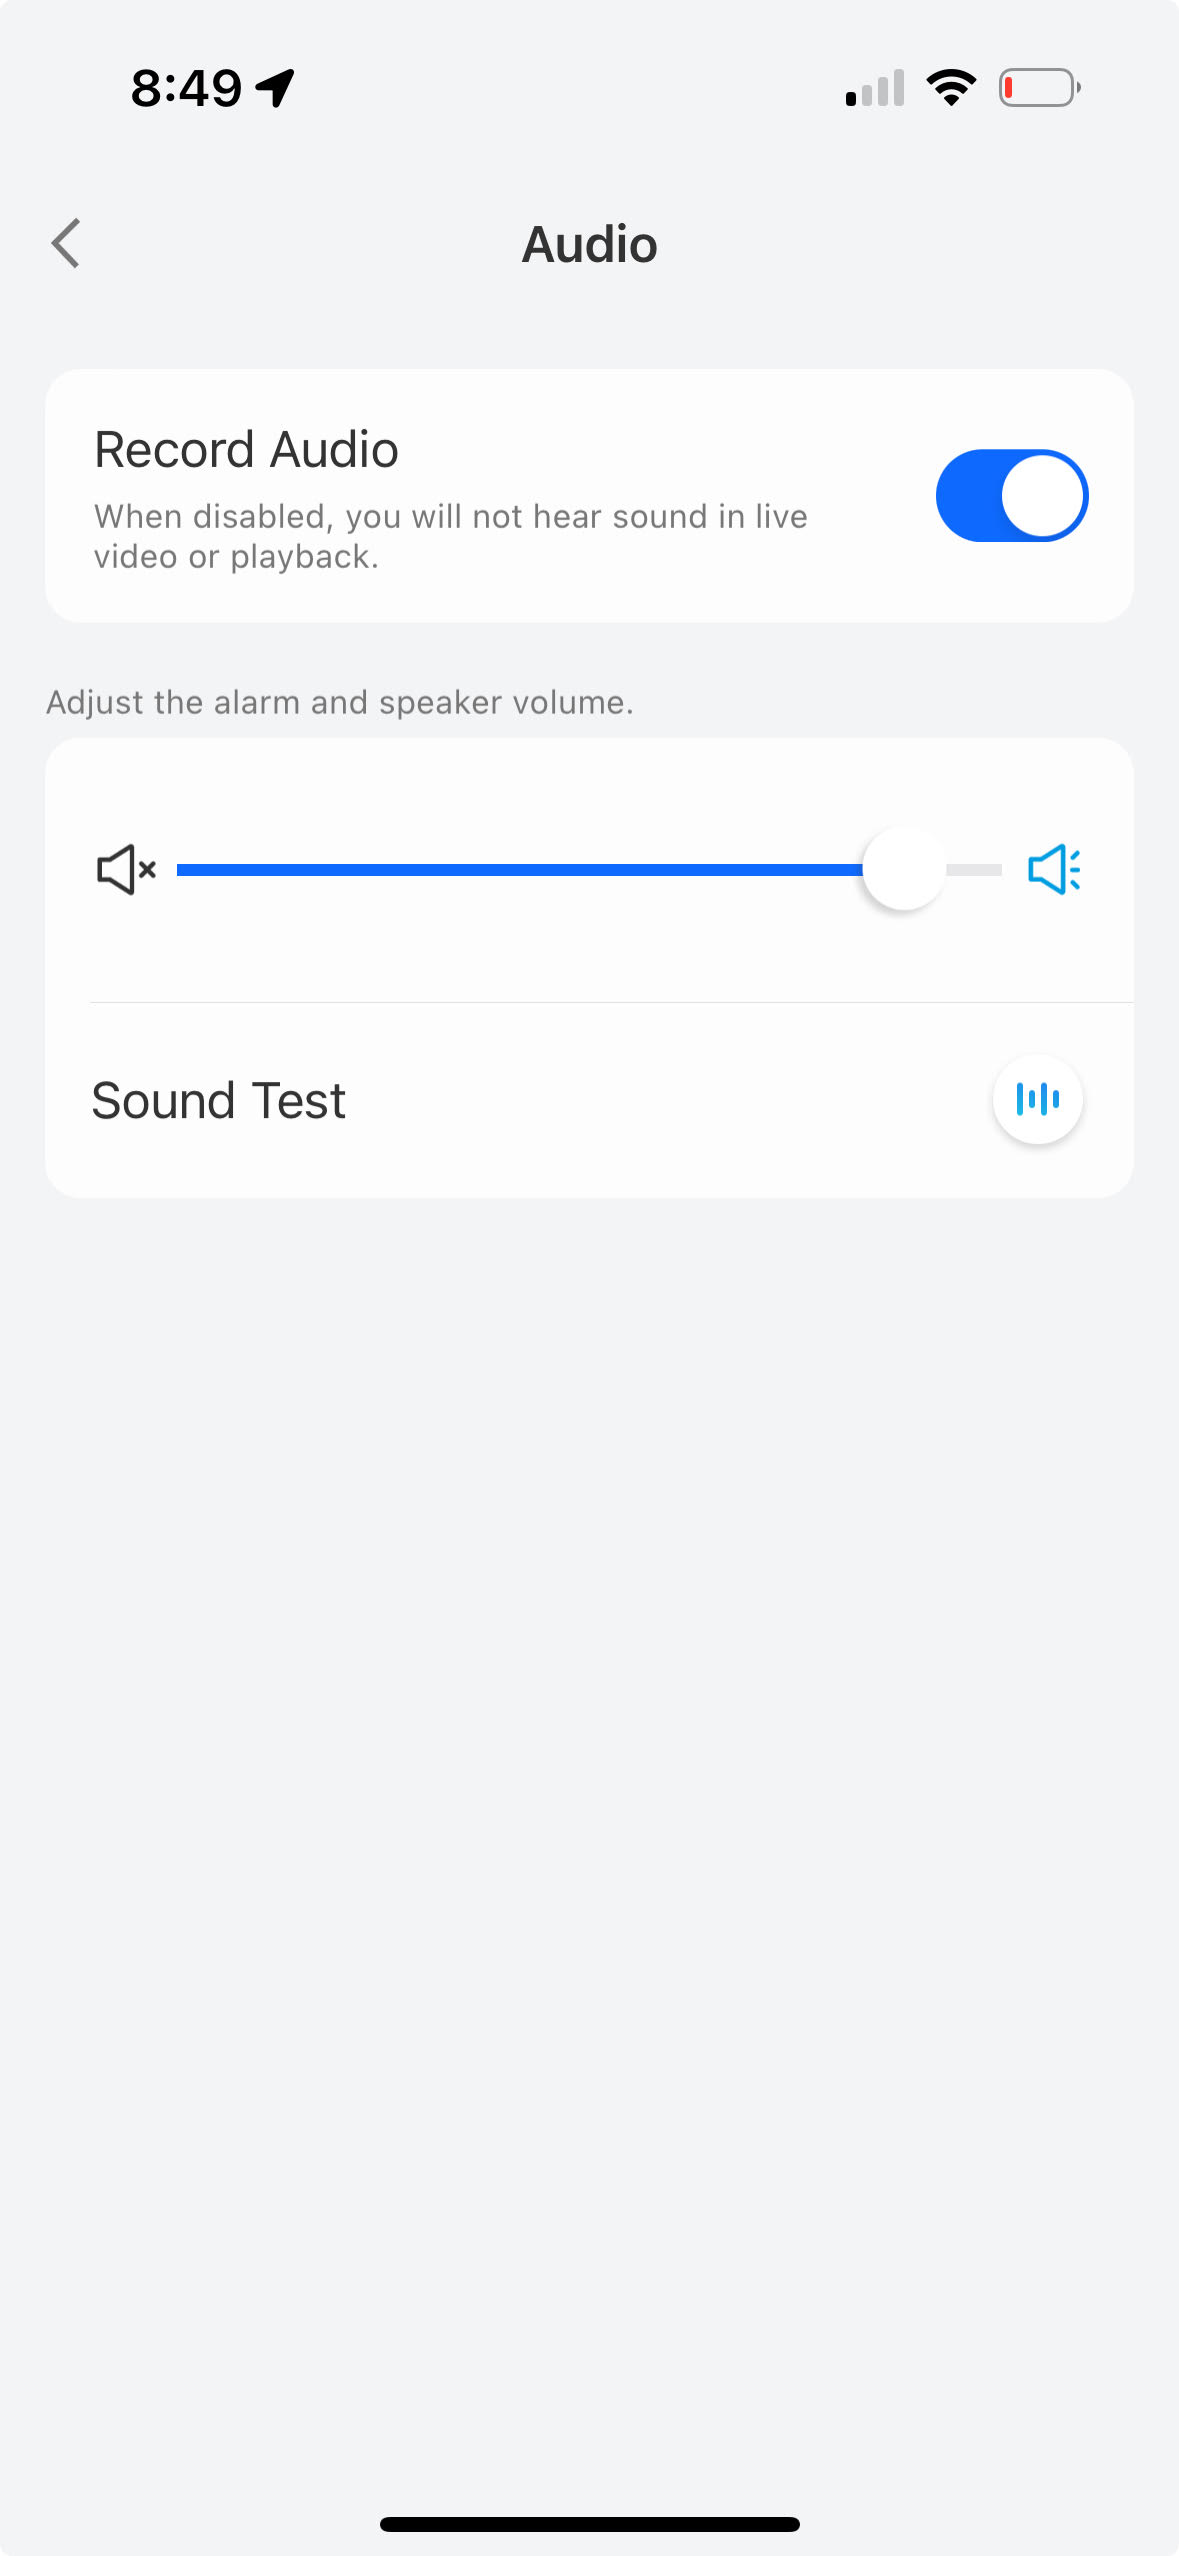
I discovered, by default, the Reolink cameras do NOT record audio. You can change this simply within the Reolink app, on a per camera basis.
And with that I have a working system. I’ll see if I can live with the 811A …
Reolink 1212A mini review
This is going to be an uncharacteristically short review, in spite of the outrageous amount of time spent with and on this camera. I bought this camera after I bought the 510A, which will be a future post because it had a security light and was much higher resolution. I have had no end of issues with this camera. And while all of these could be fixed by firmware updates, I can’t keep an unusable camera, and that’s where it is at present, in hopes a firmware update may come. So the issue with this camera, and I have tried it in numerous locations to rule that out is motion sensing … I could not find any combination that either constantly detected, or missed everything. Reolink’s support has been good but there response was to disable motion alerting and only use smart detection, but the issue is, motion detecting is how the camera records, and how the camera turns the light on. So constant detection means the light goes on and off regularly pissing off the neighbors. Dialing down the sensitivity helped, but then it just only saw major stuff and would miss animals for example. So how bad was the detection? Well … it triggered on snow, rain, shadows a branch moving in the wind … At one point the camera stopped doing smart detection. reboots didn’t fix it, leaving me with only one choice, a full restore back to factory defaults. This resolved the issue, however, really? So after trying two different outdoor locations I brought the camera inside … the room was unoccupied, not a lot of airflow, but had a window … Low and behold, yet again it triggered on a shadow that came in through the window.
To add a little credence to this I replaced the 1212A with another camera (once with a 510, and once with a 811A) and in both cases, in spite of the new camera being in the exact same location as the 1212, neither had the same issues of constant mis detection.
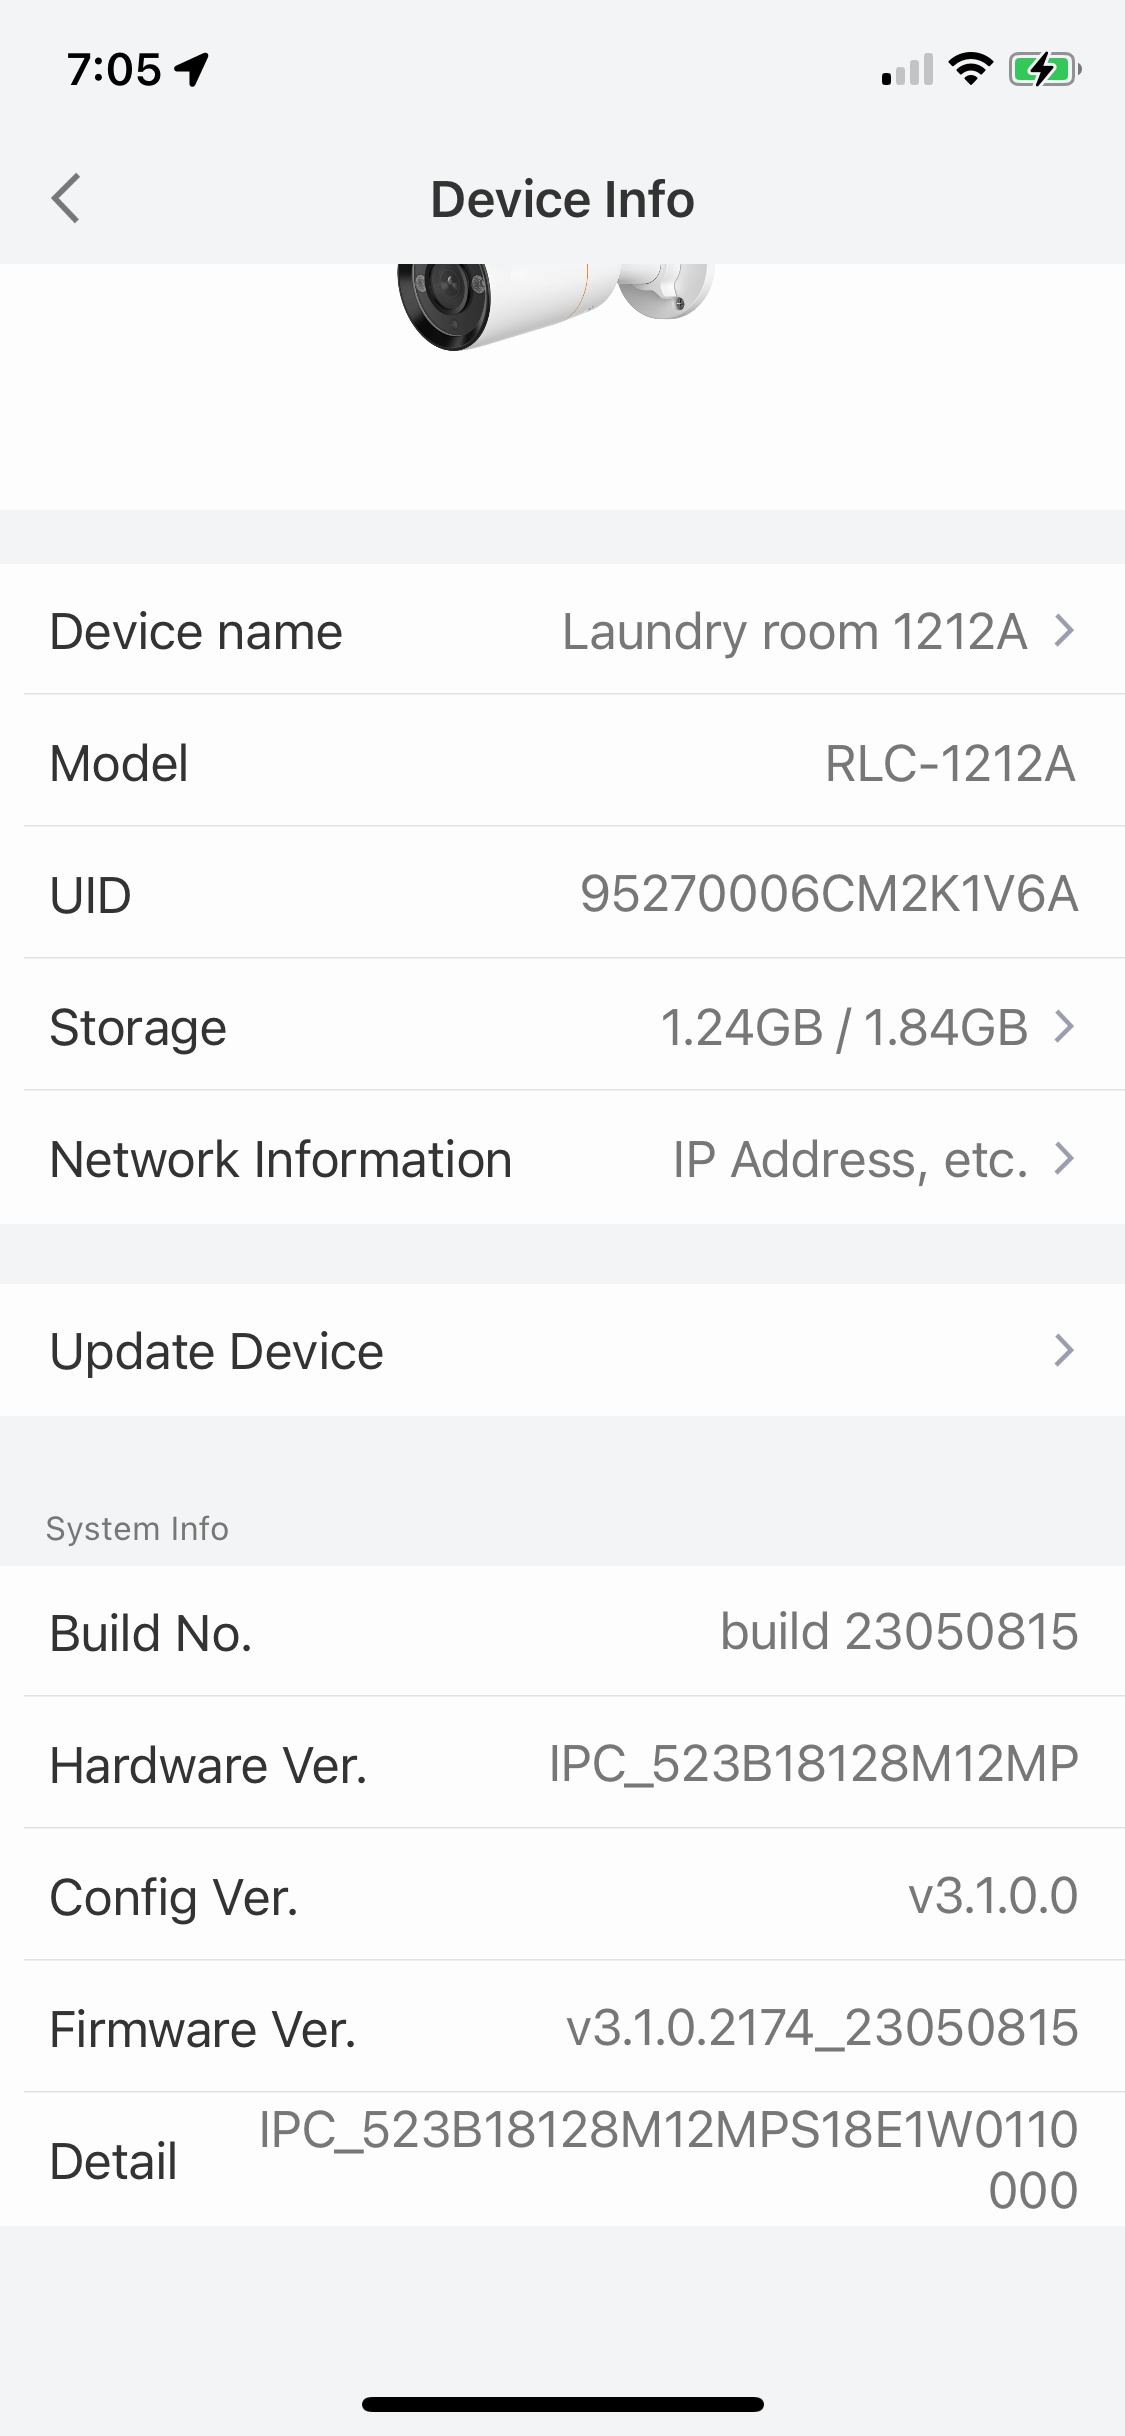
While it is entirely possible I have a defective unit, I really don’t think so. I would guess that Reolink have not adjusted there algorithms for the much higher 12Mp camera. And with that, this one goes back, thanks to Amazon’s generous return policy! For reference here are the details of the camera. Here’s the details as tested.
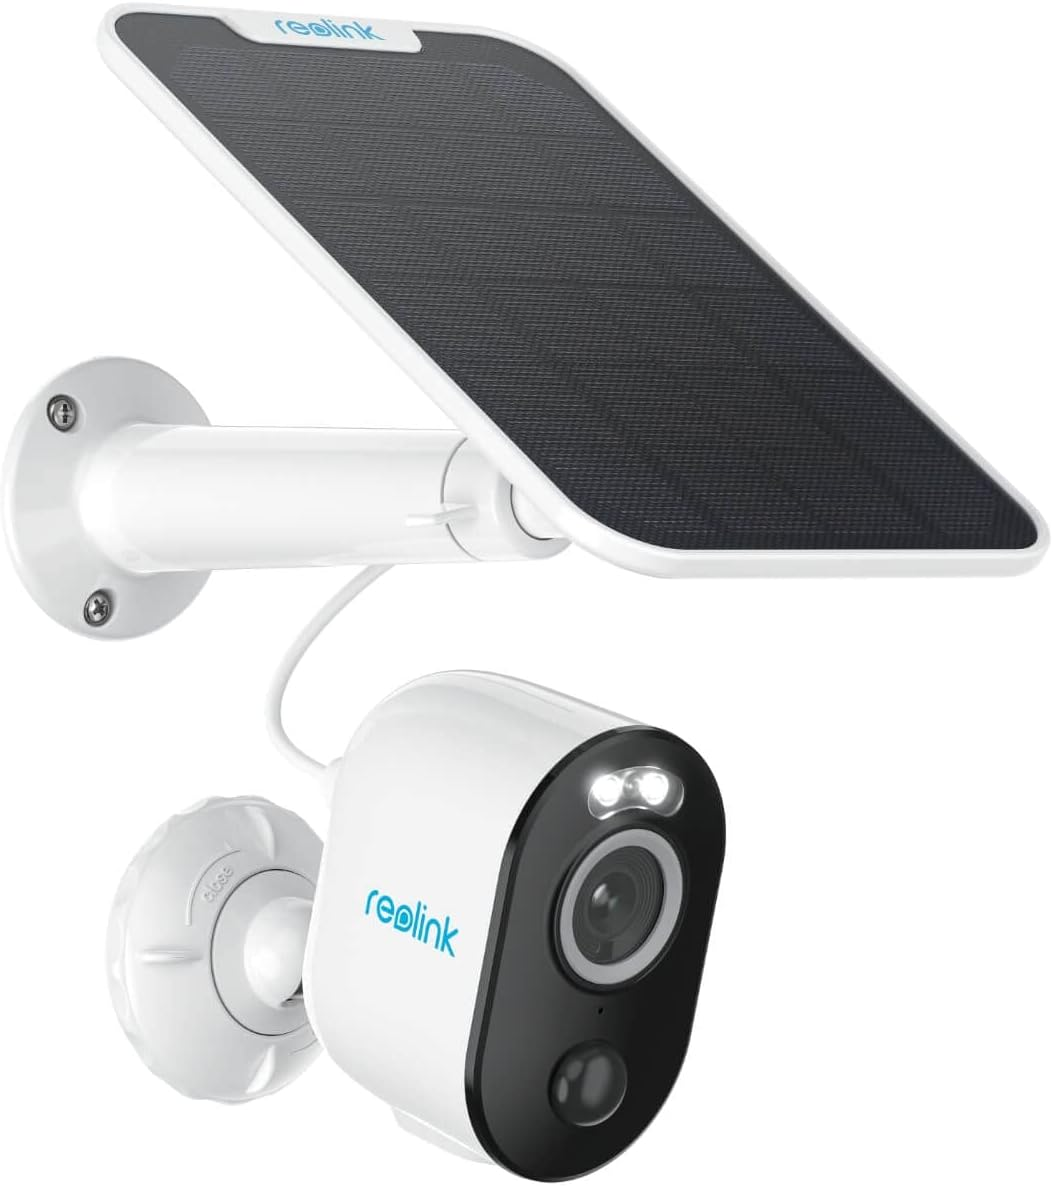
Reolink Argus 3 Pro solar security camera
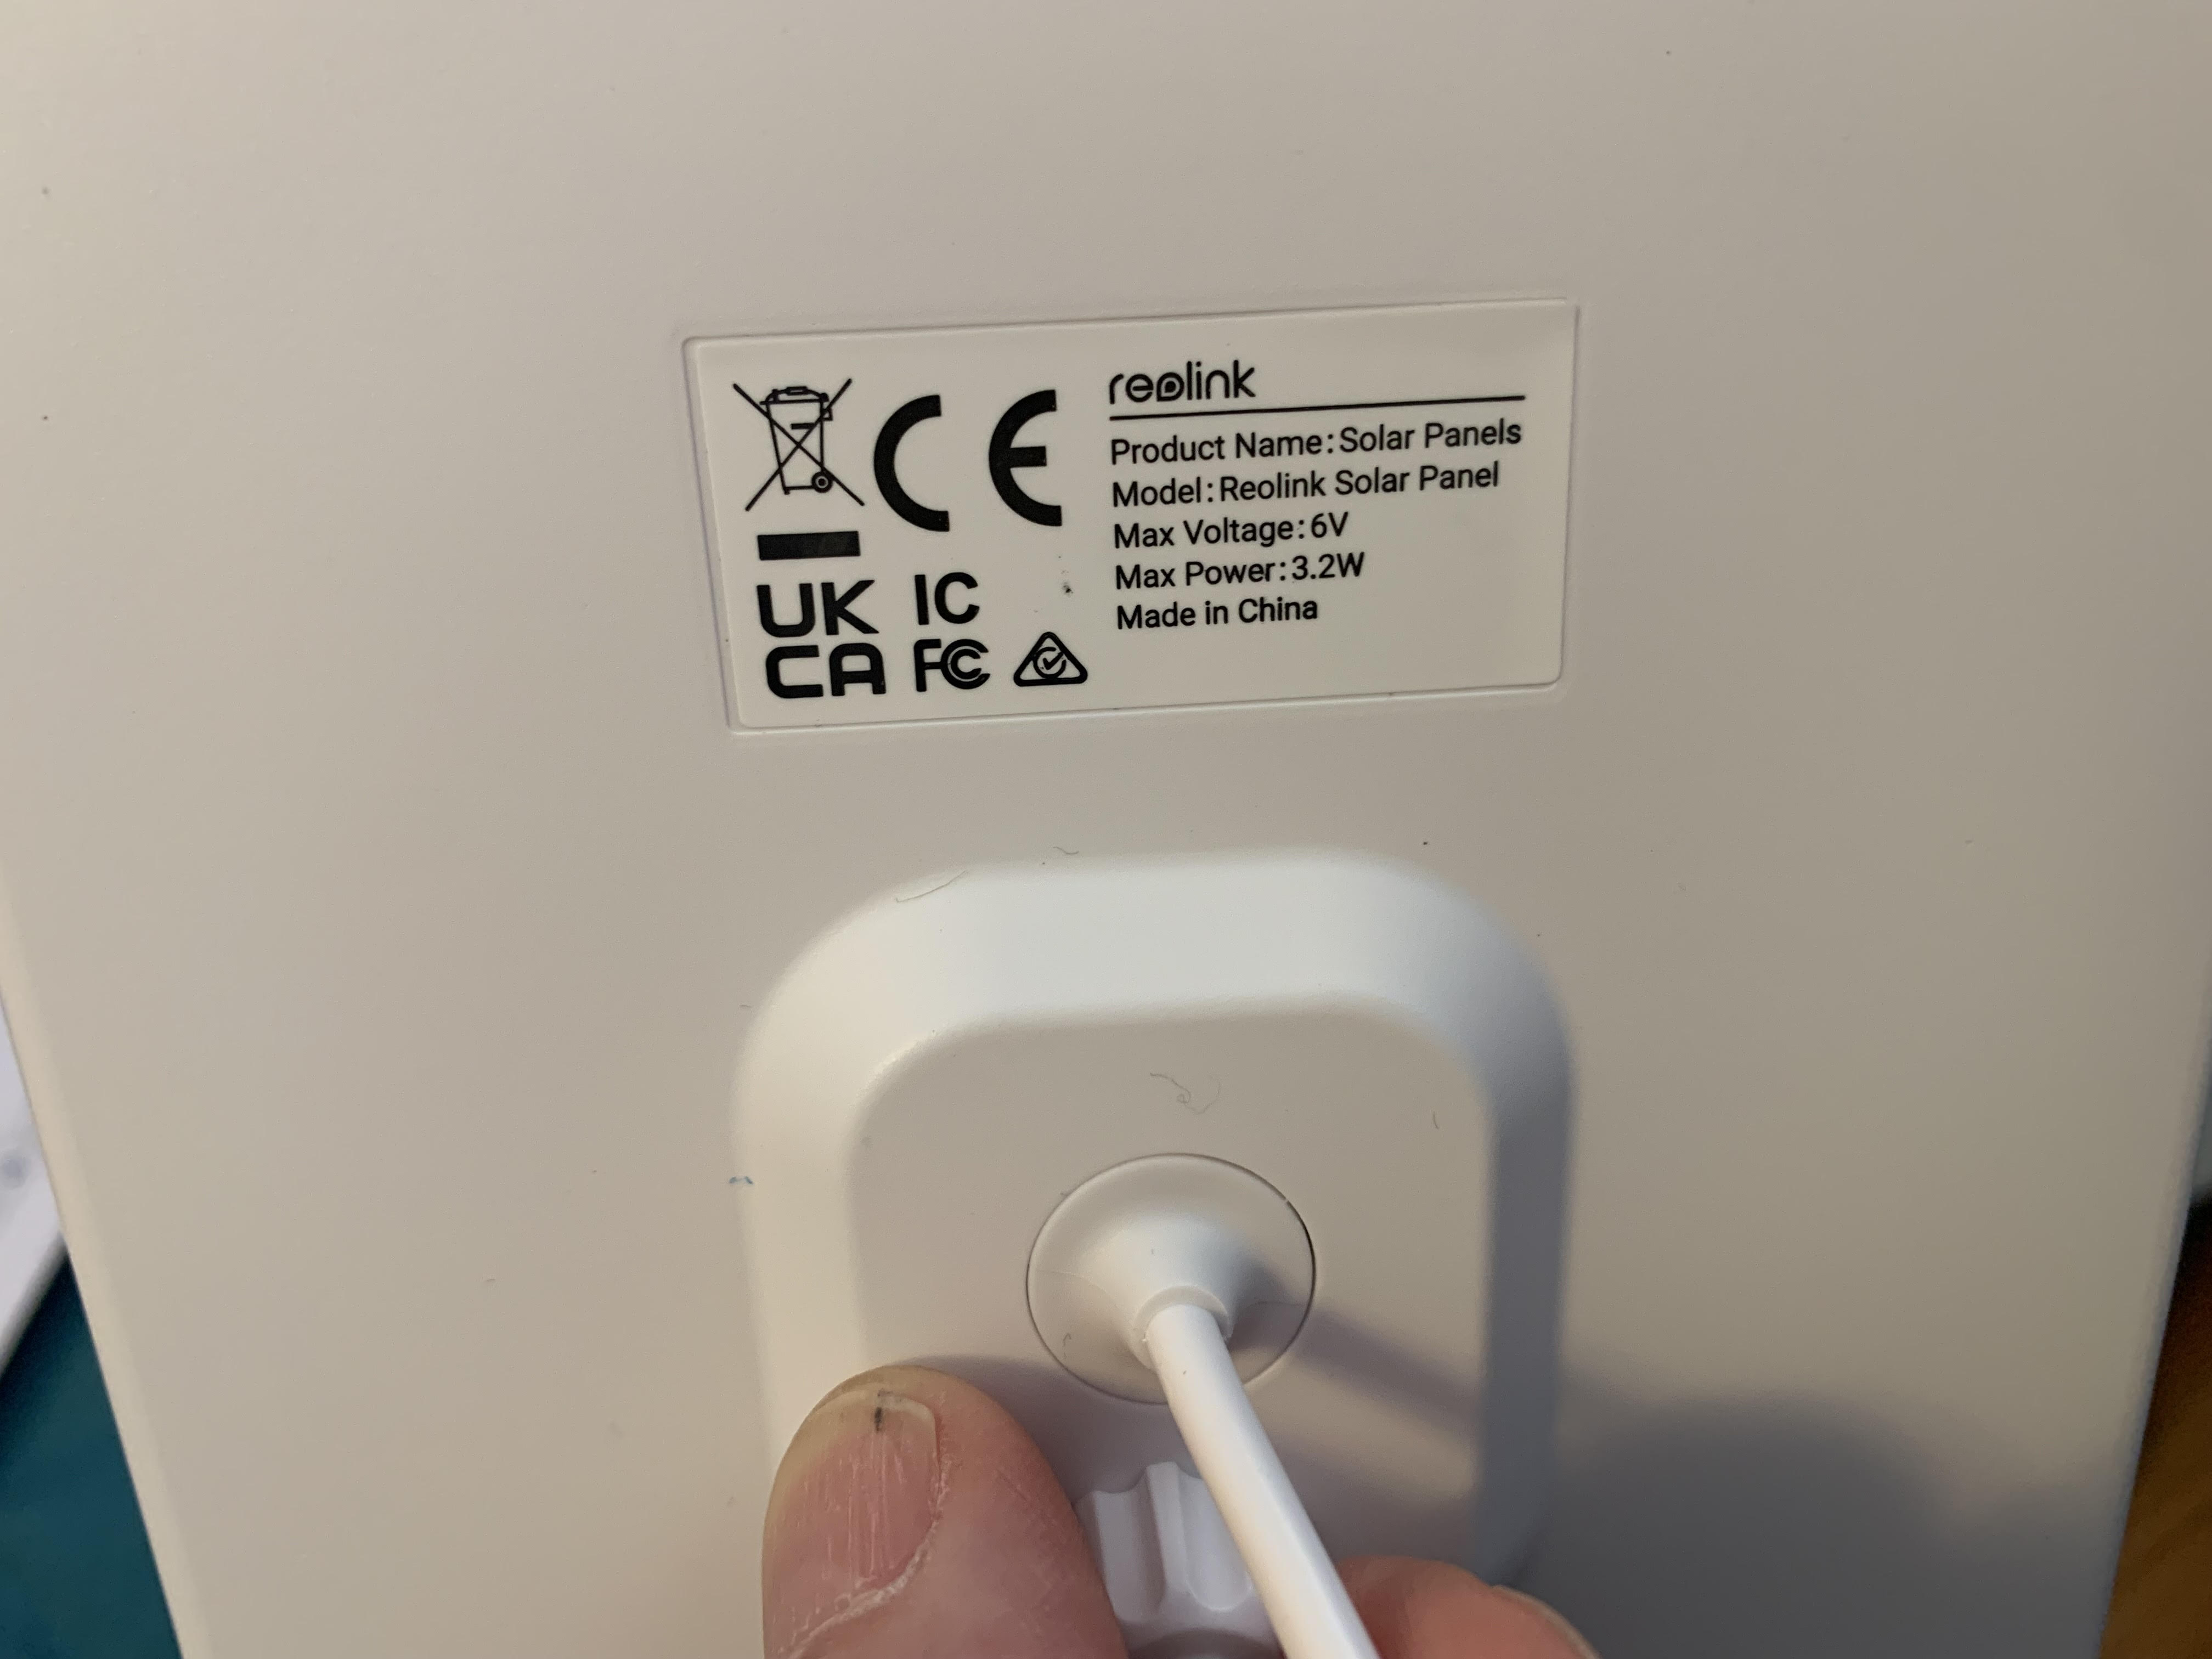
Ok, security camera take 2 … The Dekco I last reviewed missed the mark with no light and terrible night time vision … So based on a recommendation from my buddy Lance I looked at Reolink. The Dekco cost me $67.79, and the Reolink $153.67 so a BIG jump in price. Looks wise I would have preferred the black over the white, but I was impatient and the white was more readily available. Looking at the camera you immediately notice the lack of antennas for the WIFI, and this translated directly into a noticeably weaker WIFI signal compared to the Dekco in the exact same spot. The Reolink clearly identifies the solar panel as 3.2W, no clue how big the Dekco’s was.
The mounting bracket for the camera, which includes a strap you could use as a trail cam, is more solid than the Dekco one, but it’s also a LOT more fidgity, with a short thread to the base that’s not easy to get in, and a knobby edge that catches on things as your trying to tighten it. The solar panel mount is solid and well done.
The camera includes a light you can choose to disable that can be used like a security light. The light also improves the night time vision. In addition to the improved night vision the camera includes the ability to send you an email with the pic from a motion trigger. Setting this up was challenging, but we will get to that in a sec … Initial setup was relatively easy, download the app, and point it at the QR code … BUT, I got caught and wasted a good amount of time because as well as a tiny QR code on the back of the camera there is a much larger barcode on the side of the camera and I was scanning that instead and the app didn’t give any hints to NOT use the bar code. Once past that little annoyance you add the WIFI configuration and off you go. This camera supports both 2.5 and 5GHZ.
Setting up email requires you to know an SMTP server, which might be challenging for some. I tried Yahoo and gmail which they recommend, both of which didn’t connect at all. I suspect my account is not setup to allow it. I tried mailgun that I use and that got dubbed as spam by gmail and thrown into the spam bin. I couldn’t get it to work with my MS IIS SMTP server because the camera insists on using a userid in the form of an email address and password to authenticate, but I couldn’t figure a way to set that up on IIS, and it would not allow anonymous. Finally I got it working with SMTP2GO which is free. I still get a warning from gmail questioning whether it’s safe, but the mail at least comes through.
Now comes the question, what happens if your camera is offline when an alert happens. Now this is where it gets REALLY BAD. First of all you will be oblivious to it being offline. Unlike my WIFI thermostat that informs me when the thermostat hasn’t checked in, you get nada … zippo … zero … And any motion triggers that happen while the camera is offline go into the bit bucket, not to be retried when it comes back online. So your blind to the fact anything occurred. It is recorded and stored on the micro SD card if you know to go looking for it.
The camera worked ok other than the unreliable WIFI, ok motion detection etc. If they had only designed in an antenna … Ah well … next …
Dekco DC4L (super mini) review
I last reviewed the Dekco DC8L and while it was a good camera, good detection, few misdetections, it lacked some key features, namely any form of notifications other than push. And if the net or WIFI was down the notification went into the bit bucket. The main missing feature IMHO was email notifications. Honestly, if it had this feature my journey would have been done … Sadly, that was not to be … So this pair of cameras appeared in my searches. The price seemed amazing, functionality seemed good … As is so often the case the devil, as always, is in the details ..
It’s important to note, that Dekco redesigned this camera, but kept the same model number D4l. The changes they made are significant … The current version uses an indoor usb A cable/adapter to power it. Comments about a barrel plug are the previous version. Additionally, confirmed by Dekco, this camera no longer support ONVIF. Overall this camera is fine if you can locate the camera within the length of cable from an indoor outlet and can drill a whole large enough for the USB-A cable, or through a window. The DEKCO app does NOT support email notifications. The new version of the camera does NOT support the Cloudedge app. so overall this camera does not meet my needs, so thanks to a generous return policy from Amazon … off it goes back to the return pile.
iSpy review and camera wrap up
So now that we have some security cameras working time to investigate iSpy. Now I must say, when I first started this venture I didn’t understand how iSpy worked … and trying to get both iSpy and the cameras properly tuned at the same time given my misunderstanding was challenging …
So what is iSpy … it is a free to use for personal use network video recorder to work with security cameras. There is an open industry standard called ONVIF that allows interoperability, well somewhat.
Loading iSpy was easy, I had it up and running as a container pretty quickly under docker, but I quickly realized this was a REALLY bad place for it. iSpy is quite processor intensive and seems (at least on containers to be single threaded. This processor heavy is true even if your not doing detections. Even having someone streaming the cameras uses a good deal of processing power. So I moved the installation to a physical PC to avoid my container host getting bogged down. Again installing was easy, and under Windows it does seem to be multi threaded. I didn’t find iSpy under Windows 10 to be rock solid. So I loaded it up on Debian and that resolved all instabilities.
I decided to play a bit with it’s ability to use NVIDIA GPUs … I have a 1050TI, so I loaded up Debian but had issues with getting the NVIDIA drivers loaded. So I backed off to Ubuntu to give that a try. Getting that going was no small feat … I’ll bore you you the details to get that going … So the first step is to see if once Ubuntu is loaded the NVIDA card is seen, which it is, but no drivers are loaded:
lspci|grep NVIDIA
01:00.0 VGA compatible controller: NVIDIA Corporation GP107 [GeForce GTX 1050 Ti] (rev a1)
01:00.1 Audio device: NVIDIA Corporation GP107GL High Definition Audio Controller (rev a1)
- hardware is seen

cat /proc/driver/nvidia/version
- no drivers installed
So off to the NVIDIA web site to download the Linux drivers … The install is long, gives a lot of warnings but in the end it get’s the drivers recognized under Ubuntu:
jgalea@ubuntu-ispy:~$ nvidia-smi
Thu Apr  4 10:51:41 2024
+-----------------------------------------------------------------------------------------+
| NVIDIA-SMI 550.67                 Driver Version: 550.67         CUDA Version: 12.4     |
|-----------------------------------------+------------------------+----------------------+
| GPU  Name                 Persistence-M | Bus-Id          Disp.A | Volatile Uncorr. ECC |
| Fan  Temp   Perf          Pwr:Usage/Cap |           Memory-Usage | GPU-Util  Compute M. |
|                                         |                        |               MIG M. |
|=========================================+========================+======================|
|   0  NVIDIA GeForce GTX 1050 Ti     Off |   00000000:01:00.0 Off |                  N/A |
| 30%   26C    P0             N/A /   75W |       0MiB /   4096MiB |      0%      Default |
|                                         |                        |                  N/A |
+-----------------------------------------+------------------------+----------------------+

+-----------------------------------------------------------------------------------------+
| Processes:                                                                              |
|  GPU   GI   CI        PID   Type   Process name                              GPU Memory |
|        ID   ID                                                               Usage      |
|=========================================================================================|
|  No running processes found                                                             |
+-----------------------------------------------------------------------------------------+
Now with this loaded and supported your ready to head over to your iSpy server configuration for playback where you can turn on the GPU. And immediately you can see the GPU doing STUFF using the nvidia-smi command from above.

On my NVIDIA 1050Ti with one camera on max res and max FPS it used about 30% of the GPU. You could immediately see a decrease in CPU use. 2 cameras bumped that up to 60% … I did play a bit with GPU use under Windows but ran into issues with the hardware I had, nothing to do with iSpy, but did see about the same GPU use as in Debian. Of course, getting it going under Windows was a LOT easier.
The most confusing part about iSpy for me, was to realize that iSpy has it’s own detection of motion. I assumed it was triggering off the cameras detection, which it does not (by default). Simple detection within iSpy catches so much it’s useless for notifications. It’s less of an issue to have iSpy doing excessive recordings, would always rather have more than less. So this, for me becomes problematic for iSpy notifications. You can however configure iSpy to detect and notify if a camera goes offline (or stolen ;). I found one way to mitigate this is to use a schedule and change the sensitivity to higher are night.
So there are a list of cameras iSpy support, and instructions on how to setup Reolink cameras from iSpy. There was also instructions from Reolink on how to setup their cameras in iSpy. Sadly, both documents, IMHO are WRONG. So I’ll give you my take. I’m going to use my Reolink 510A and 1212A for the purpose of this post … So by default Reolink do not enable ONVIF or RTSP. So install your cameras, get them on the network and either load the Reolink for Windows app or logon to the web interface for each camera. The Reolink Windows app, or the iPhone/Android app can tell you the IP of the camera. Click on the network tab and then click advanced and slide down until you see server settings. Here you will see how to setup ONVIF.

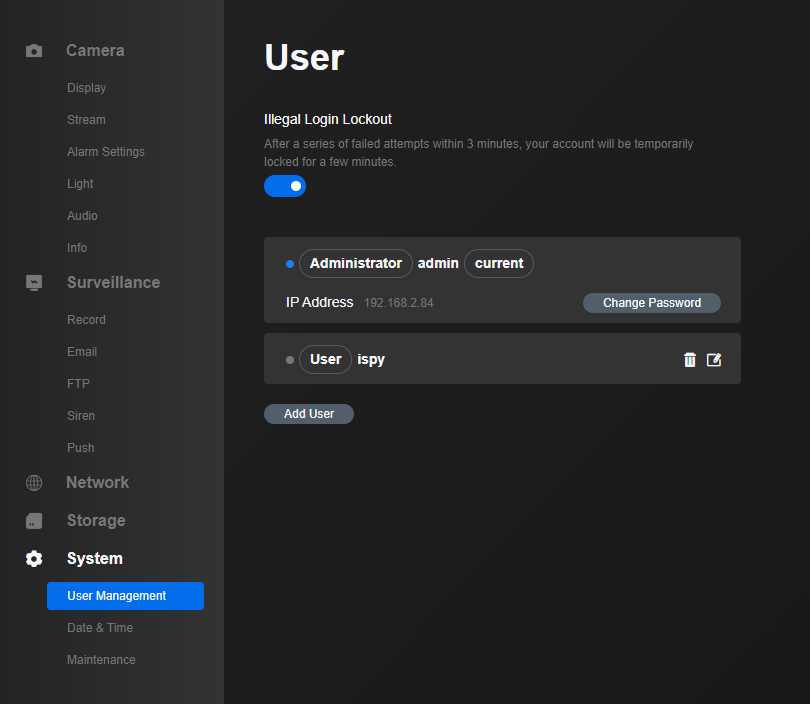
Now if you wanna get paranoid you can setup a read only used for the cameras to insure nothing on the camera gets changed by iSpy.
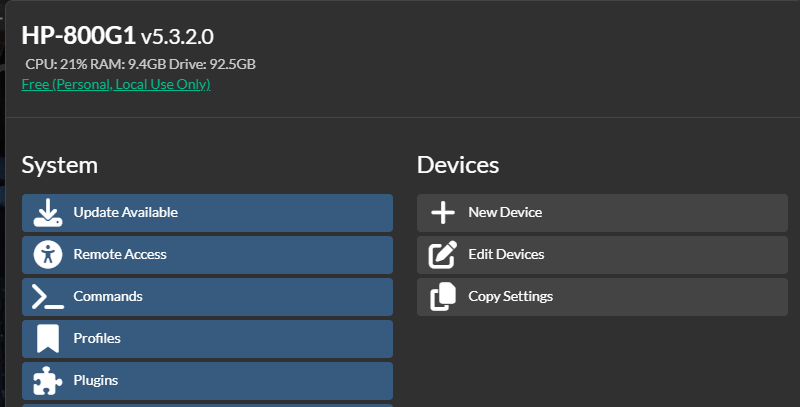
Ok the cameras are now setup, iSpy is loaded and your ready to go … So now logon to your iSpy interface and click the button next to the lock icon in the top left corner, then click new device.

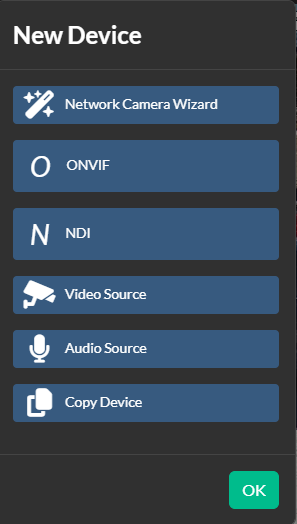
Now click the plus sign

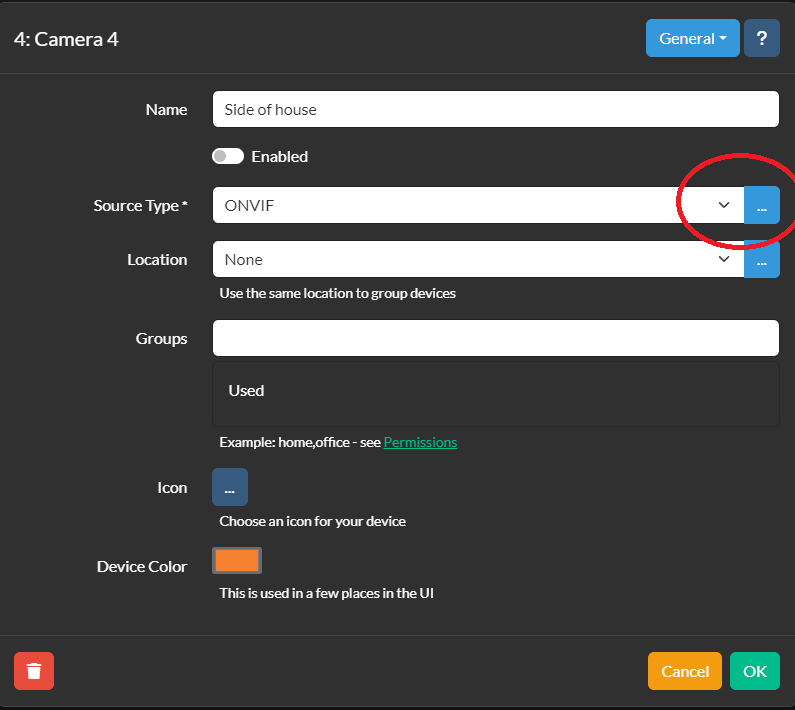
Select an ONVIF decide and then click the three dots to configure the camera
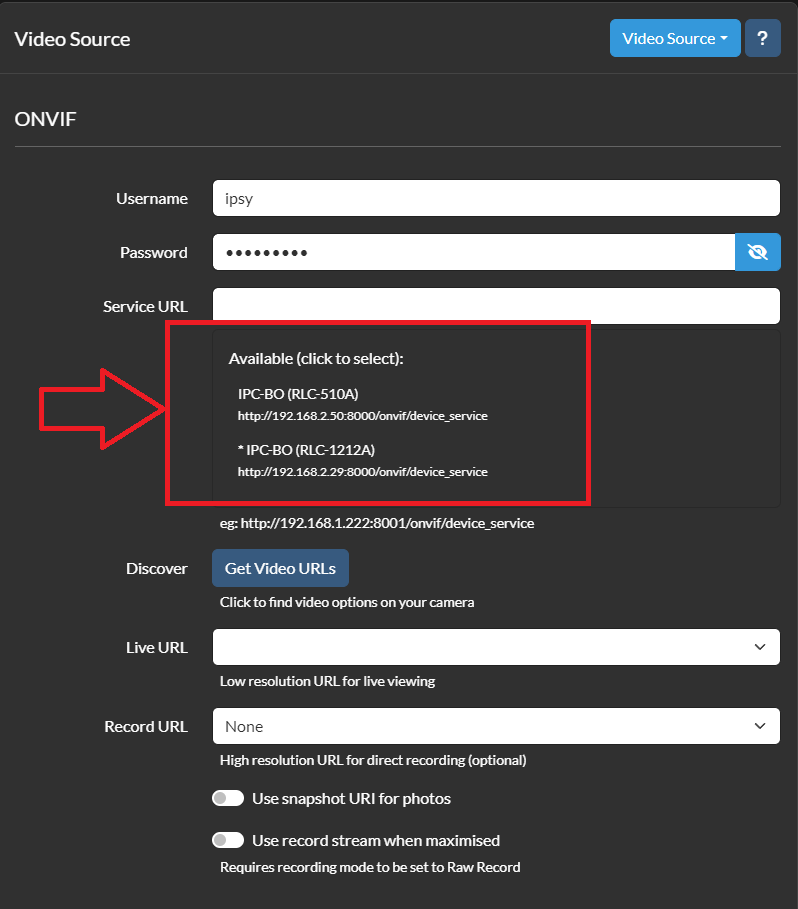
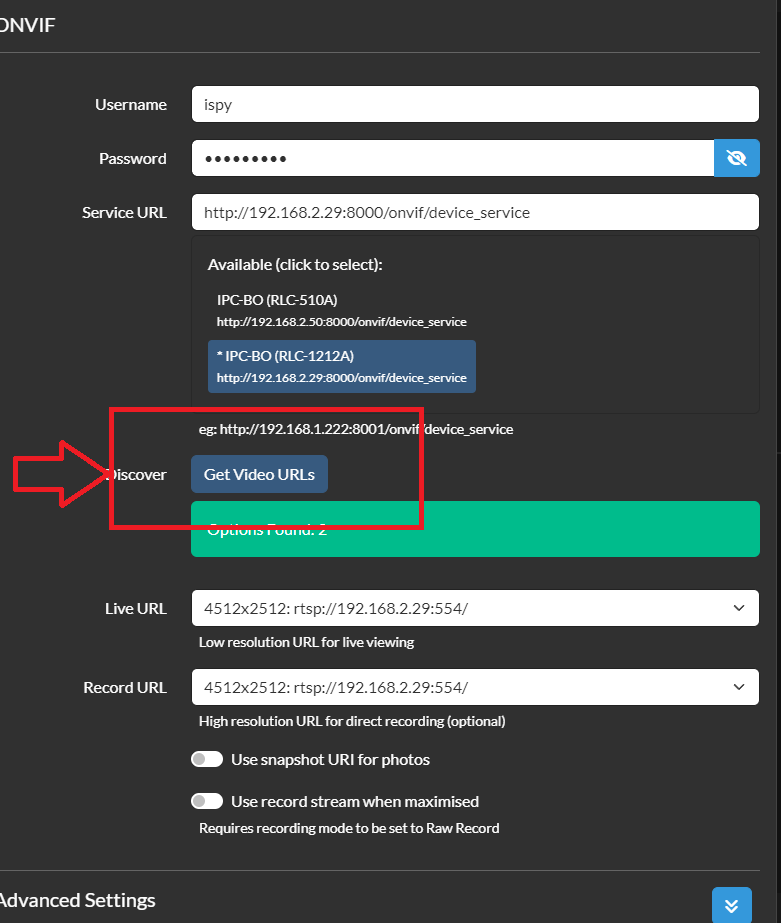
Enter your camera’s userid and password. By default the Reolink is admin for the userid but I create an account just for iSpy. If your lucky your camera will be found automatically by iSpy scanning your network. If not, it gives you hint and you can manually enter the service URL for the camera. If it does detect you camera, as mine did (after a little while) you can then click the camera you wanna setup and your on your way to clicking the get video URLs. Which allows you to choose your resolution.
And with that your camera is in ISpy … But at this point it won’t do anything other than display the camera. And maybe that’s all you want. But next up would be to edit the device(s) and for each device setup your detector, any detection zones, and sensitivity for the detector.
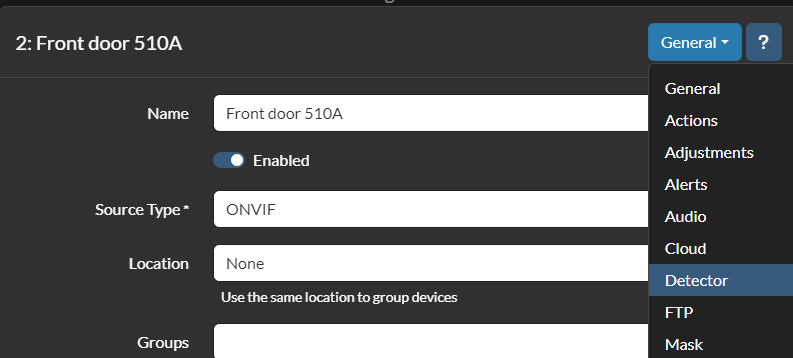
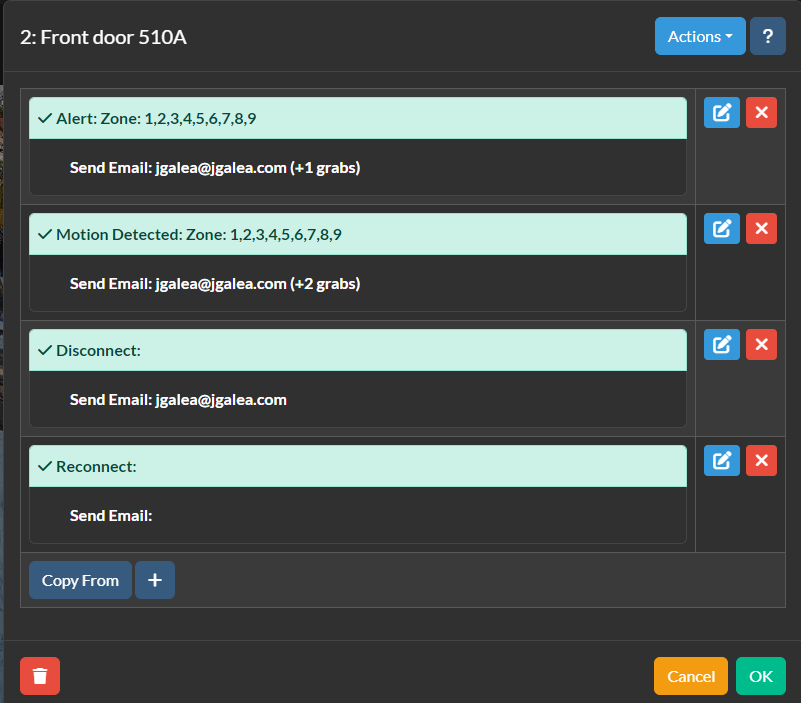
Once a detector is setup your now ready to define any actions you want to take, like notifications.
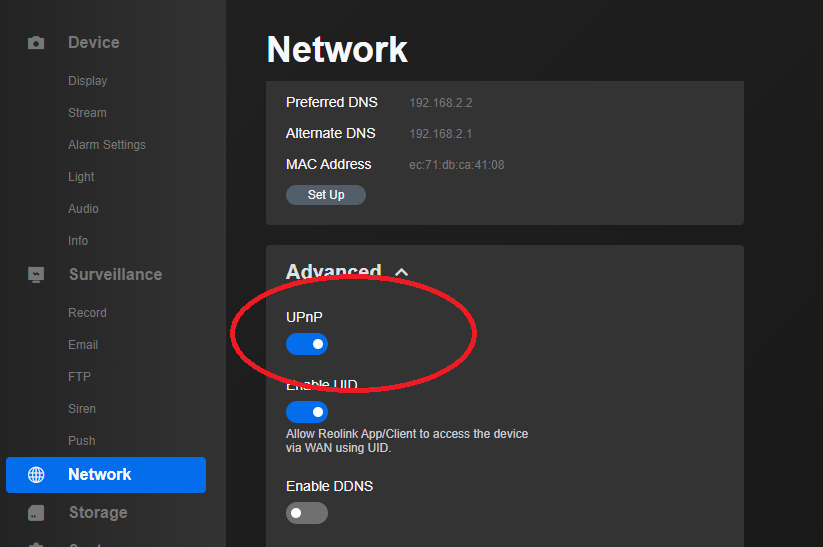
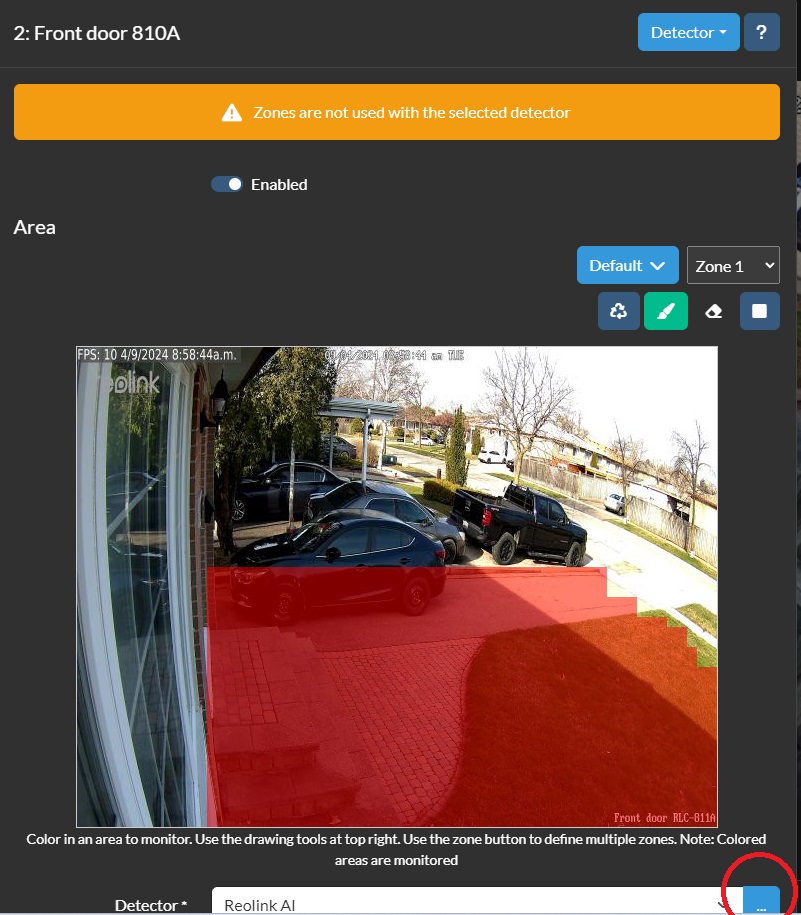
This is actually an updated article now, I did manage to get ONVIF detector working which works ok, I didn’t spent a lot of time on it, it worked sometimes and not others. I had issues getting Reolink AI detection going so I posted on the forums, and pretty quickly got back an answer. The solution to getting this working is to enable UPNP on the camera through the web (or PC app). From the web interface of the camera click, network, advanced where you will see the setting.
Once this is enabled go back to the camera setup in iSpy and select the Reolink AI detector, change it to SSL and change it to AI.

With this setup, you can now setup ONLY the camera with what you need for areas, sensitivity etc and it will in turn kick off iSpy. I was surprised to see, that while it decreased the processor use of iSpy, not as dramatically as I expected.
So next up I decided to try out constant recording. For this I am going to use default settings for encode to minimize CPU, and the 811A 8Mp Reolink camera (just one camera). I’ll divide the recordings into 15min chunks. It took 675M to record 15mins (and the file is an mkv), or 2.7G/hr, so it would take 65G to have 24 hours of on loop recording. iSpy can manage the space in the recordings settings, you can adjust how much space to limit iSpy to so it doesn’t just fill up and die. You can also schedule your recordings as well. I did not see much change to the CPU use with recording on/off. Speed wise it’s going to consume ~ .75MB/s so not a lot at all, and very manageable from an IO point of view. Even with constant recording on you still get event driven triggers!
The iPhone the iSpy app was easy to get going and allows you to see your cameras in an array that’s convenient. But push notifications are a paid service, there’s no siri integration and integration with Home Assistant is minimal at best.
Well this post is long enough so I’ll spin off a new post for CodeProject AI with iSpy.
Mac M1 Pro performance in Lightroom Classic
I’ve seen a number of non specific quotes about how efficient and fast Lightroom is on a Mac, but I’ve had difficulty finding real numbers. So I decided to run a test, my PC against my boss’s M1 based Macbook. Special thanks for Frank for taking the time … Here are the belligerents in the battle:
In the first corner:
Dell Precision 3640
64G memory
kxg60znv512g kioxia NVME M2
Core i7 10700@ 3.8GHZ 8core hyperthreaded Circa Q22020
NVIDIA 1070Ti 551.61 drivers
Adobe Lightroom Classic 13.2 RAW 16.2 with the GPU acceleration fully enabled
Windows 11 22H2

In the second corner is:
14-inch MacBook Pro Circa October 2021
Apple M1 Pro with 8-core CPU, 14-core GPU, 16-core Neural Engine
16GB unified memory
1TB SSD storage
MacOS: Sonoma Version 14.2.1
Lightroom:  13.2 Build[202402141005-bf1aeb84]
Camera Raw 16.2
For the test I decided to do three experiments, the same images were used on both machines and are Canon RAW files.
First a simple denoise using Adobe’s built in function. On the PC this took 71 seconds, on the Mac 36 seconds, 51% of the time of the PC …
Test two took two images, applied a subject mask inverted, adjusted the background, applied a subject mask and adjusted the subject. Then copied this and applied it to a second image. On the PC this took 6 seconds, on the Mac 3, pretty much, again ~50% of the PC …
Lastly we are simply going to export the images to local … I chose this because I had seen a number of early results saying Macs sucked here … On the PC this took 16 seconds, on the Mac 8 seconds.
Now I have to say, I am positively shocked. Now neither machines are brand new, but are roughly equally old. I have no idea if the M3 based system might be even faster, but I have little expectation that a faster PC would be anything more than marginally faster. Watching perfmon on the PC says these operations are heavily using the NVIDA GPU. The 1070Ti is by no means high end, there are a LOT faster cards.
Dekco DC8L security camera review
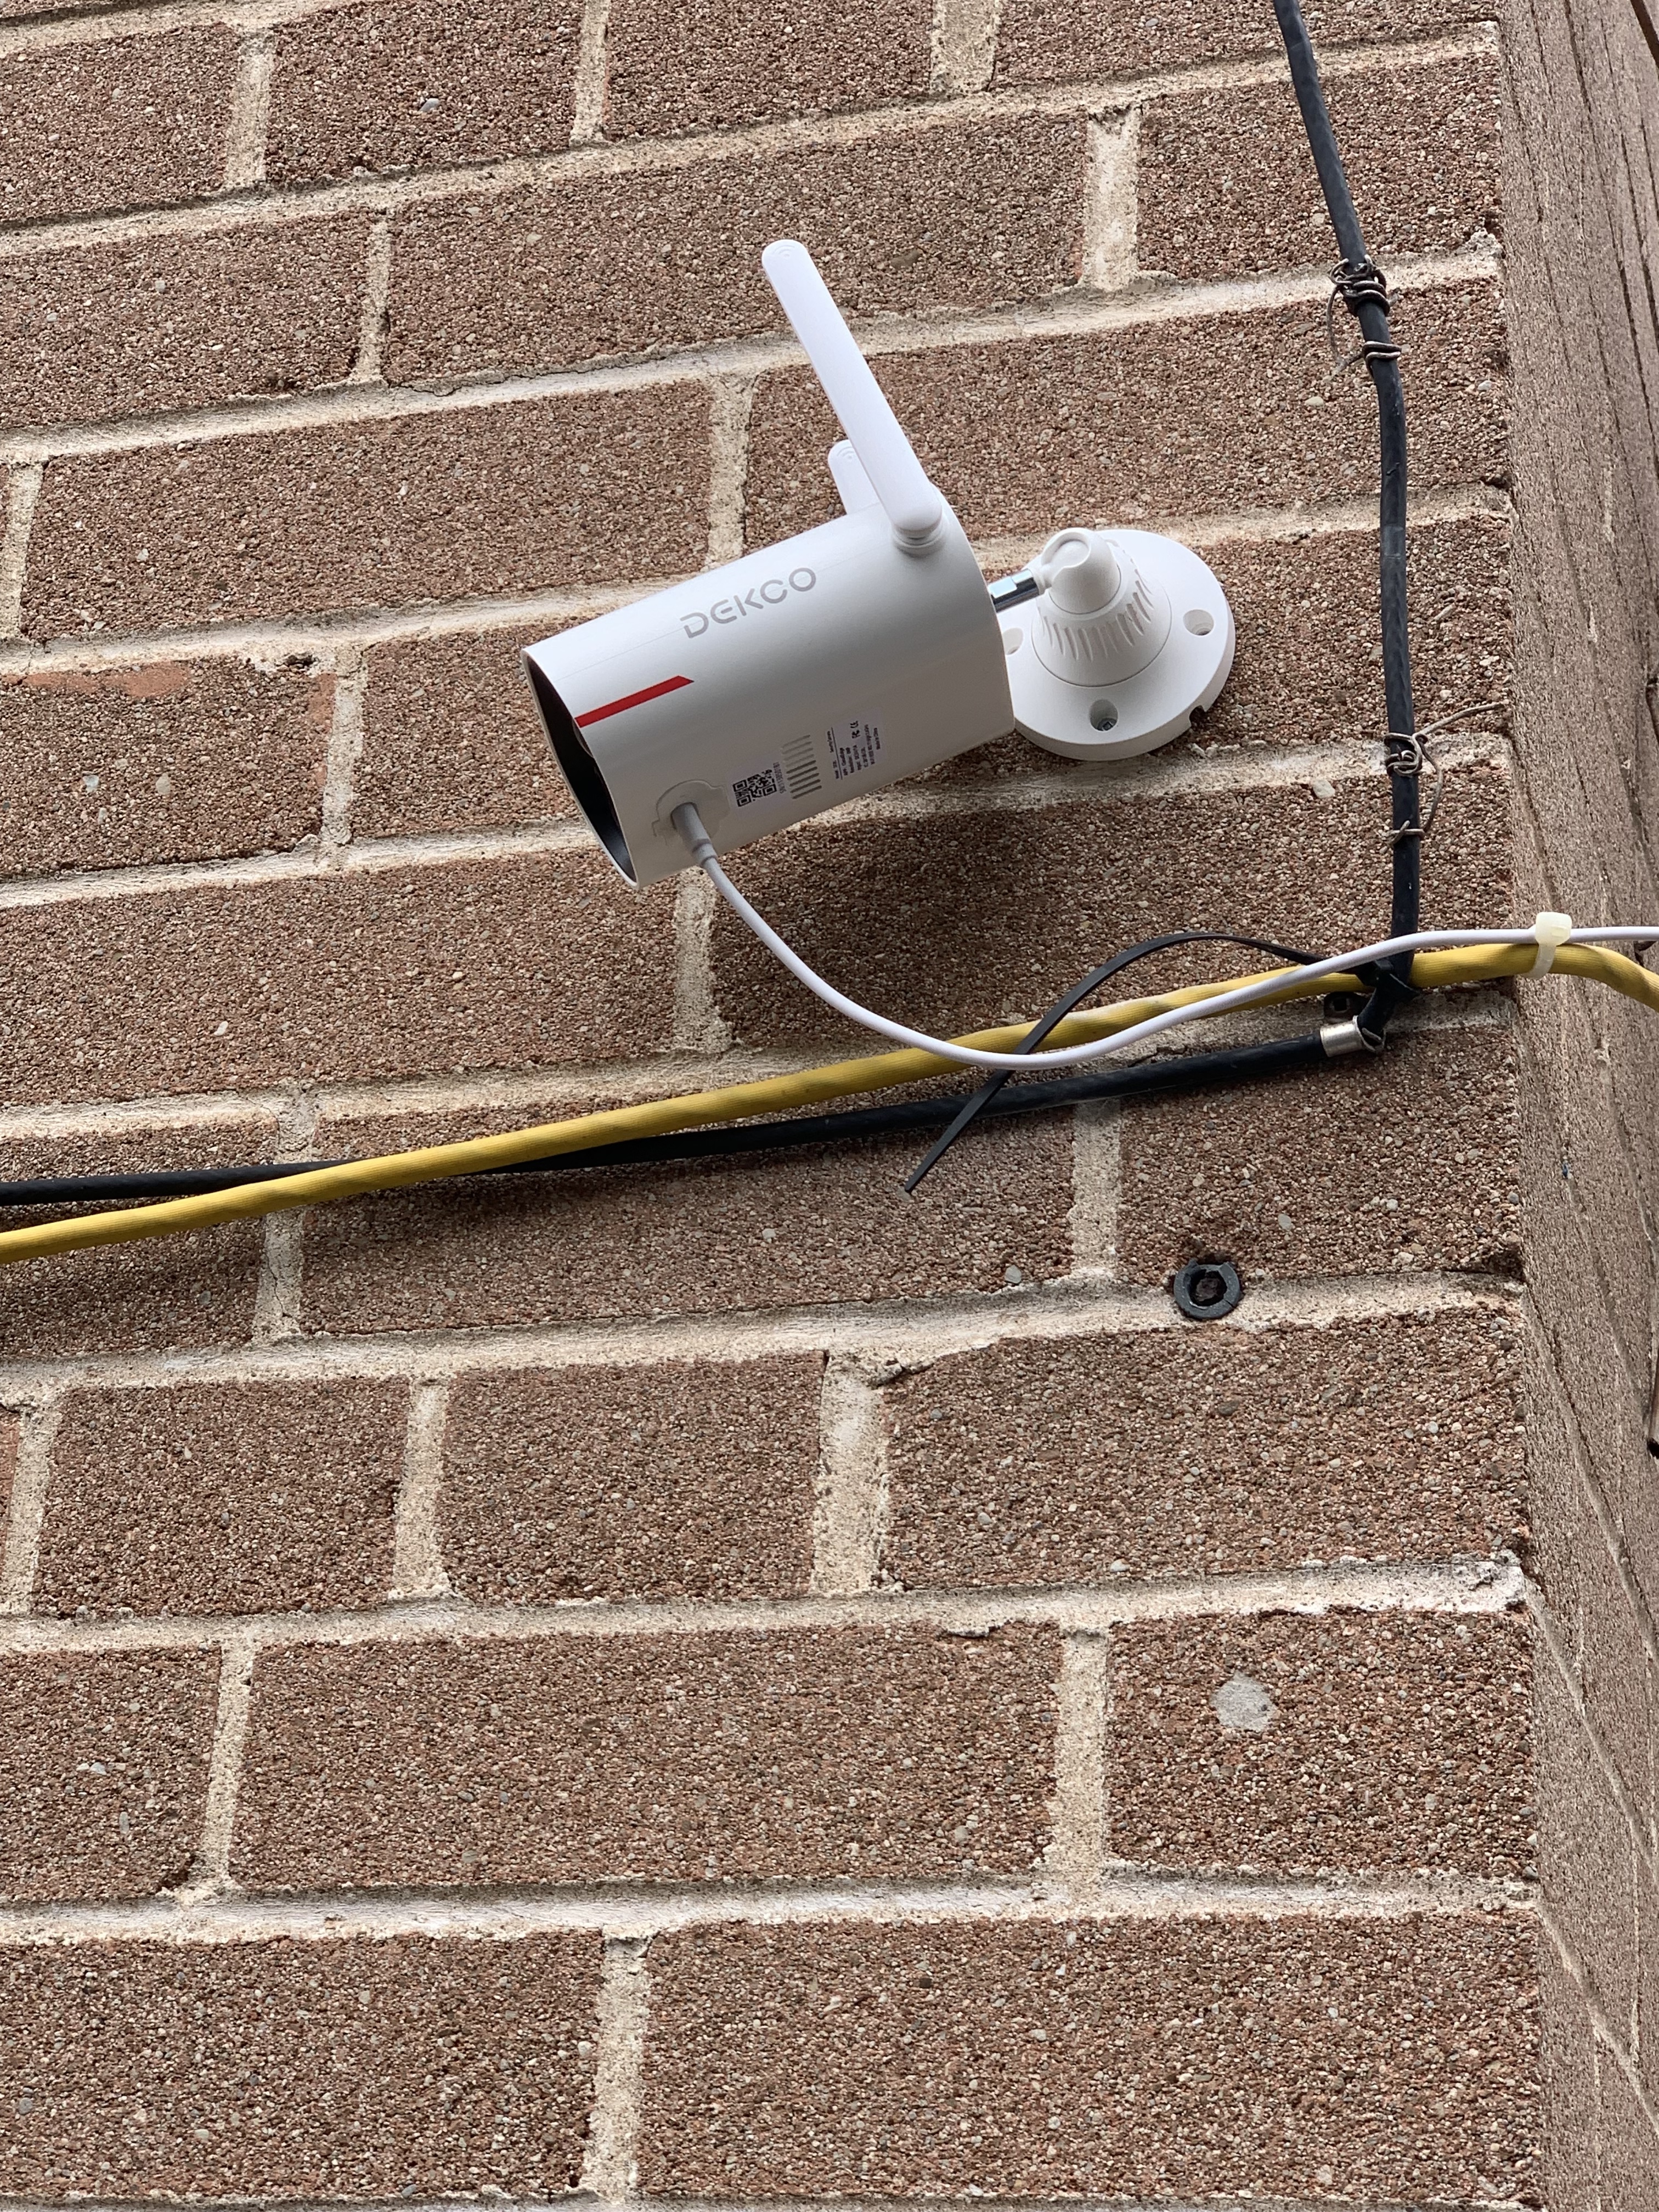
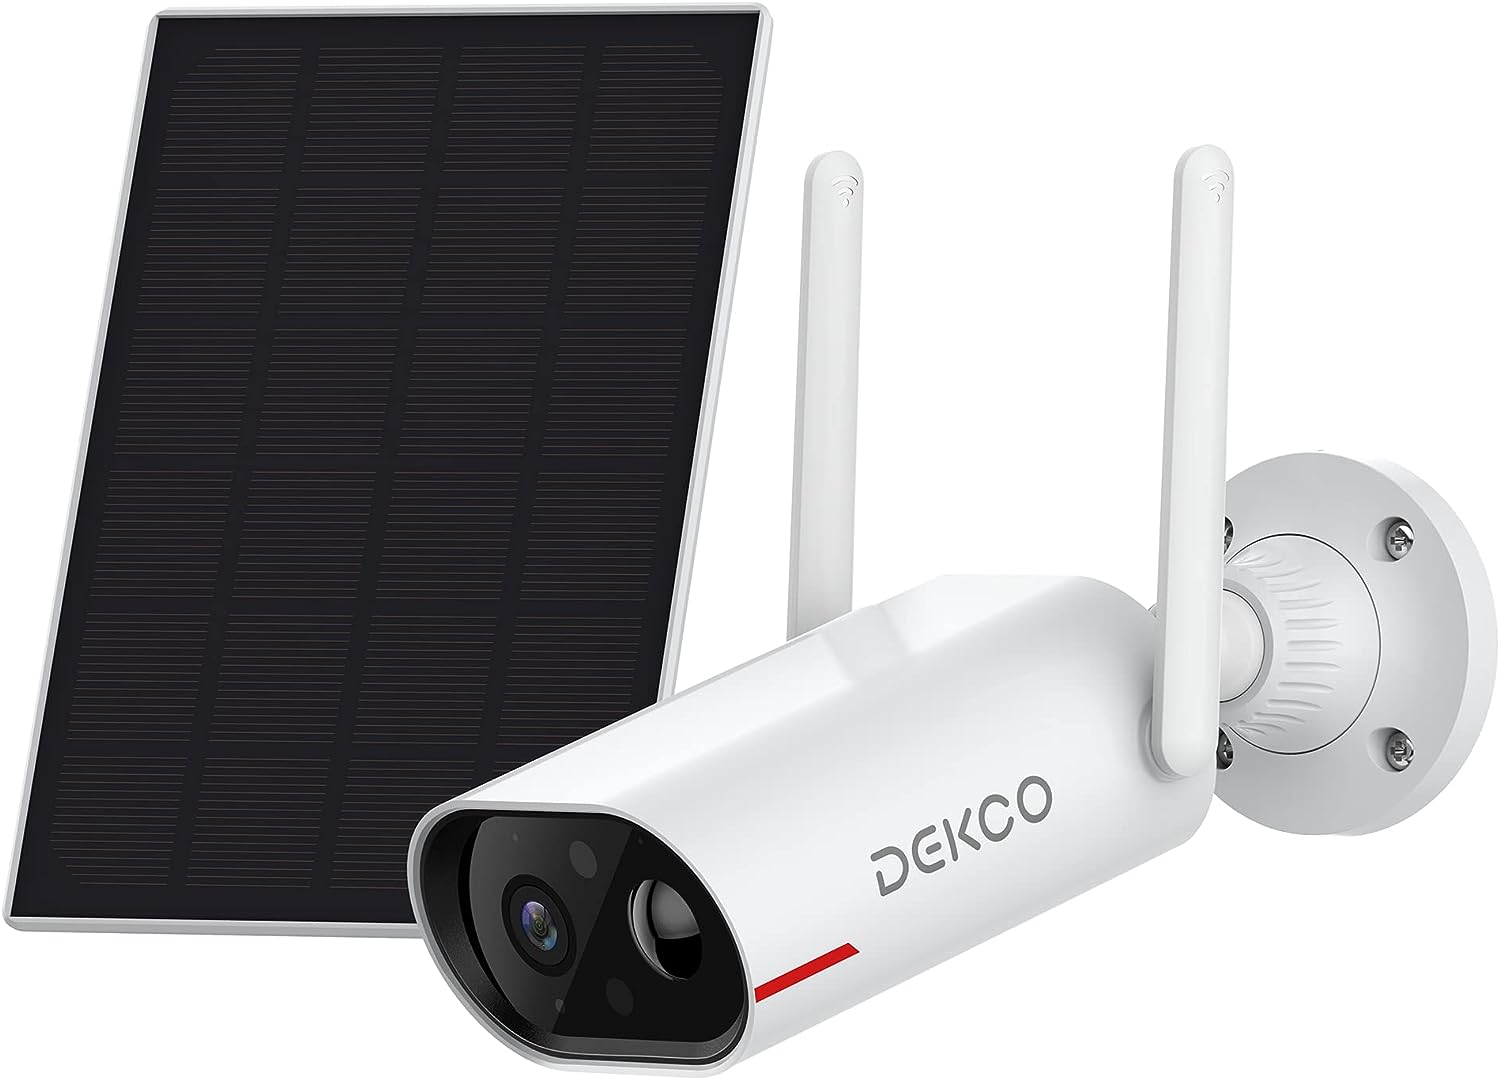
Ok, I’ve not played with any of the security cameras to date, so I decided I wanted one … I’m being lazy and not running wires so this means I want it to be solar, and WIFI. Now this right off the bat this limits the camera significantly. The solar panels they use are not that powerful, so the camera is meant ONLY for occasional transmission of the video signal. So this means you can NOT use this camera with DVR applications like iSpy, it is NOT ONVIF compatible. The camera watches for motion, wakes up, records a video of programmable length, snaps a photo, and stores the video and photo on the local SD card, sends a notice to you on your mobile app and then goes back to sleep. You can optionally have it trigger an alarm that is built into the camera. This particular camera does NOT have a light. When the sun is not up the camera runs off an internal battery that gets recharged when the sun is up. According to the manual you control this camera with the CloudEdge app. There is NO online portal for this camera and it can ONLY be viewed, controlled, setup using the mobile app. Photos/videos can be manually downloaded to your phone, but if someone takes the camera, and it would not be all that hard to dislodge it from the plastic mount, your evidence goes along with the camera. I see no way to automate downloaded the images/videos and they are NOT emailed etc. I have to admit, this is a pretty big limitation that renders this camera largely a toy IMHO.
The camera does not seem to have listeners for any ports, and it seems to only talk to an AWS server.
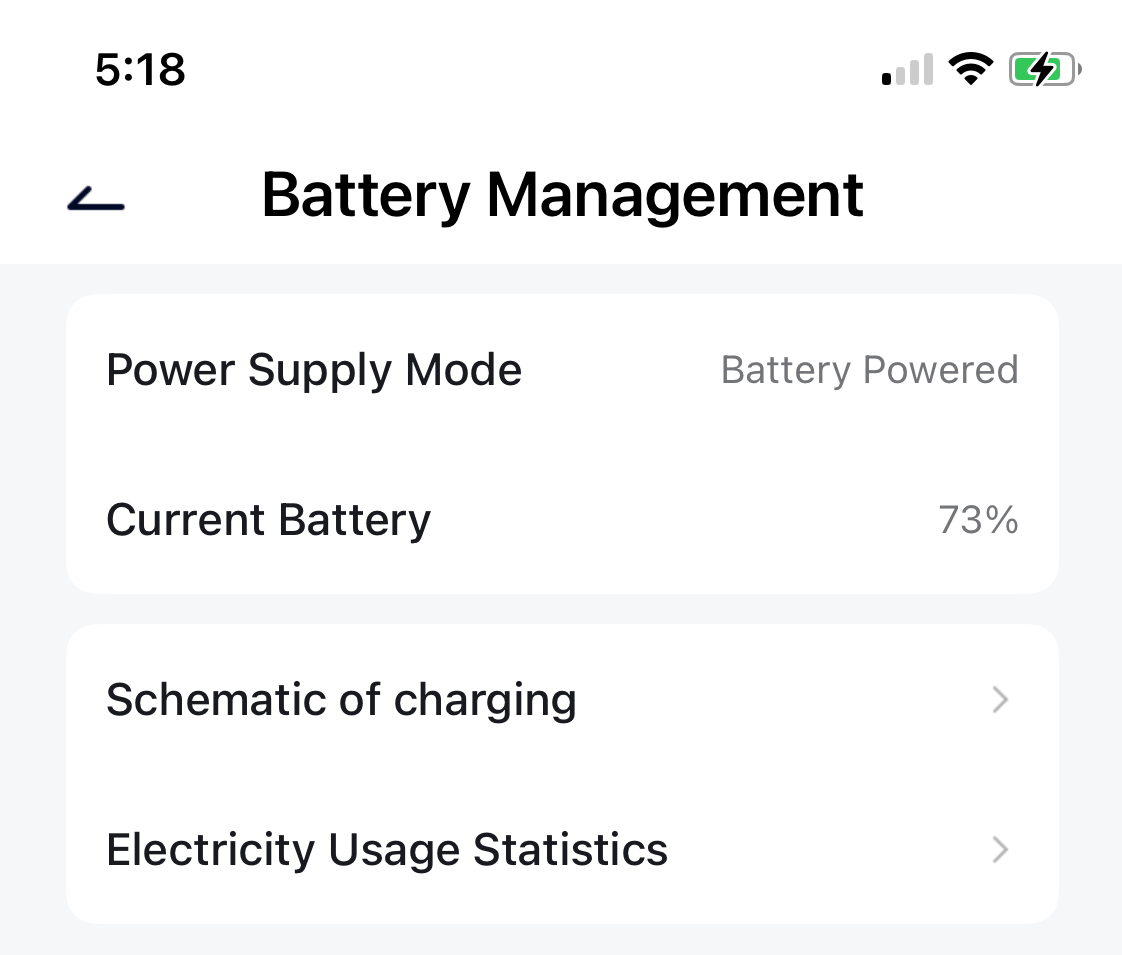
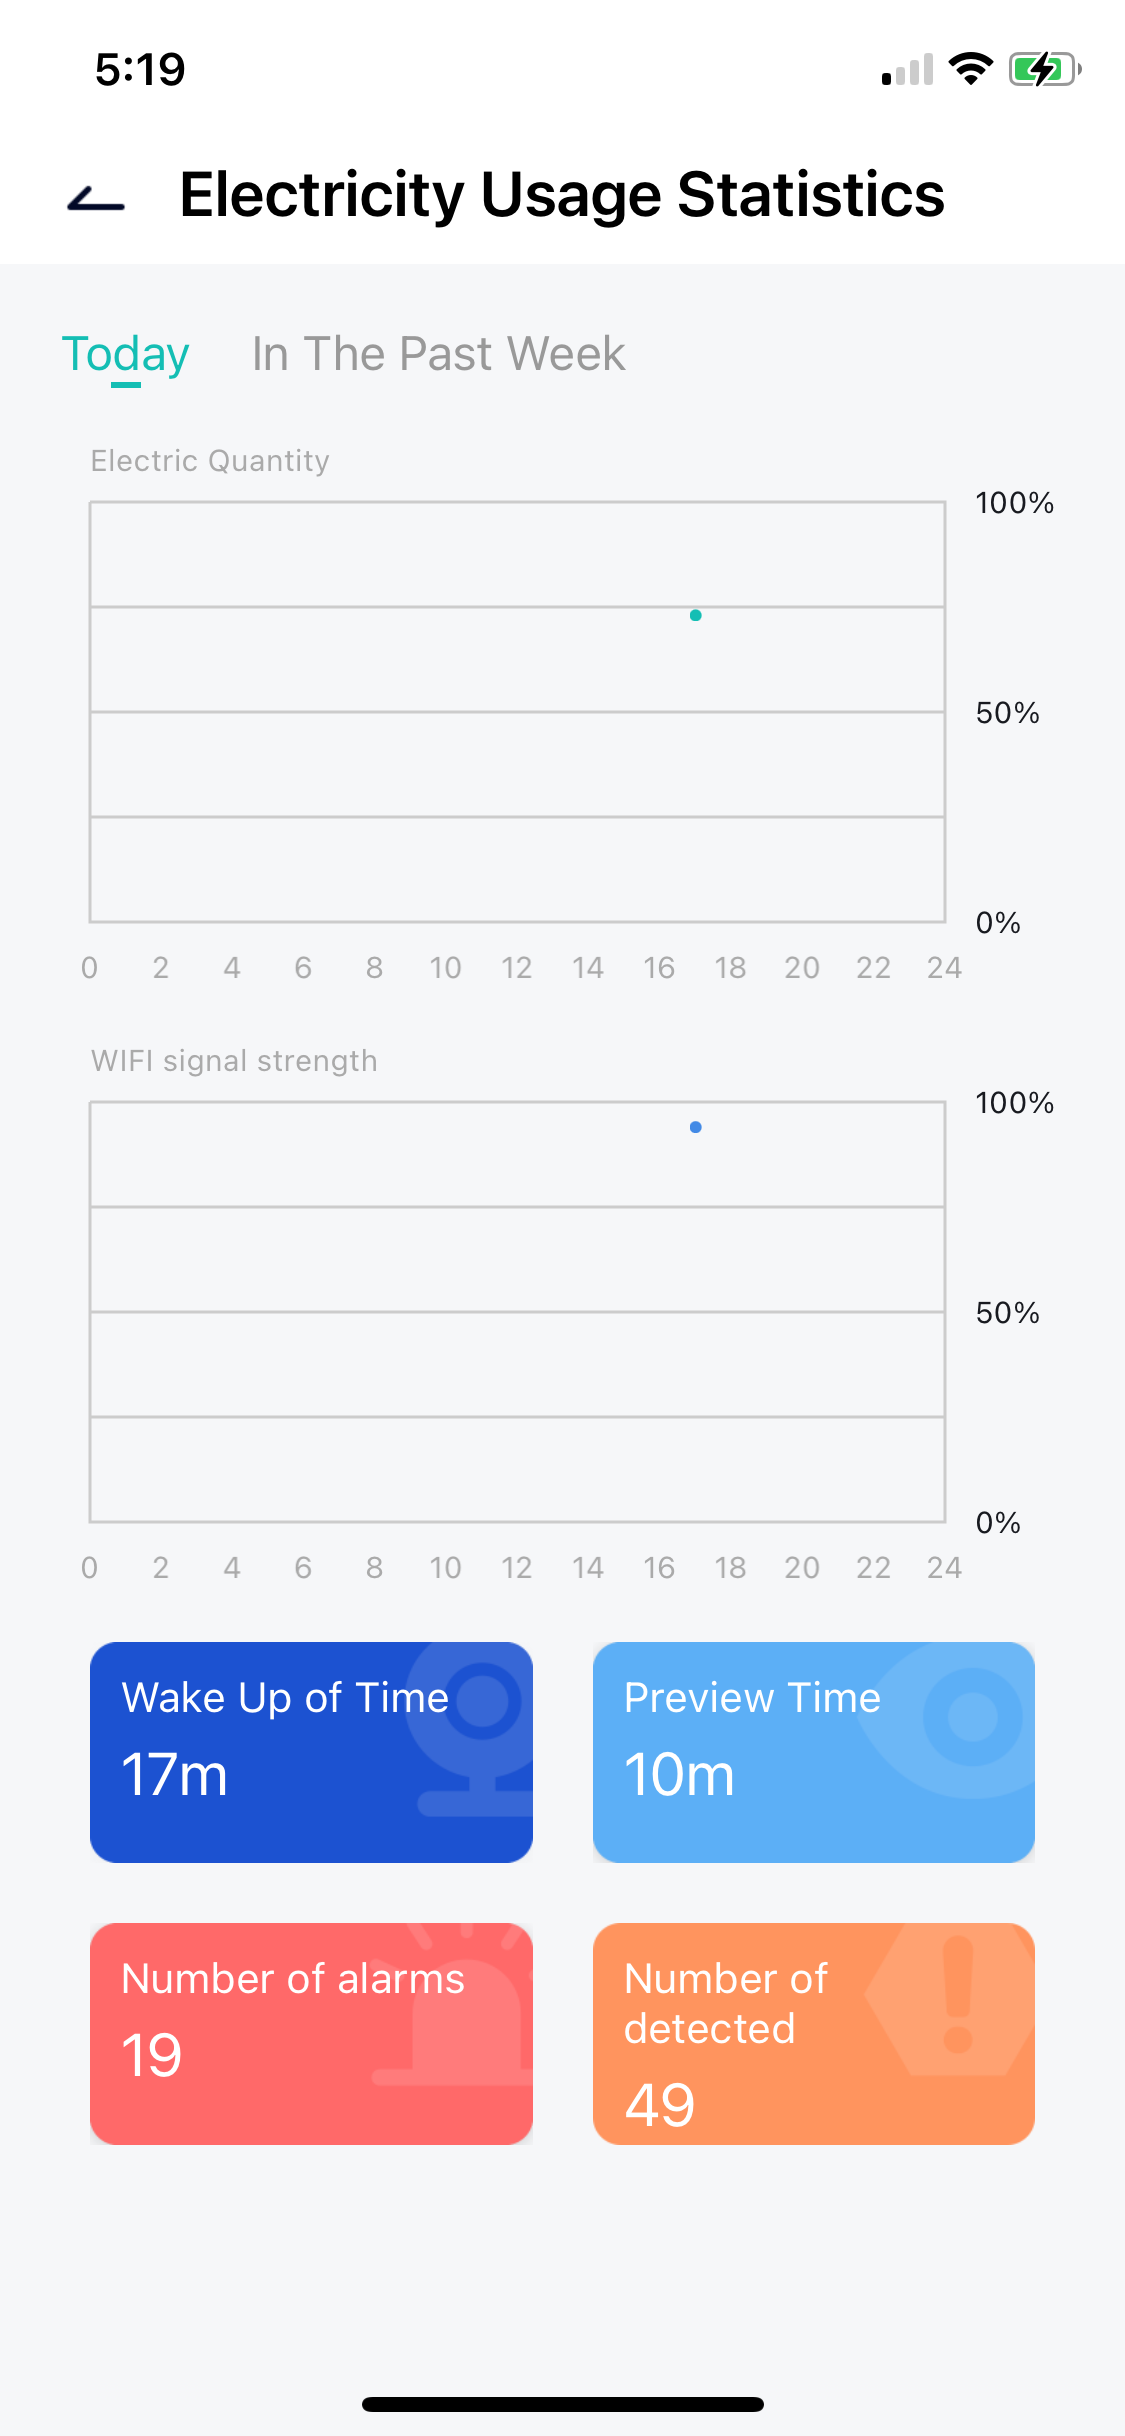
WIFI on this camera is 2.5GHZ only and signal strength was quite good. Let’s delve into the app … Setup was pretty easy, charge the battery with the included cable and any USB-A phone charger, install the app and then tell the camera your WIFI password and your done. Once in the app you can see the state of the battery, but I found it did not correctly identify when the solar panel was charging and not. So much so I wondered if the solar panel was even working. It pretty much always says battery powered except when it’s on an AC charger. There was no firmware update when I checked … Power consumption is quite low, and it would seem this camera would continue to work for many days without sun … I didn’t test just how many but it really didn’t go down much over night.
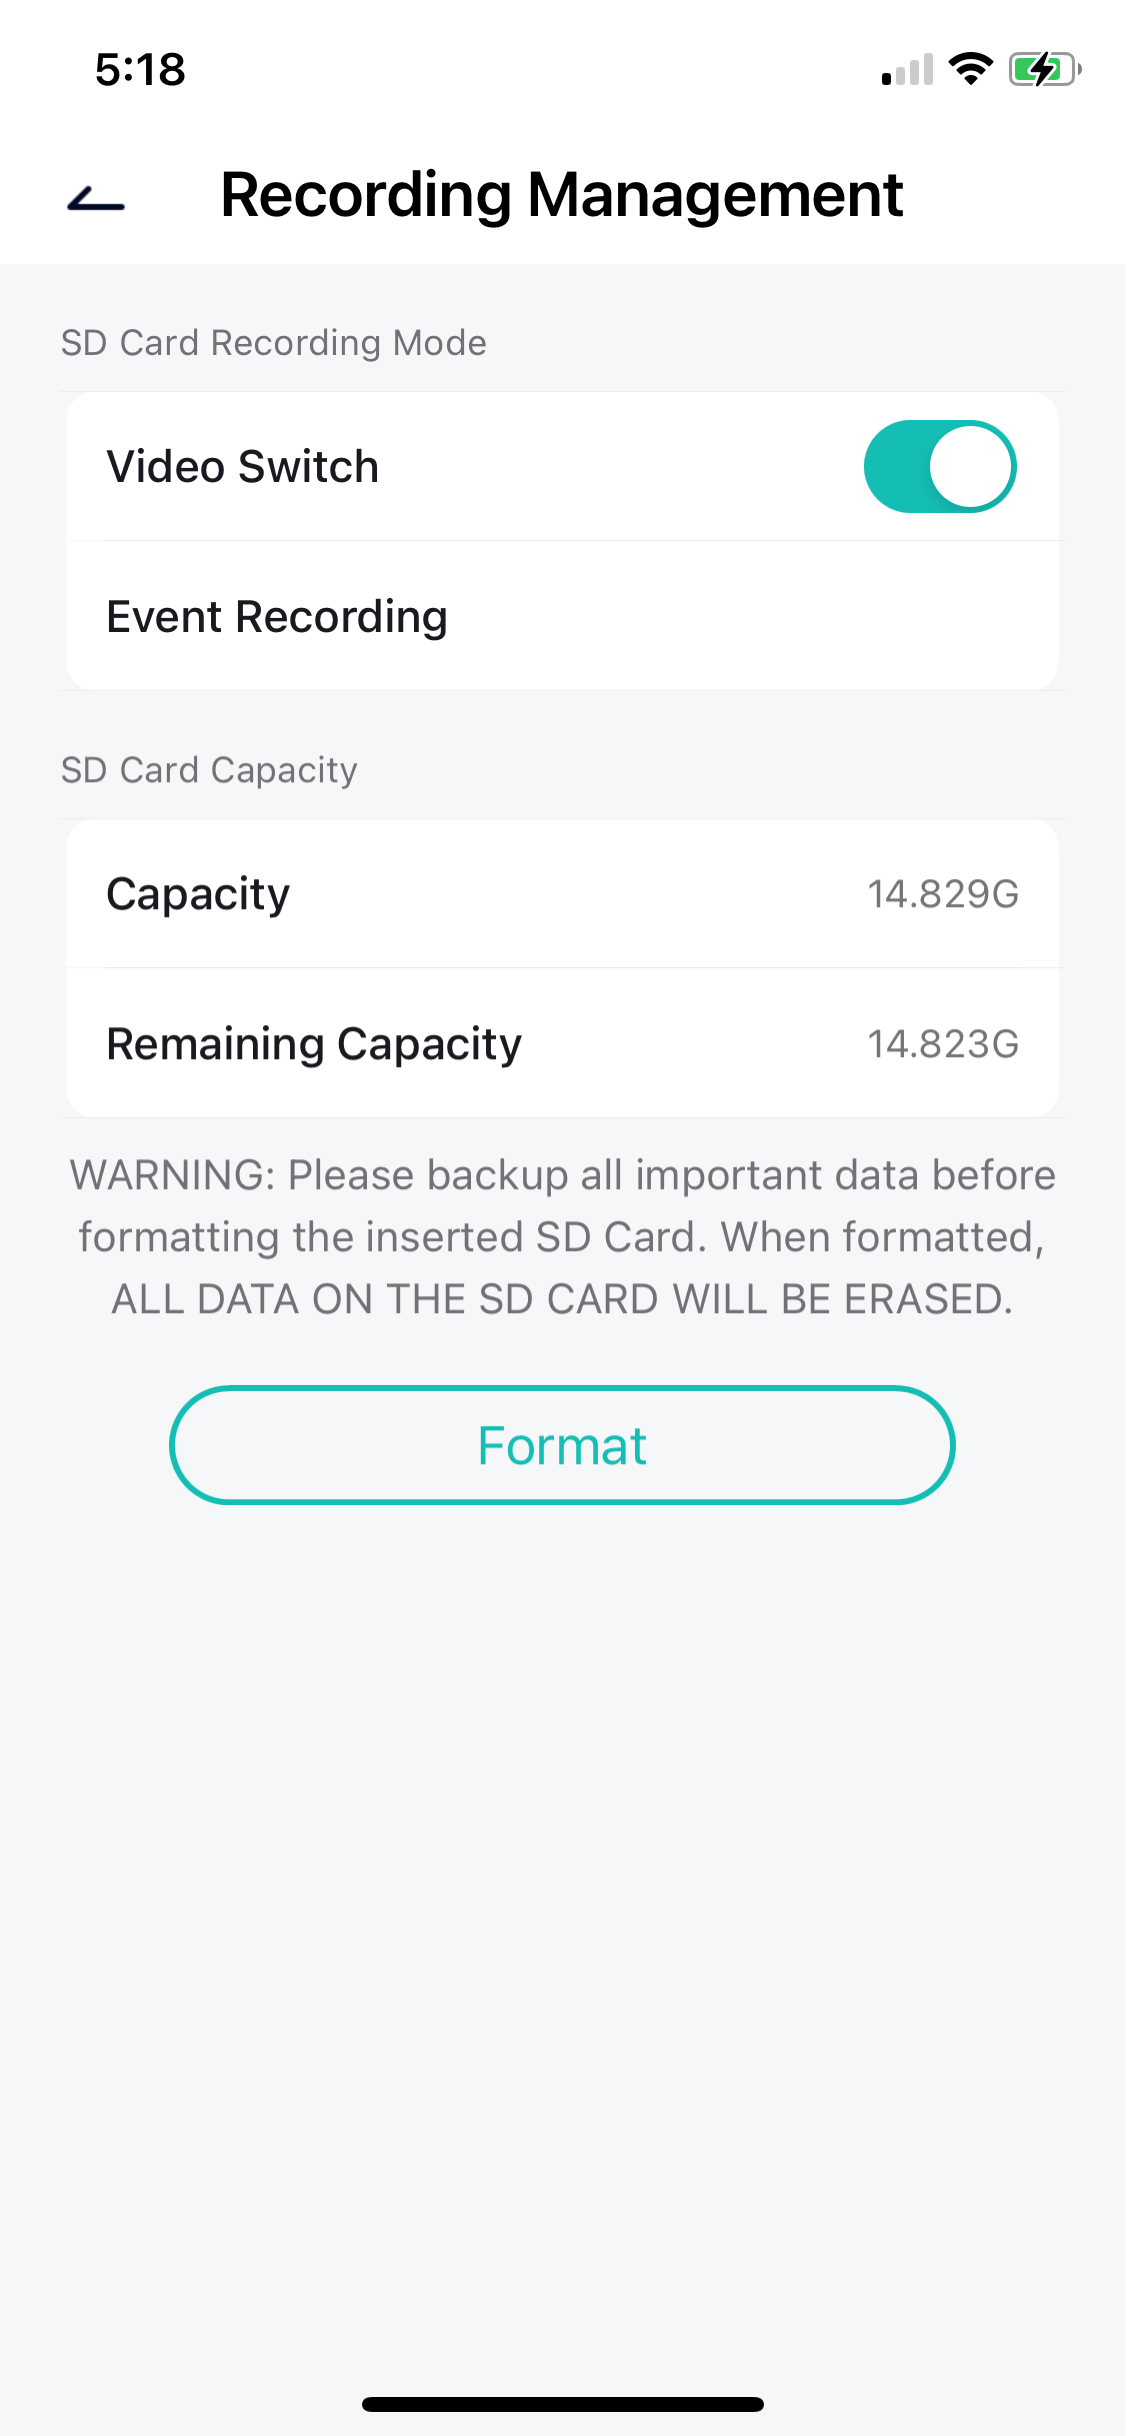
Managing the recorded media is pretty easy, from the Messages you can see the recordings on a per day basis. They can pretty easily be cleaned up, and it’s easy to see how much storage is being consumed by them. You have to go into each day, select them all and then delete them. What’s missing? Well the only way to delete all of the recordings is to format the card, and I see no way of having it auto prune files, but MAYBE it does this as the card becomes full? I am unsure if the camera would notify you if the card was getting full?

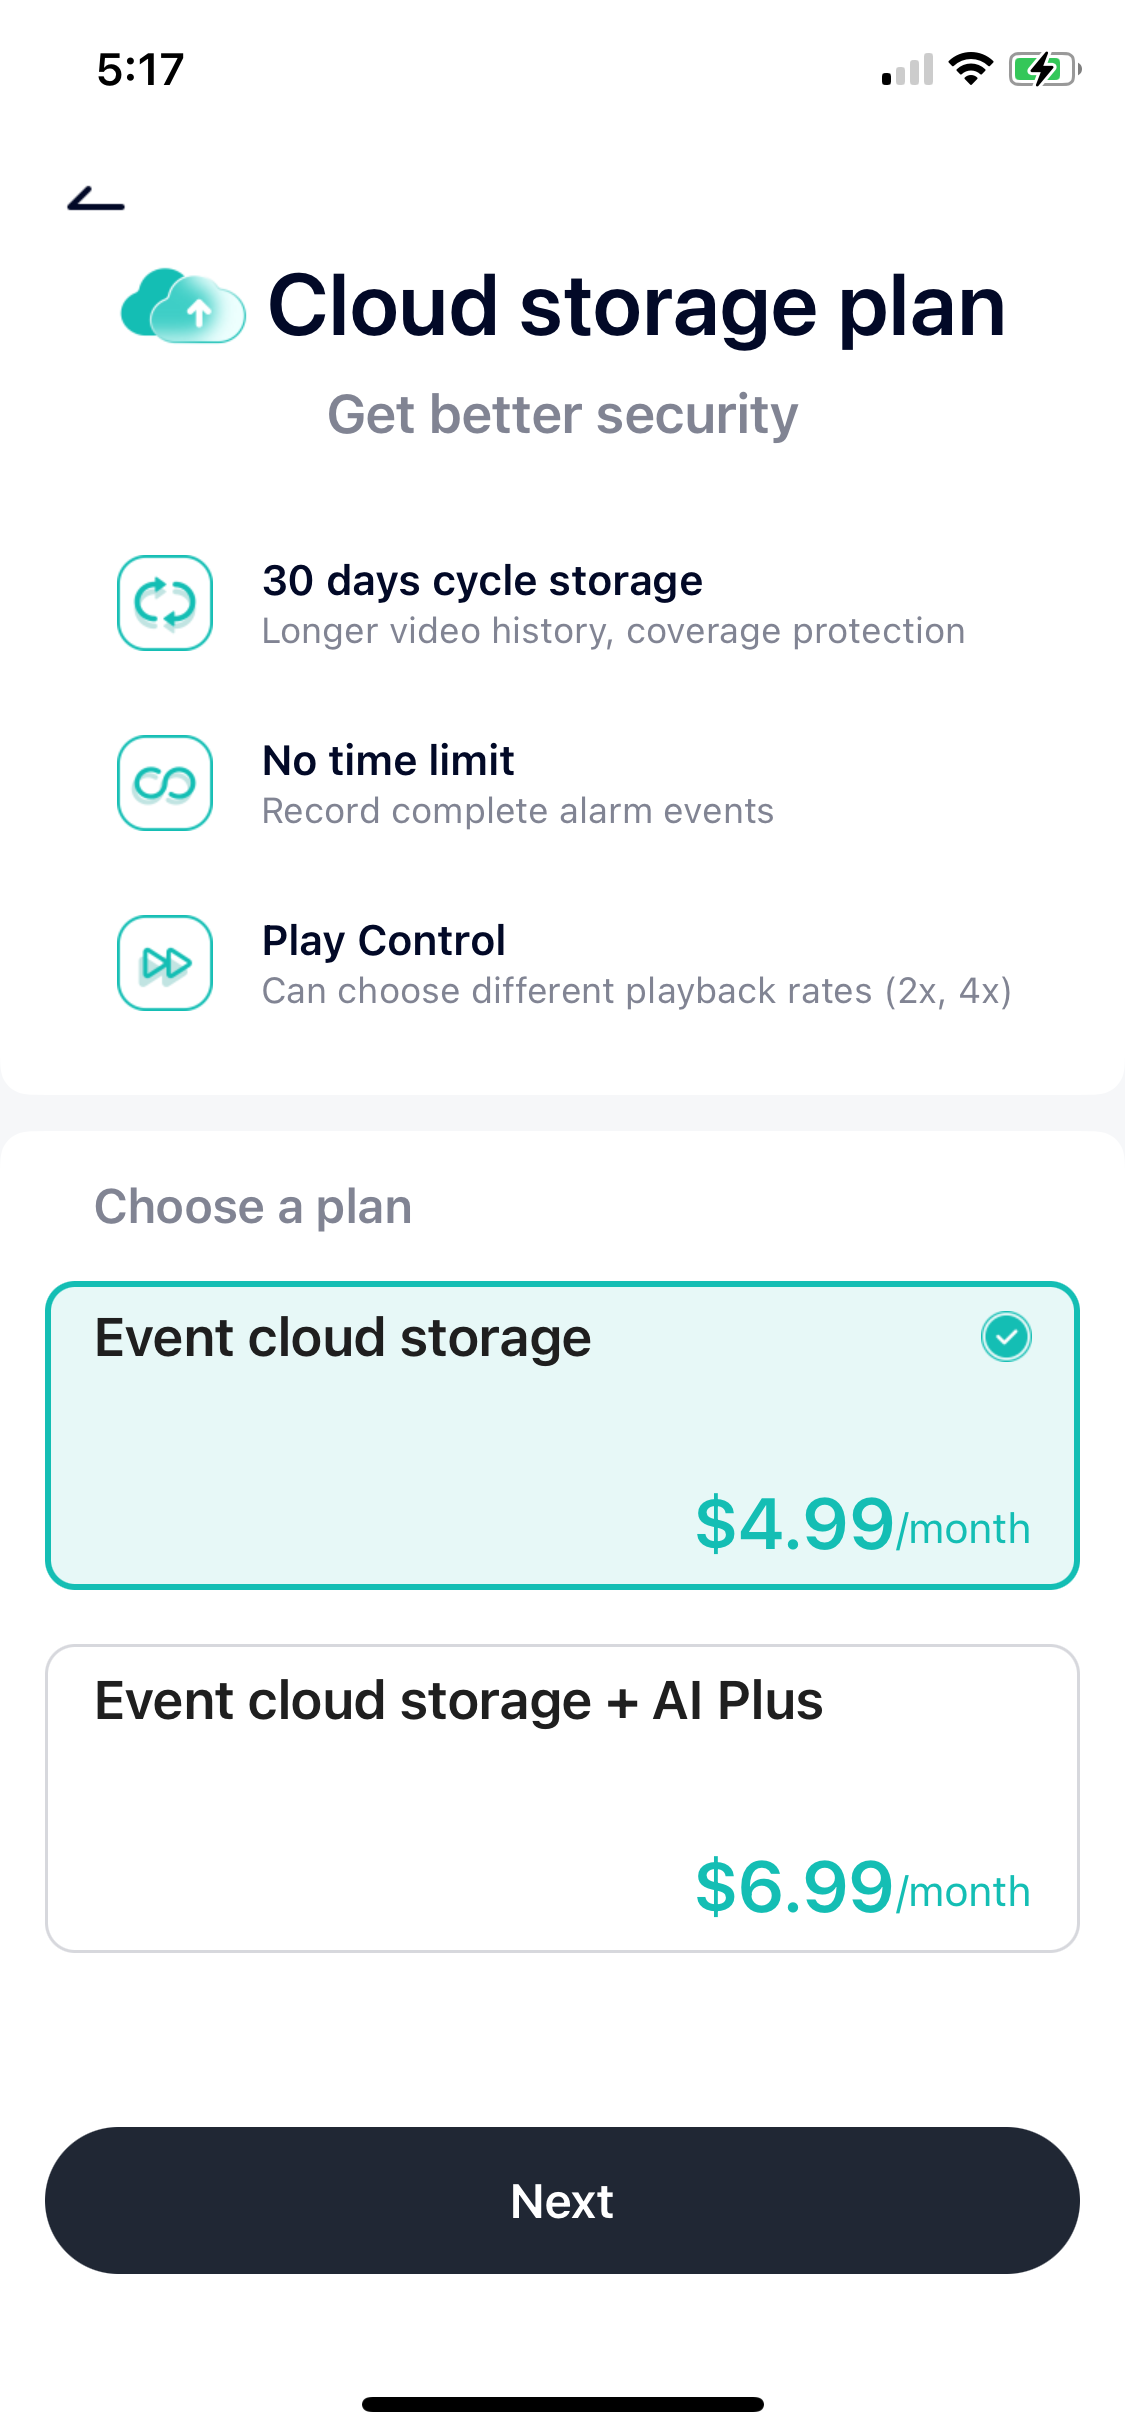
You can optionally pay to for cloud storage, but I didn’t so I can’t tell you how that works and if it’s immediately uploaded. I also don’t know what currency is
You can easily see how much the camera has been doing which allows you to understand battery consumption.
The biggest issue I have with the camera is where I mounted it, I need it to look down a wall at a gate for intruders. It’s the reason I bought it … Unfortunately the IR on the camera completely messes up and there are no settings to tune to fix it. So the camera is basically useless at night in this location. Here’s what I see … I spoke with support for Dekco and there only answer was to move the camera off the wall. I did that and had to get 20″ away from the wall to make it usable at night.


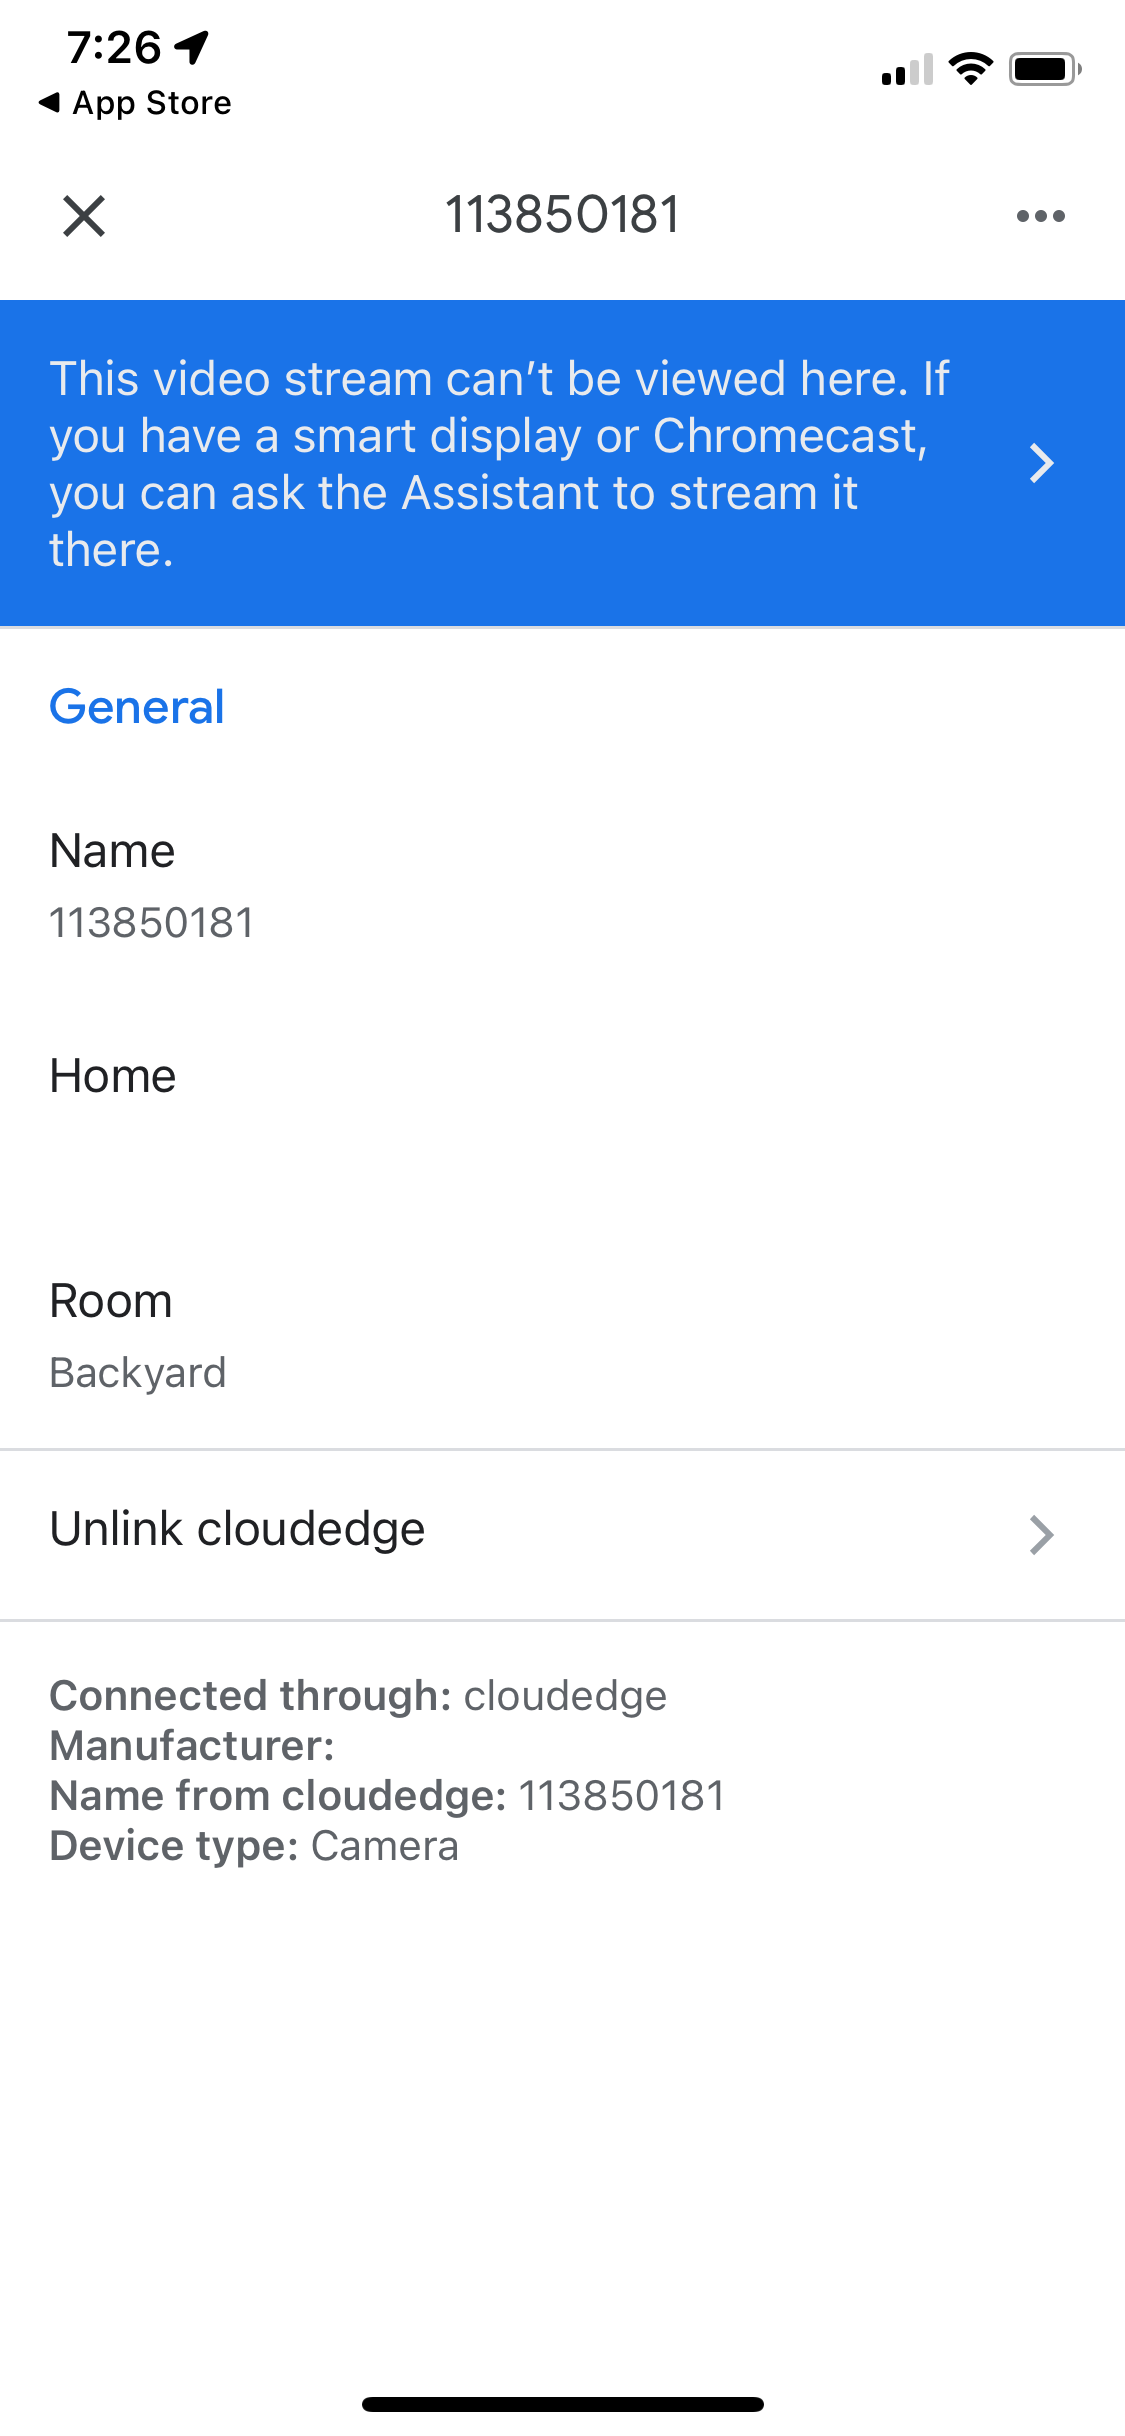
I did try to see what adding this to google home does … answer not much of anything so don’t bother.
So all in all, it’s an interesting camera, but it sadly misses the mark for what I was hoping for, and while the price is good, the functionality … not so much.
Windows photos raw support
If you’ve ever clicked on a RAW image file in Windows 10 or 11 Microsoft Photos replies with a nice helpful message (No really, well sorta).
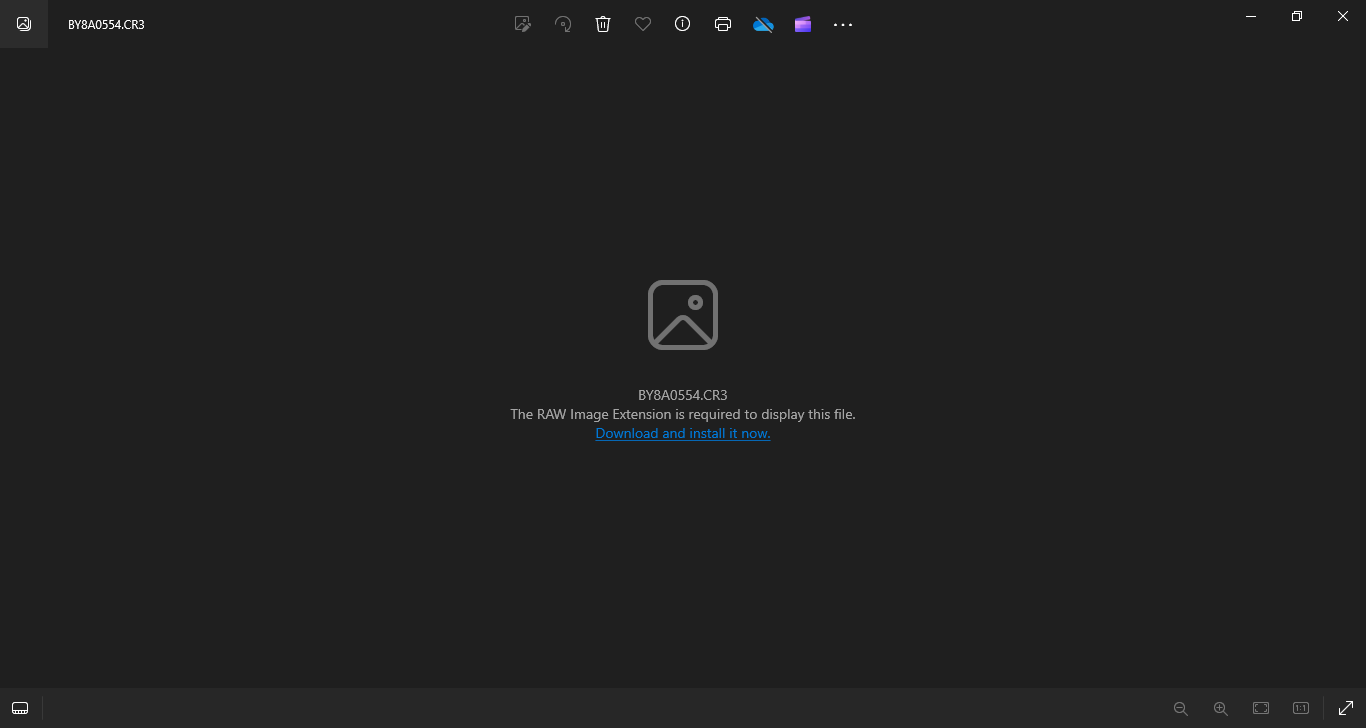
Clicking on the Link to resolve the “issue” takes you to the MS Store to install the missing code … DON’T DO IT …
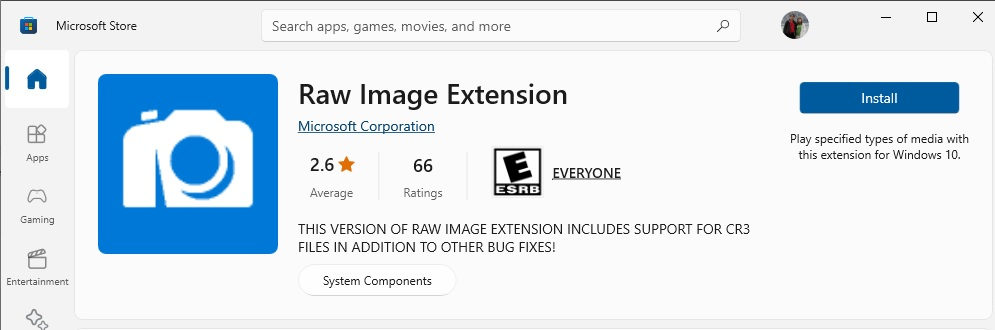
Seems harmless enough, but what they do not point out, is that it can NOT be uninstalled. Google it … lots of chatter on the subject, some recommend doing registry changes, and all kinds of solutions for removing it none of which actually work. So why do you care … Well … on slower systems, when you enter a directory with a lot of raw image files in it it will dramatically delay how long it takes for the folder to come up. Press sort by date for example and your waiting again … I’ve seen it on my older laptop take minutes … it’s maddening. And to have this be uninstallable is egregious IMHO. Or at the very least warn users, are you sure … Of course, even if they had warned me I probably would have installed it anway, who could have predicted the disastrous consequences …
Ok so now what … well the best solution I’ve found to date, and it reduced the impact but did not completely resolve the issue is to reboot the system into safe mode following the Microsoft Guide.
Once in safe mode, and this is basically hacking the OS, what we are going to do is manually delete the DLL.
dir %windir%\msrawimage.dll /s
I did go into the registry and deleted references to cr2 and cr3s but this was challenging and I was not able to remove them all due to permissions issue. This is afterall, according to Microsoft, a system component.
What are your other choices … well the remaining choices are BAD. Reinstall windows, or if you have a restore point and know exactly when you installed it, you can restore back to that point.
About
I do these reviews for personal interest and amusement. I buy the devices out of my own pocket. If you would like to send along a donation it would be much appreciated.
![]()
-
Recent
- iPhone 15 Pro review
- CodeProject AI with iSpy mini review
- Reolink 510A and 811A security cameras and all things related
- Reolink 1212A mini review
- Reolink Argus 3 Pro solar security camera
- Dekco DC4L (super mini) review
- iSpy review and camera wrap up
- Mac M1 Pro performance in Lightroom Classic
- Dekco DC8L security camera review
- Windows photos raw support
- Birding in Long Boat Key Florida!
- Transferring Lightroom Classic to a new computer (mini post)
-
Links
-
Archives
- April 2024 (3)
- March 2024 (6)
- February 2024 (2)
- January 2024 (4)
- December 2023 (1)
- November 2023 (6)
- October 2023 (1)
- September 2023 (6)
- July 2023 (1)
- June 2023 (6)
- May 2023 (2)
- April 2023 (6)
-
Categories
-
RSS
Entries RSS
Comments RSS
